ADDRESS BOOK – COMPANIES
List of Companies
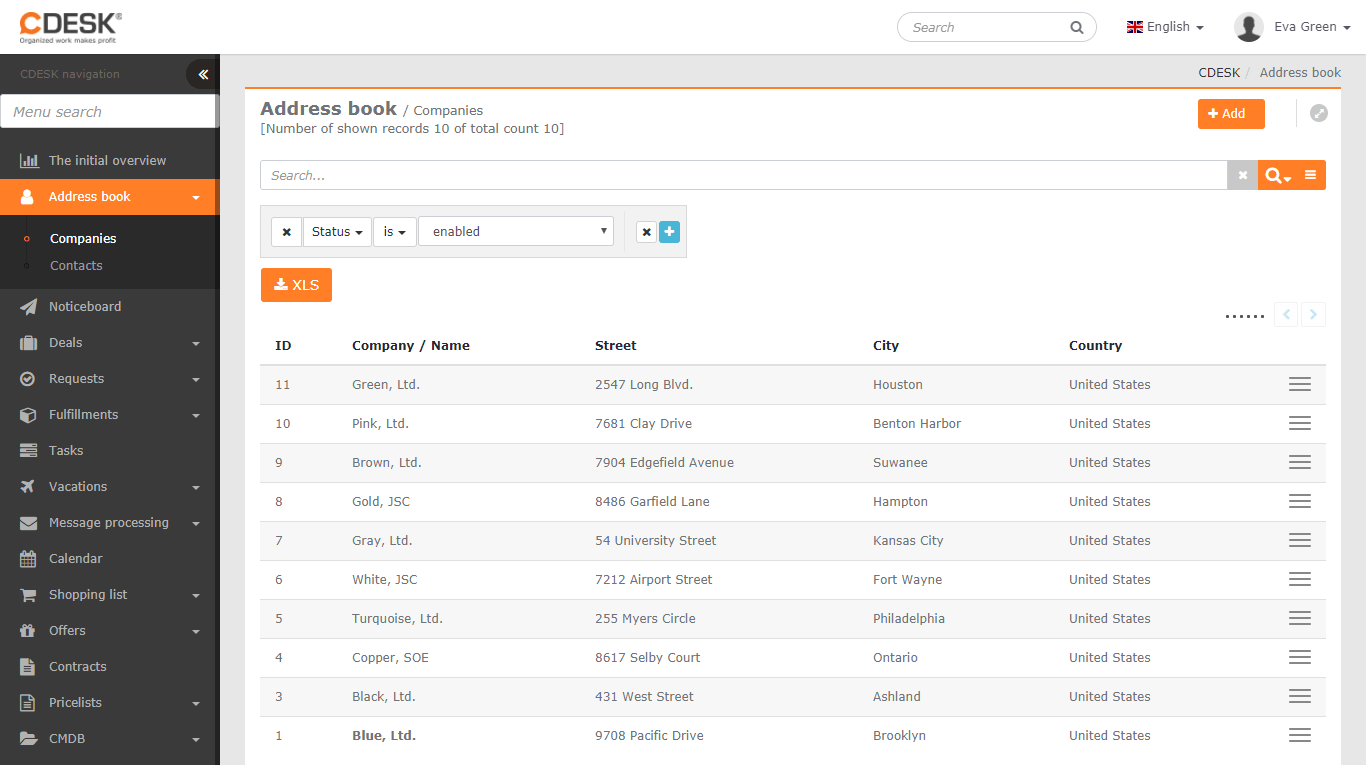
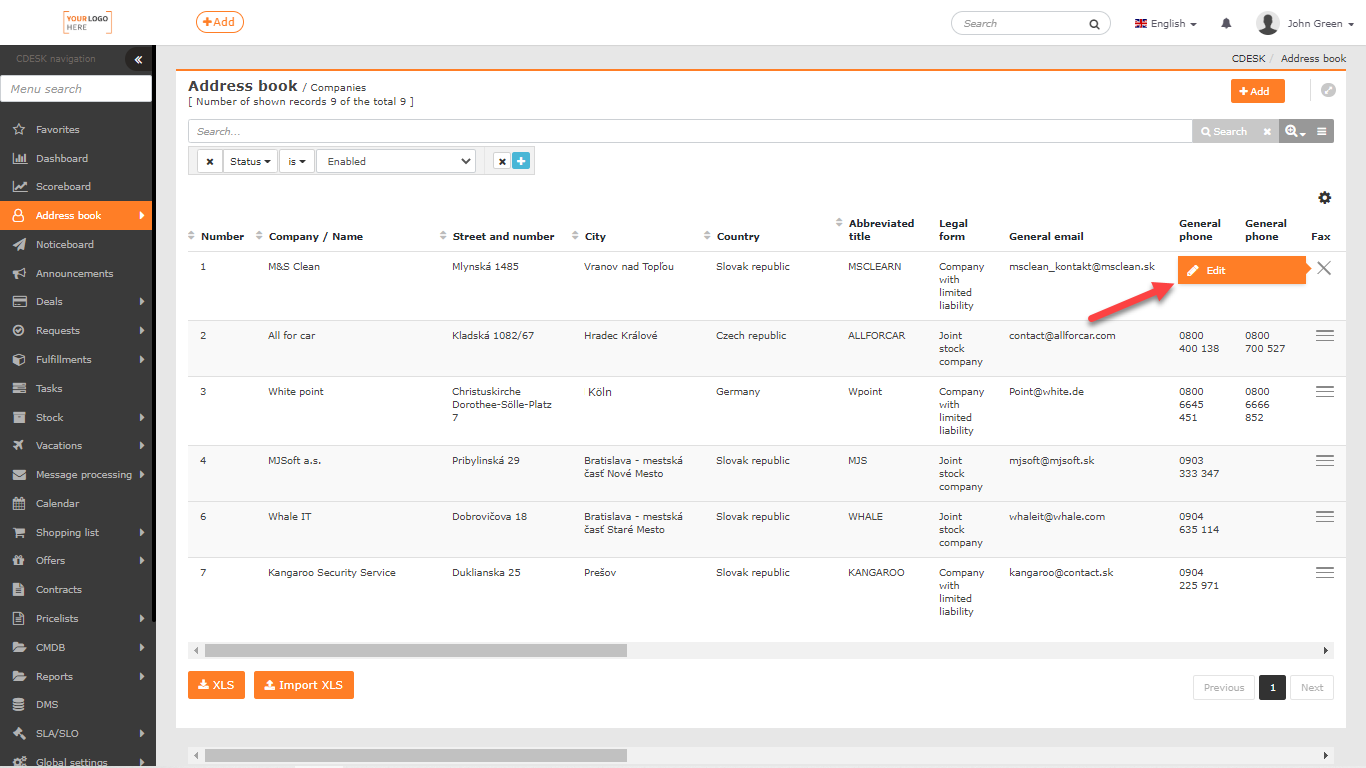
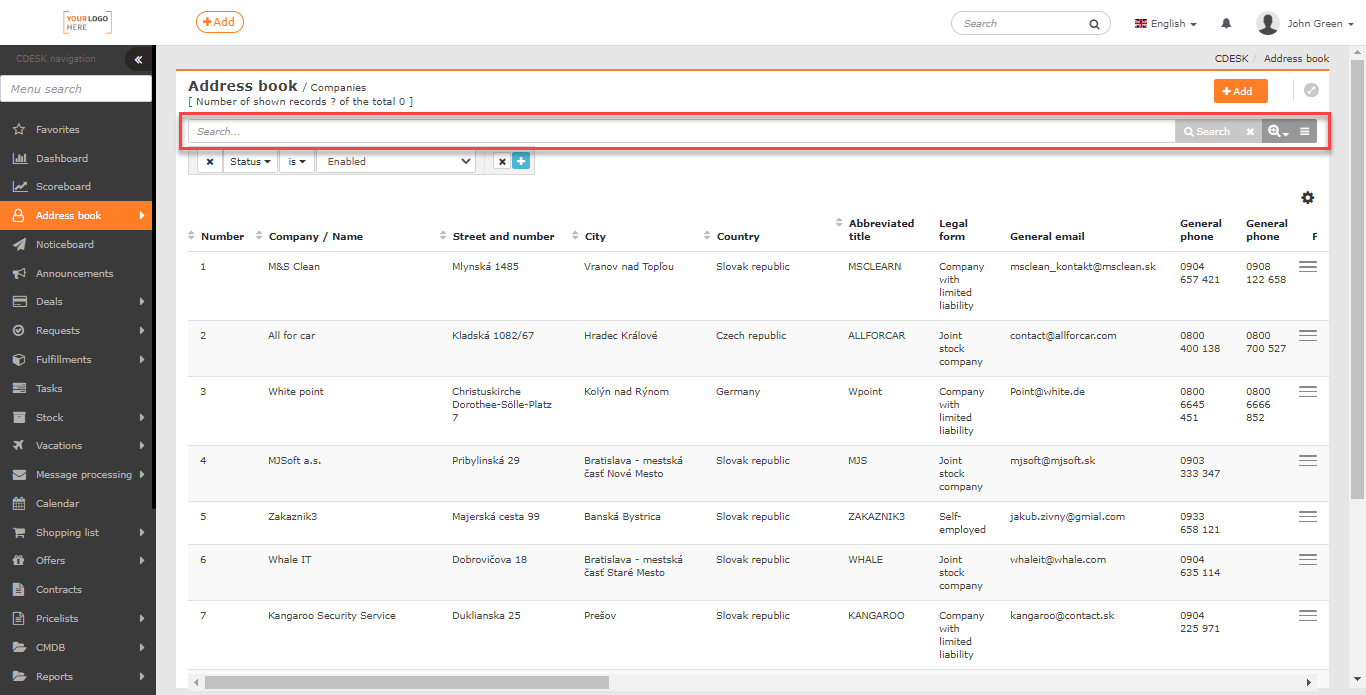
The list of companies can be found in Address Book->Companies. If this item is not present in the menu, check the permission settings for the user. The user must have permissions to access both the companies and the Address Book module itself.
Permissions to access the Address Book module can be set in Users and Groups->Users->choose a user->Permissions tab->Address Book. Permissions to access Companies can be set in Users and Groups->Users->choose a user->Permissions tab->Address Book->Companies.
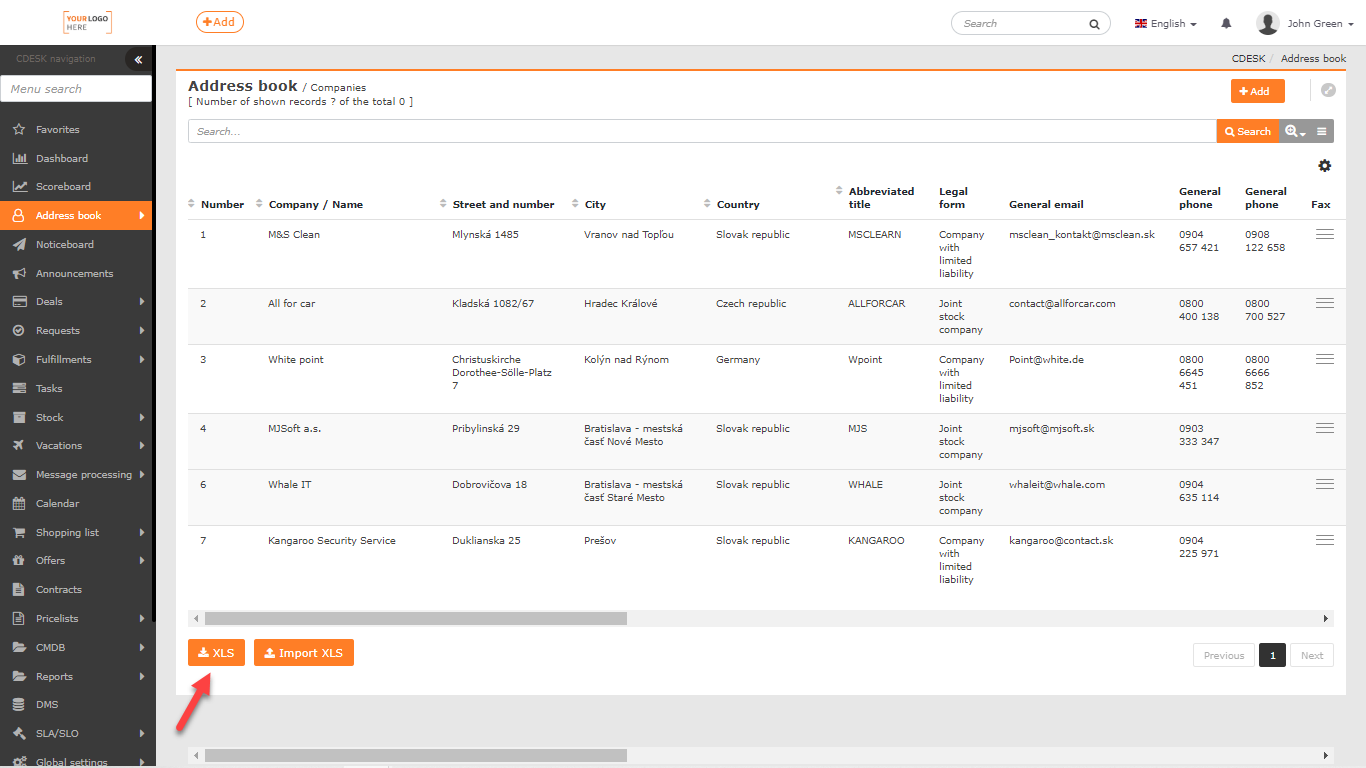
The header of the List of Companies window informs about the number of displayed records out of the total; there is a button to add a company, search using the advanced filter and a button to export to XLS.
The following is a list of companies enabled in the CDESK system. To view all companies, uncheck the filter by clicking ×
At the end of each record line there is a context menu ![]() , for further operations with the record – to edit and to delete.
, for further operations with the record – to edit and to delete.
Add a New Company
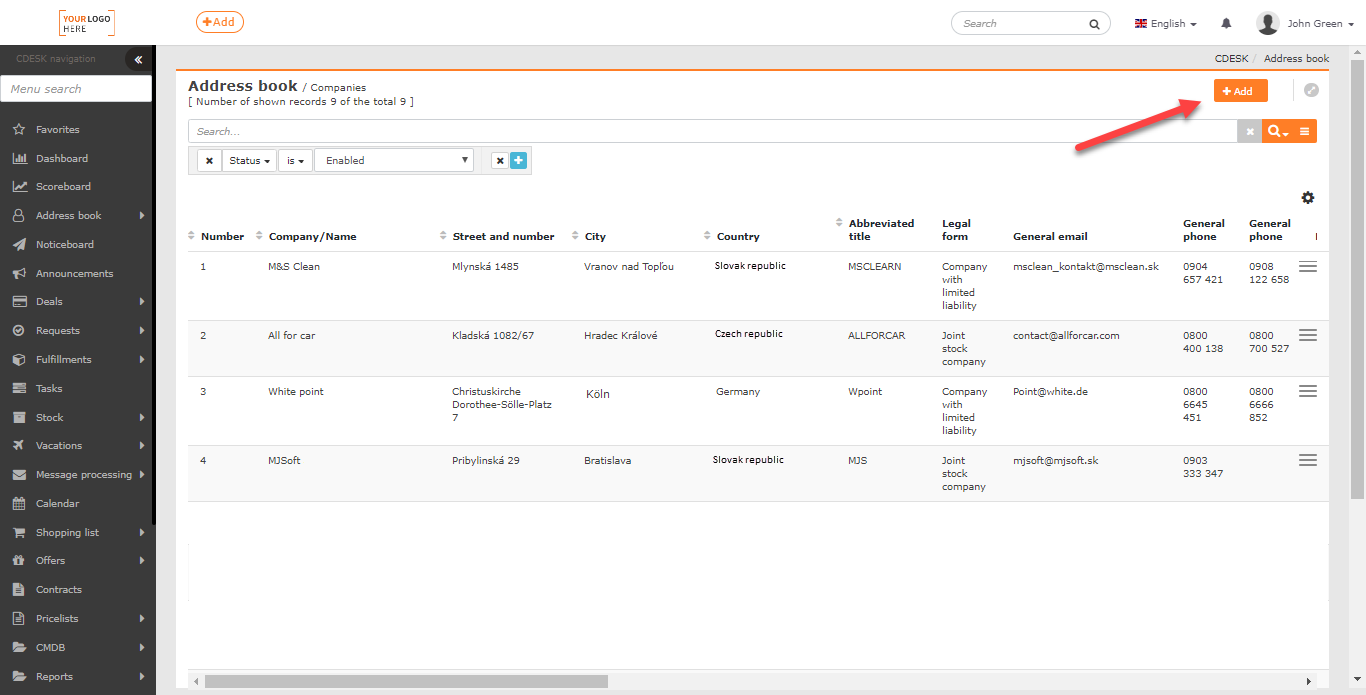
There are two options for creating a new customer card in the system:
- Click the +Add, button at the top of the List of Companies window
- In any form requiring a company/customer/supplier name, click the + button next to the company selection box
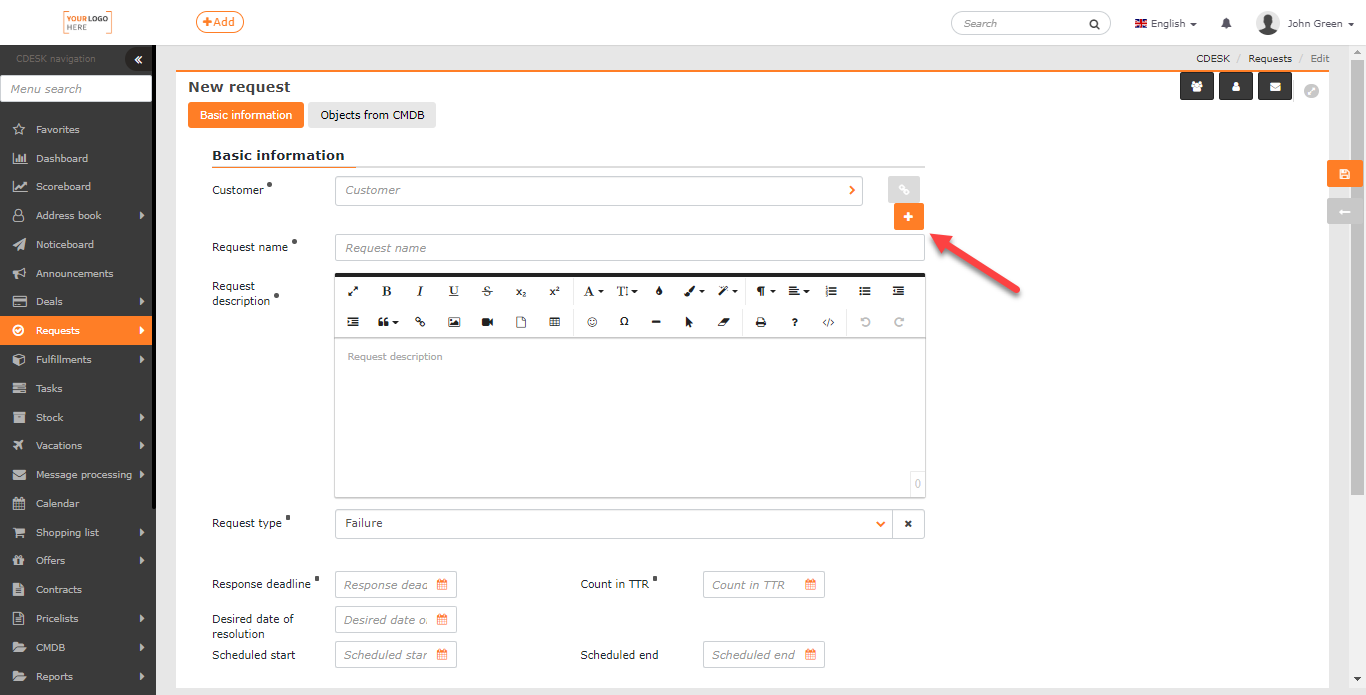
If the buttons for adding a company are not displayed, check if you have permission to create records. Permissions can be set in Users and Groups->Users->choose a user->Permissions tab->Address Book->Companies->Records.
Clicking on any of the add record buttons will open a form window for filling in general information about the company. Items marked • are required.
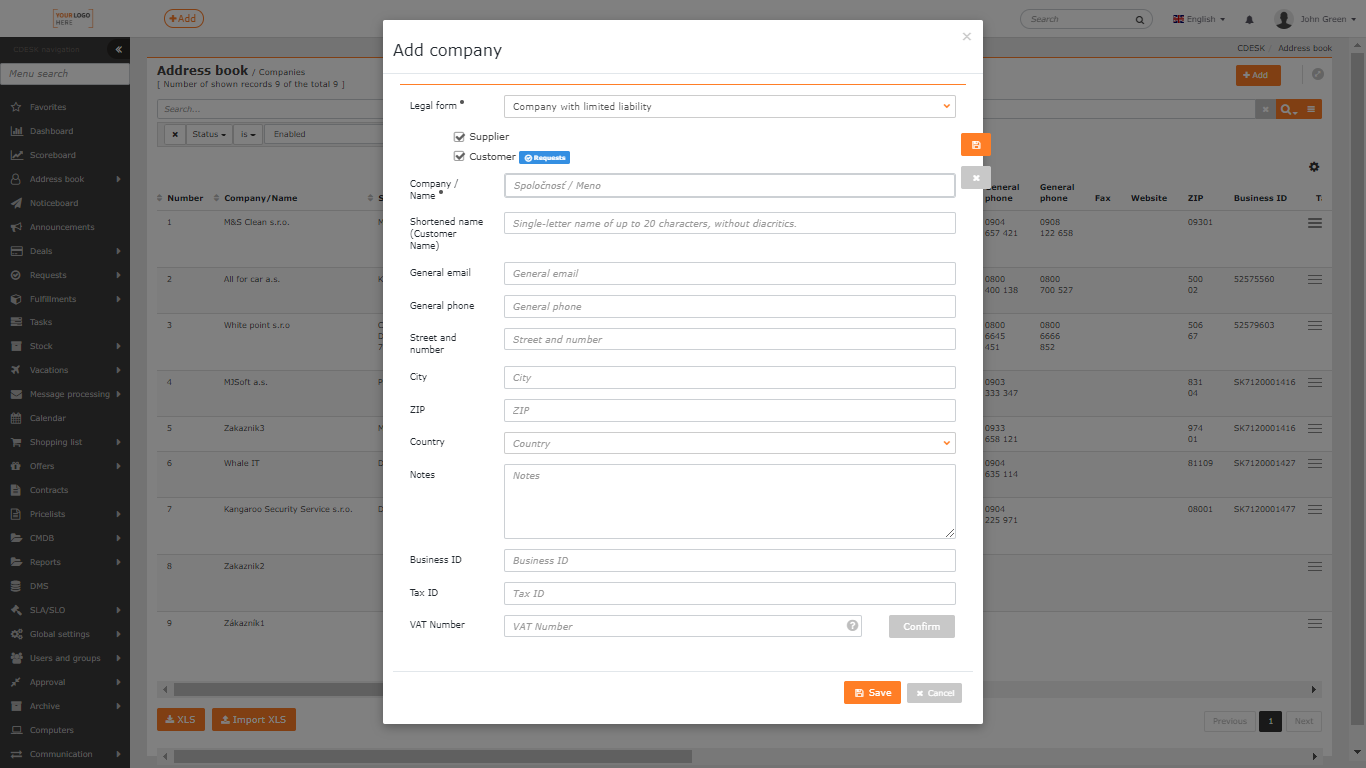
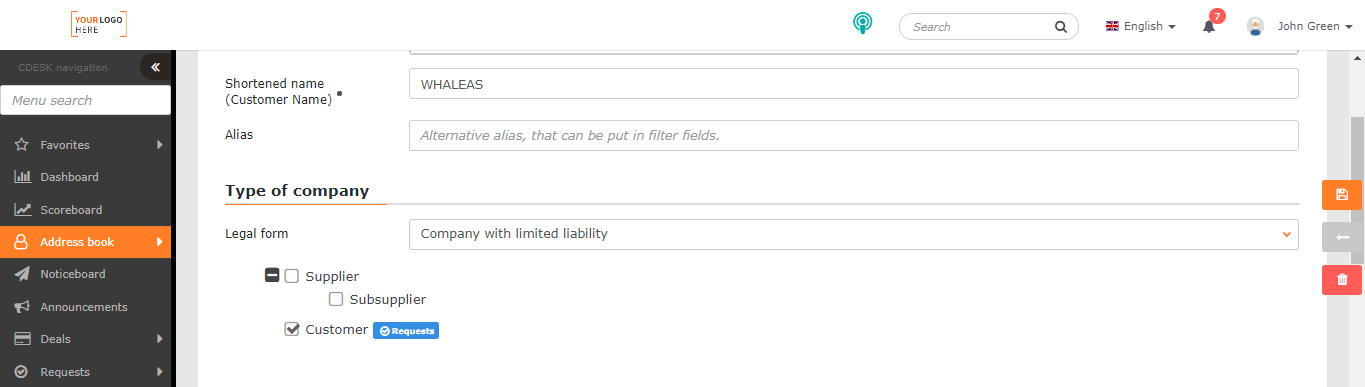
Legal form of the company • – selection of options offered can be narrowed down if necessary by disabling unused legal forms in Global Settings->Address Book->Companies.
Company types • – select a company type. By default, the list includes Customer and Supplier options. Additional options can only be added and removed by a user with appropriate permissions, under Global Settings->Address Book->Companies->Company Types. Permissions can be set in Users and Groups->Users->choose a user->Permissions tab->Address book->Companies->Field Access->Company Type.
By marking the Customer field only, the company being created will only be offered on forms requiring the customer to be listed, not when the supplier needs to be listed. Checking only the Supplier option works alike. Checking both options, the company will be offered among both customers and suppliers. The company type marked with the Requests flag is enabled to add requests.
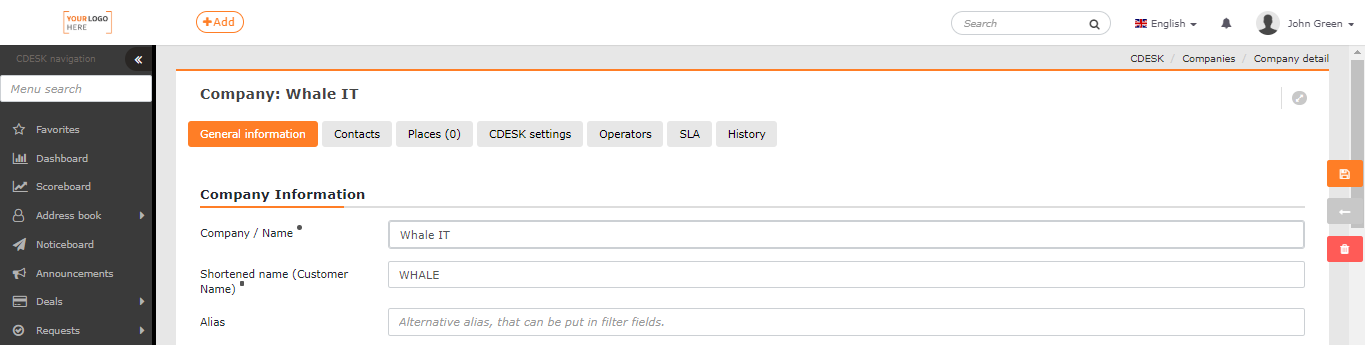
Company / Name • – enter the name of the company. The company will be displayed under this name in all linked modules.
Shortened name (Customer Name) • – an abbreviation of the company name for when being displayed in listings, for example in subject lines of email notifications.
General Email Address – a field for a general contact of the company to which no email notifications are sent.
General Phone Number – enter a phone number in case the assigned assignee needs to contact the company by phone. SMS notifications will not be sent to this phone number.
Address – fields for entering address data.
Notes – text field for entering additional information about the company. This text is displayed in the request tooltip next to the company name.
Business ID – text field for entering the identification number of the organization.
Tax ID – text field for entering the tax identification number.
VAT Number – text field for entering the VAT identification number. To verify the validity of the number, click the Confirm button.
Once you have completed the form, click the Save button to finish adding the company. Click Cancel to close the window without saving the record. Once saved, the created company record will open for Editing, where additional information about the company can be added.
Edit the Company
To edit, double-click on the record in the list of companies, or select it from the context menu ![]() Edit.
Edit.
This opens the company record divided into the following tabs:
- General Information
- Additional Properties
- Contacts
- Places
- CDESK Settings
- Assignees
- SLA
- Evaluation of Failures
- History
Only a user with appropriate permissions can edit companies. Permissions can be set in Users and Groups->Users->choose a user->Permissions tab->Address book->Companies->Records. If you do not have permission to edit companies, the edit button will not appear in the context menu.
General Information
Compared to the basic form for adding a company, the menu of options is wider by:
Company Information
Alias – an alternative company name by which to filter.
Status • – on – the company is offered when selecting the customer name; off – the company is not offered in any form. It will be searchable only in the list of customers, when selecting the all statuses or off filters.
Company type
Company type can be selected when adding a company. The selected company type can be changed after saving. A company can also belong to more than one type. You can only change the company type with the appropriate permission. Permissions can be set in Users and groups->Users->choose a user->Permissions tab->Address Book->Companies->Access to fields->Company Type.
Company Category
Here you can select categories, according to which it is easier to filter companies matching the selected criteria. Additionally, it is possible to determine, for example, whether the company is a contract customer, whether it falls under a certain region, etc. Adding categories and editing the list of categories can be done by a user with appropriate permissions in Global Settings-> Address Book-> Companies-> Categories. Permissions can be set in Users and Groups->Users->choose a user->Permissions tab->Address Book->Companies->Field Access->Company Category.

Company Groups
Choose the company group. Company groups are used to sort companies. They can be used to filter items in the list of companies and requests. Company groups can be created by a user with appropriate permissions in Global Settings->Address Book->Companies in the Groups of Companies section. Permissions can be set in Users and Groups->Users->choose a user->Permissions tab->Address Book->Company->Field access->Company group.

Adress
Once saved, you can edit the data entered when registering the company. The form is extended with additional fields and settings:
Record general contacts – by setting the switch to on position ![]() , the following fields become available for records: general phone number, fax and website.
, the following fields become available for records: general phone number, fax and website.
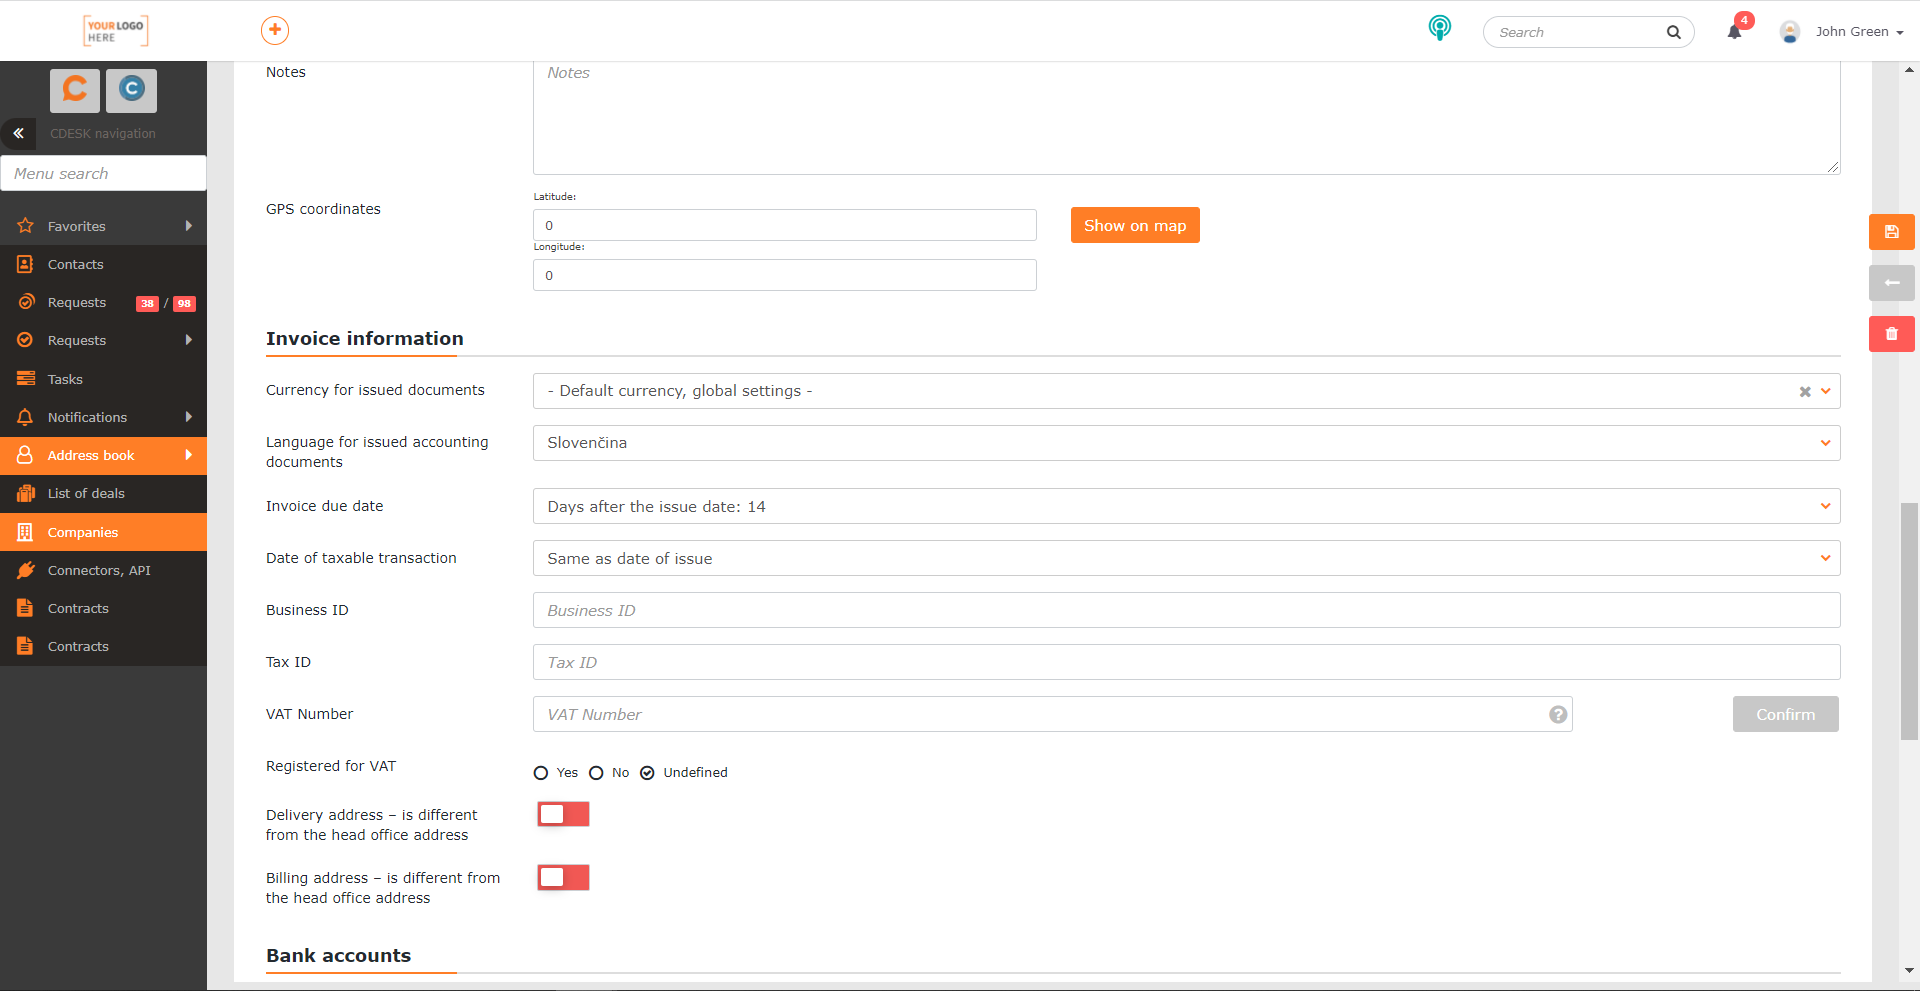
GPS coordinates – a field for entering the latitude and longitude of the company. The information is used for search using the GPS system.

Invoice Information
Currency for issued documents – the default option – Default currency, global settings – can be changed to a different currency, which for the selected company will be offered automatically in all forms where this information is required. The list of allowed currencies can be edited with appropriate permissions in Global Settings->Billing.
Language for issued accounting documents – select a language for created invoices.
Invoice due date – the number of days for the invoice due date.
Date of taxable transaction – determines the date on which the service was supplied.
Registered for VAT – Yes / No / Unspecified – information whether the company is a VAT payer.
Delivery address – is different from the head office address – by toggling the switch to the on position ![]() , the rows for entering the delivery address will appear.
, the rows for entering the delivery address will appear.
Billing address – is different from the head office address – by toggling the switch to the on position ![]() , the rows for entering the billing address will appear.
, the rows for entering the billing address will appear.
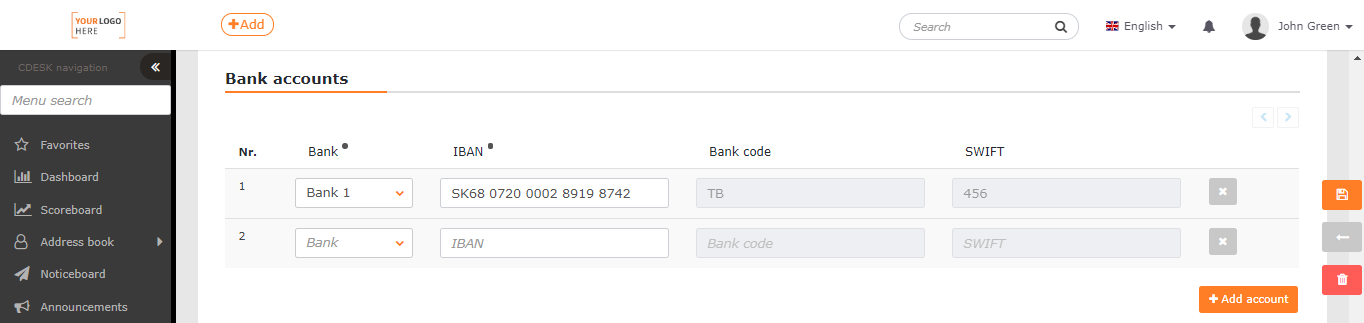
Bank Accounts
List of client’s bank accounts. The list of accounts can be added by clicking the +Add an account button, or the account can be deleted by clicking on x . The banking institutions you select in the Bank column need to be predefined in Global Settings->Billing. Only a user with appropriate permissions can add and edit bank accounts of companies. Permissions can be sets in Users and Groups->Users->choose a user->Permissions tab->Address Book->Companies->Field Access->Bank Accounts.
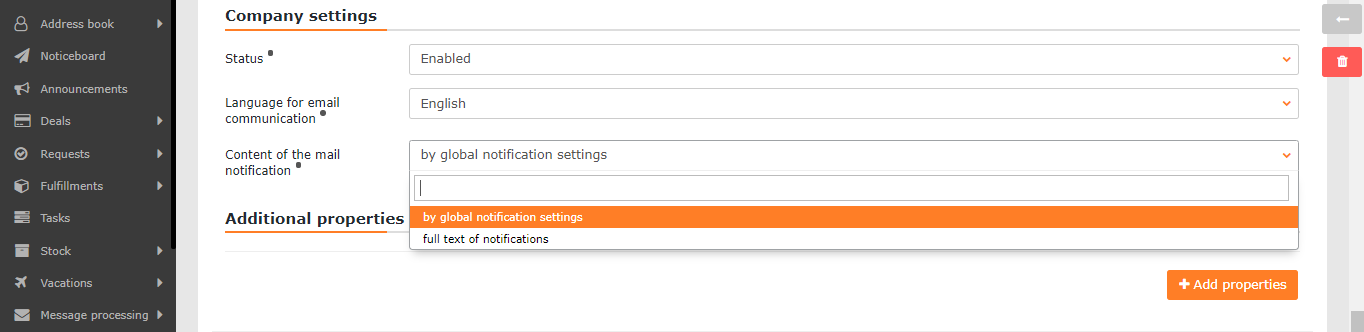
Company Settings
Language for email communication • – language selection for all email notifications from CDESK.
Content of the mail notification • – set how mail notifications will be created. The following options are available:
- By global notification settings – contents of notifications will be customized according to the settings in Global settings->Notifications->Basic Settings.
- Full text of notifications – notifications will contain all parameters regardless of the settings in Global Settings->Notifications->Basic Settings.
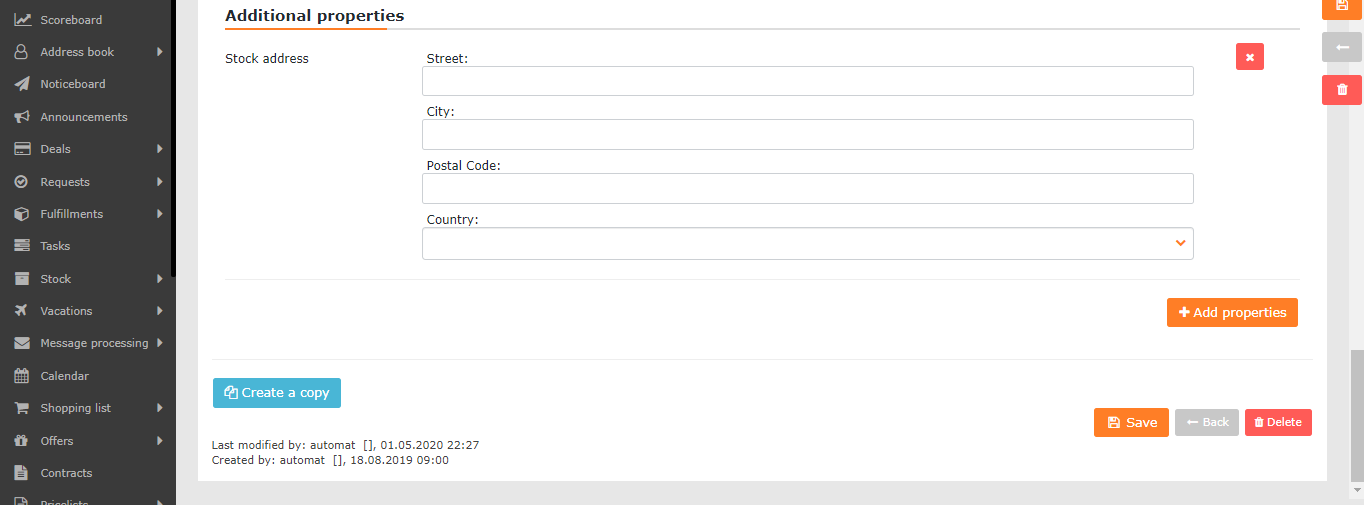
Additional Properties
In addition to the properties predefined in Global Settings->Address Book->Companies, it is possible to add additional properties to the saved record by clicking on +Add properties. Additional properties added via a specific company’s form are not transferred to other companies‘ records. For more information on adding and defining new additional properties, see the Additional Properties article.
Additional properties can only be seen and added by a user with proper permissions. Permissions can be set in Users and Groups->Users->choose a user->Permissions tab->Address Book->Companies->Field Access->Additional Properties.
Additional properties added via Global Settings->Address Book can be included in the export of records and also as a column in the list of companies
Contacts
The Contacts tab becomes available after saving the company data. If the tab does not appear, make sure you have permission to access contacts. Permissions can be set in Users and Groups->Users->choose a user->Permissions tab->Address Book->Contacts.
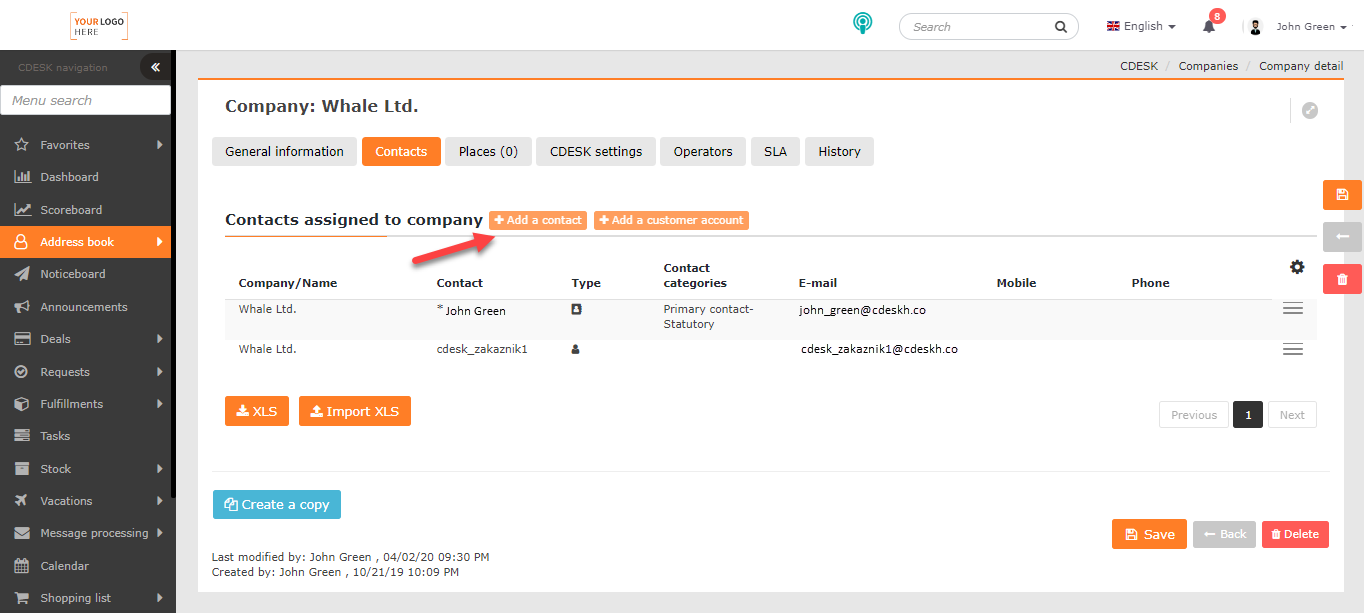
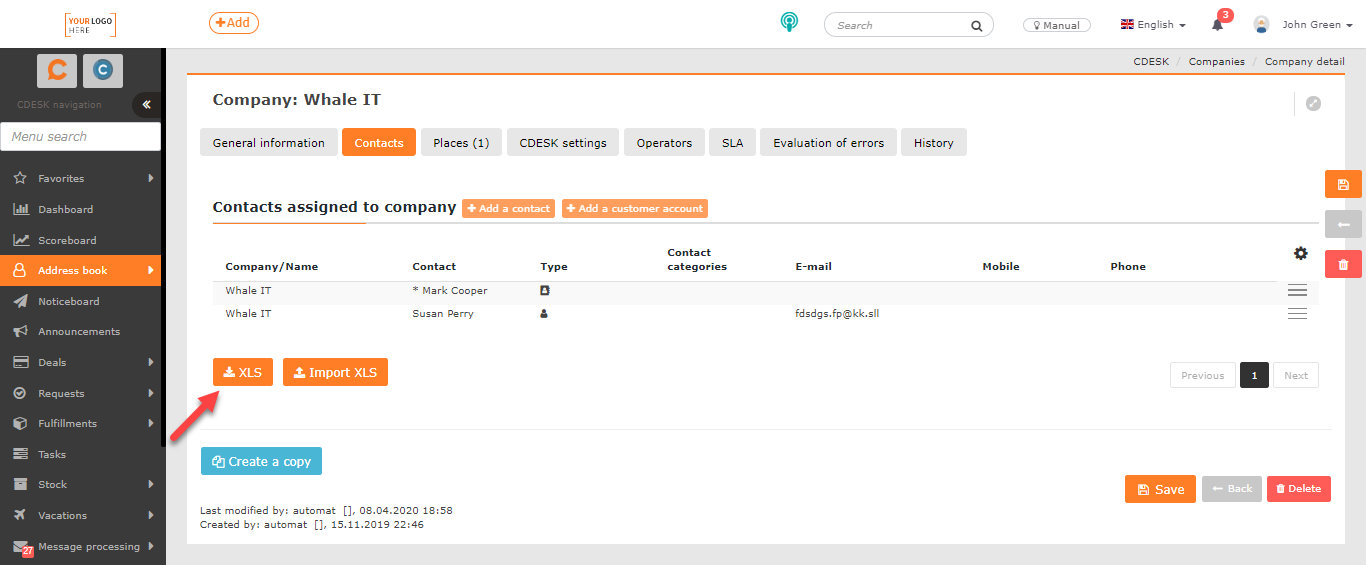
The tab displays all contacts, customer accounts assigned to the selected company with options for adding contacts and for exporting an existing list.
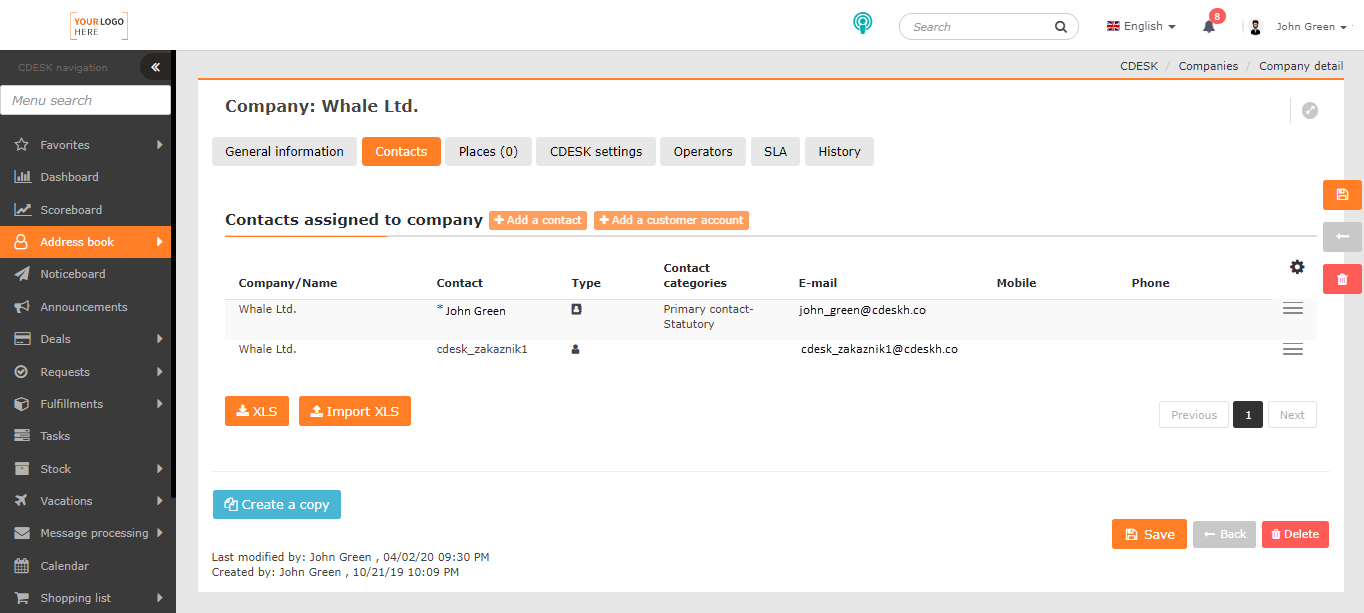
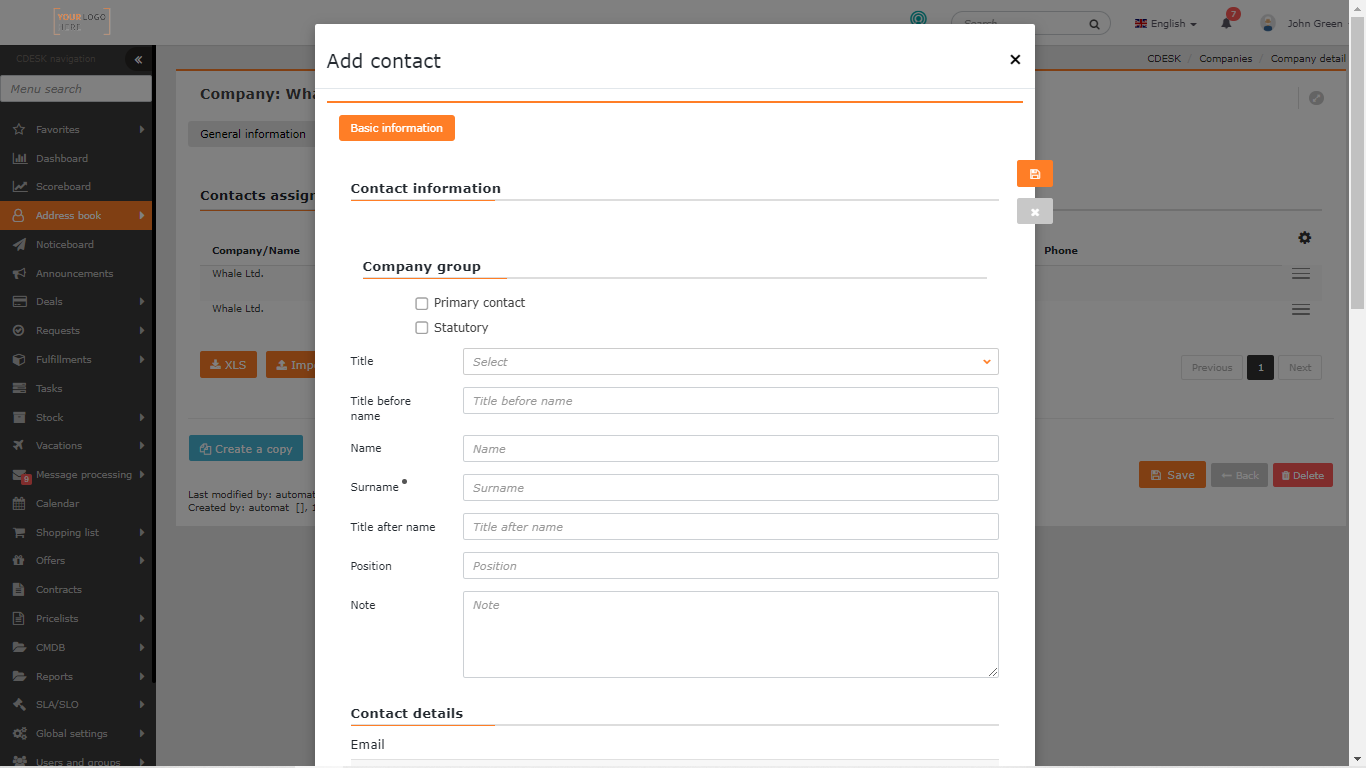
Add a Contact
Use the +Add a contact button to add contacts. Click to open a window with a form. The meaning of individual fields is described in Contacts.
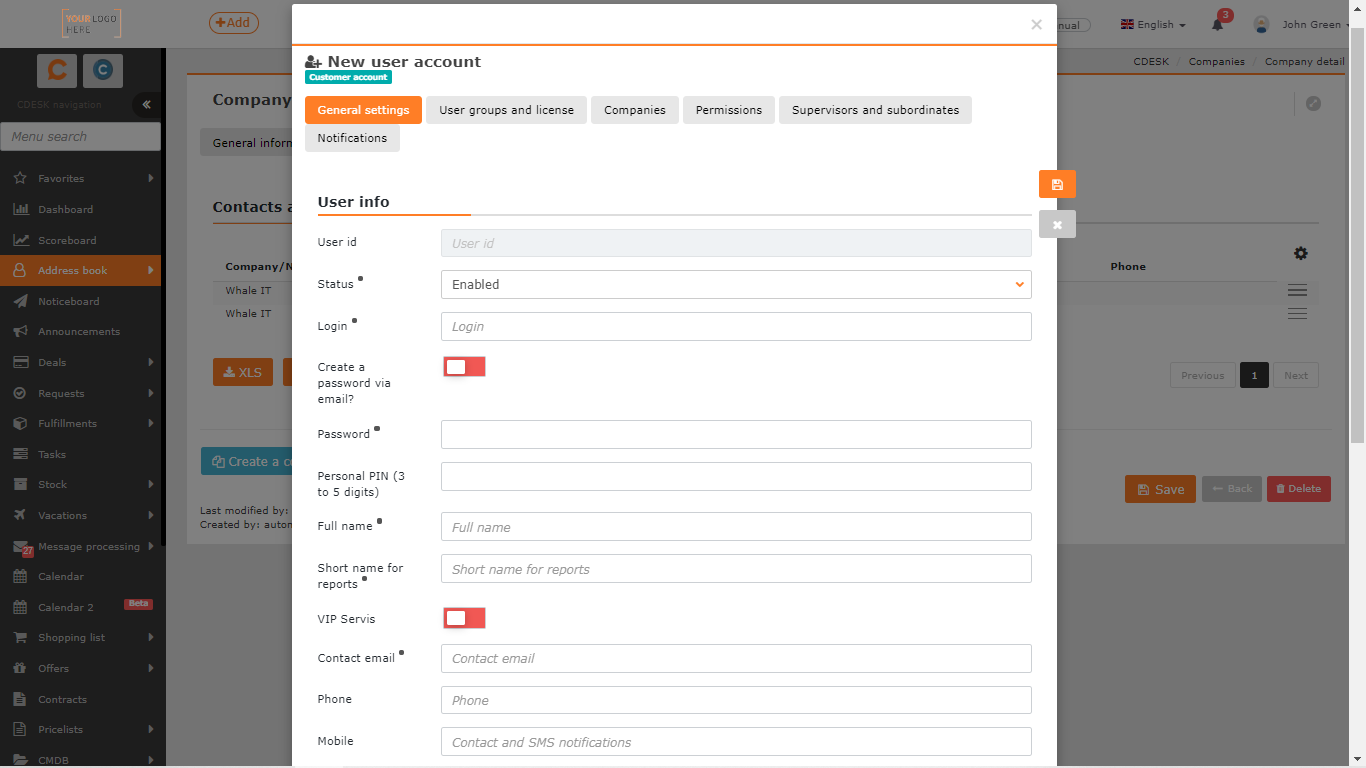
Add a Customer Account
The +Add a customer account button is used to give customers access to some CDESK functions.
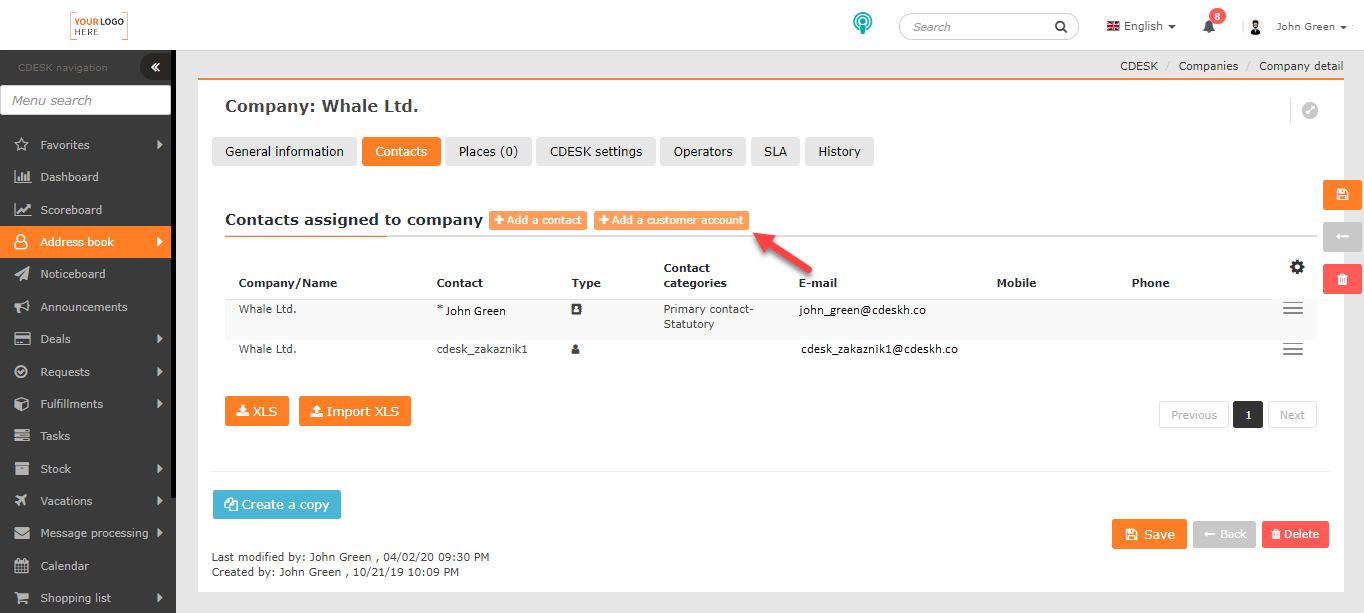
Click this button to open a window with options to select:
- Select an existing account – once selected, the code list of existing customer accounts will open. Click Next to open the account form to edit fields. Their meaning is described in the Users and Groups text. To save the changes, click the Save button.
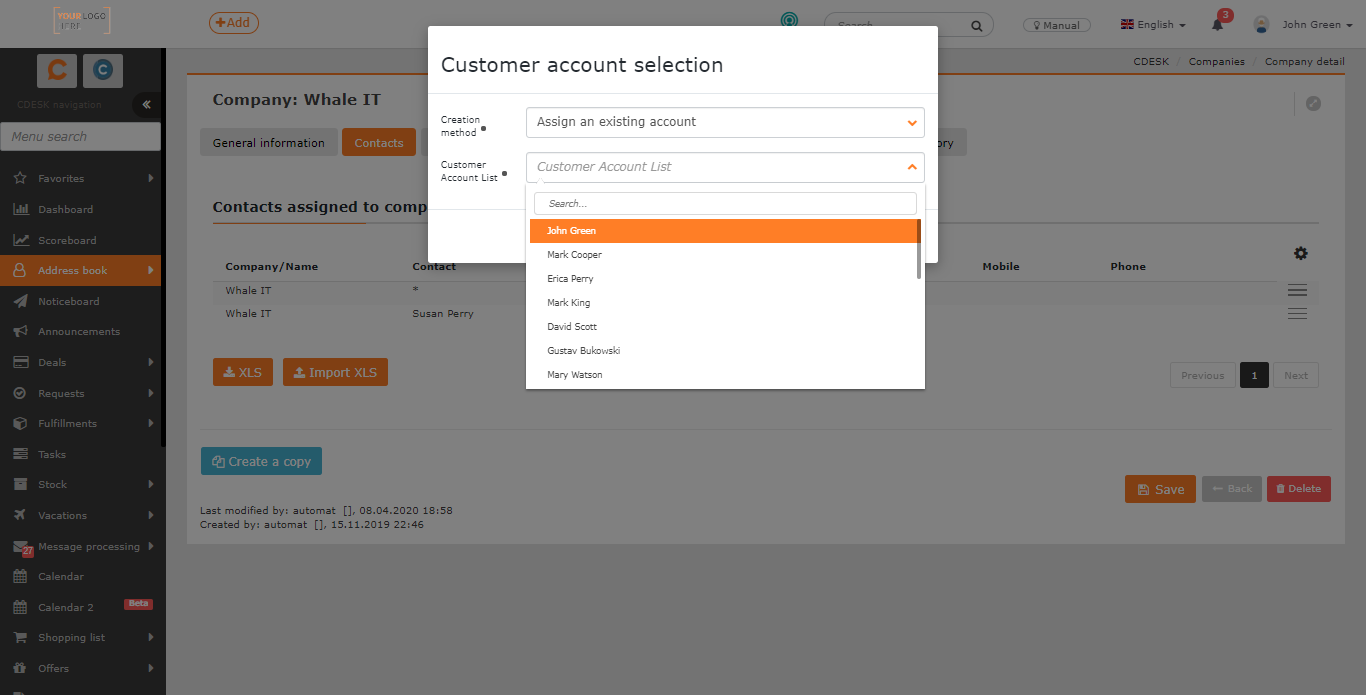
- Create a new account – Click to open the form to add a new account. How to create a user/customer account is covered in Users and Groups.
Export of Contacts Added to the Company
In the bottom left corner of the list of contacts, there is an XLS button that you can use to export the list in XLS format. The Export Tasks button can be enabled/disabled to users in Permissions. Permissions can be set in Users and Groups->Users->choose a user->Permissions tab->Address Book->Contacts->Export.
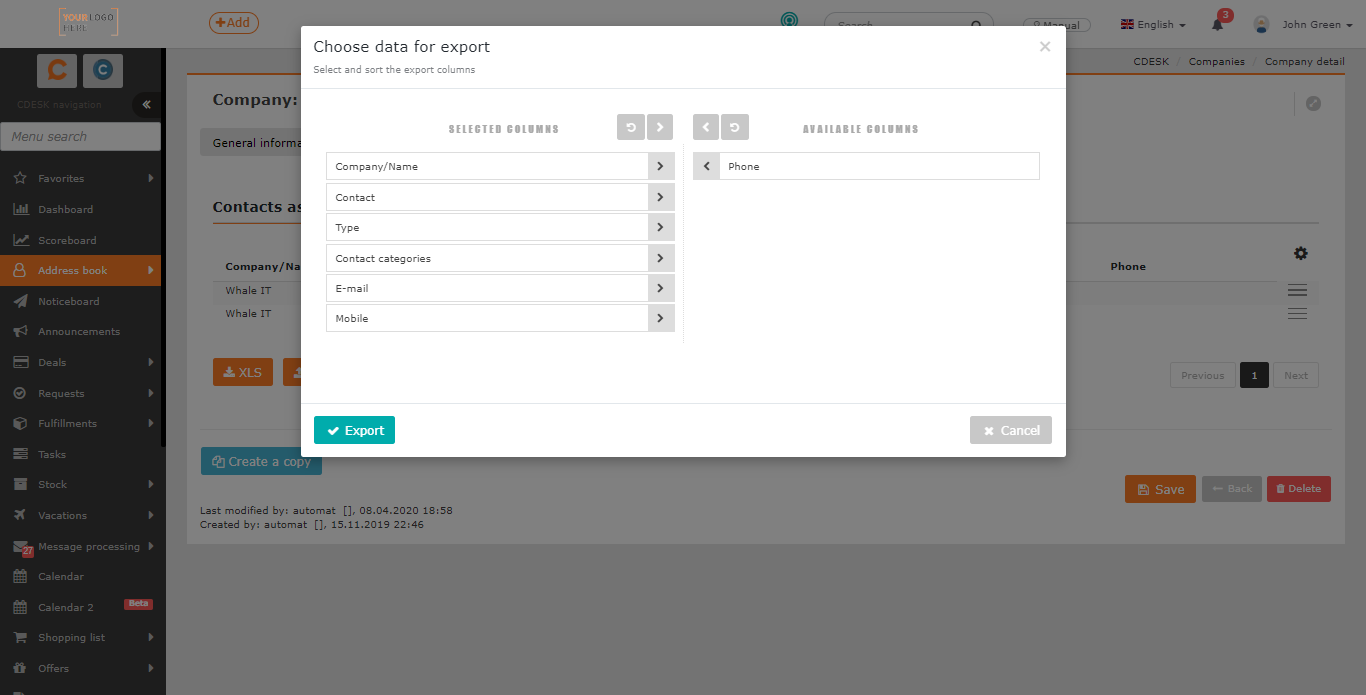
Click to open a new window in which you can select the columns to export. If you want to export all columns, no need to select them individually. Click on < to select them all. The order of the columns in this list also determines their order in the export. If you wish to have columns in the default order, click the ![]() icon and the columns are sorted.
icon and the columns are sorted.
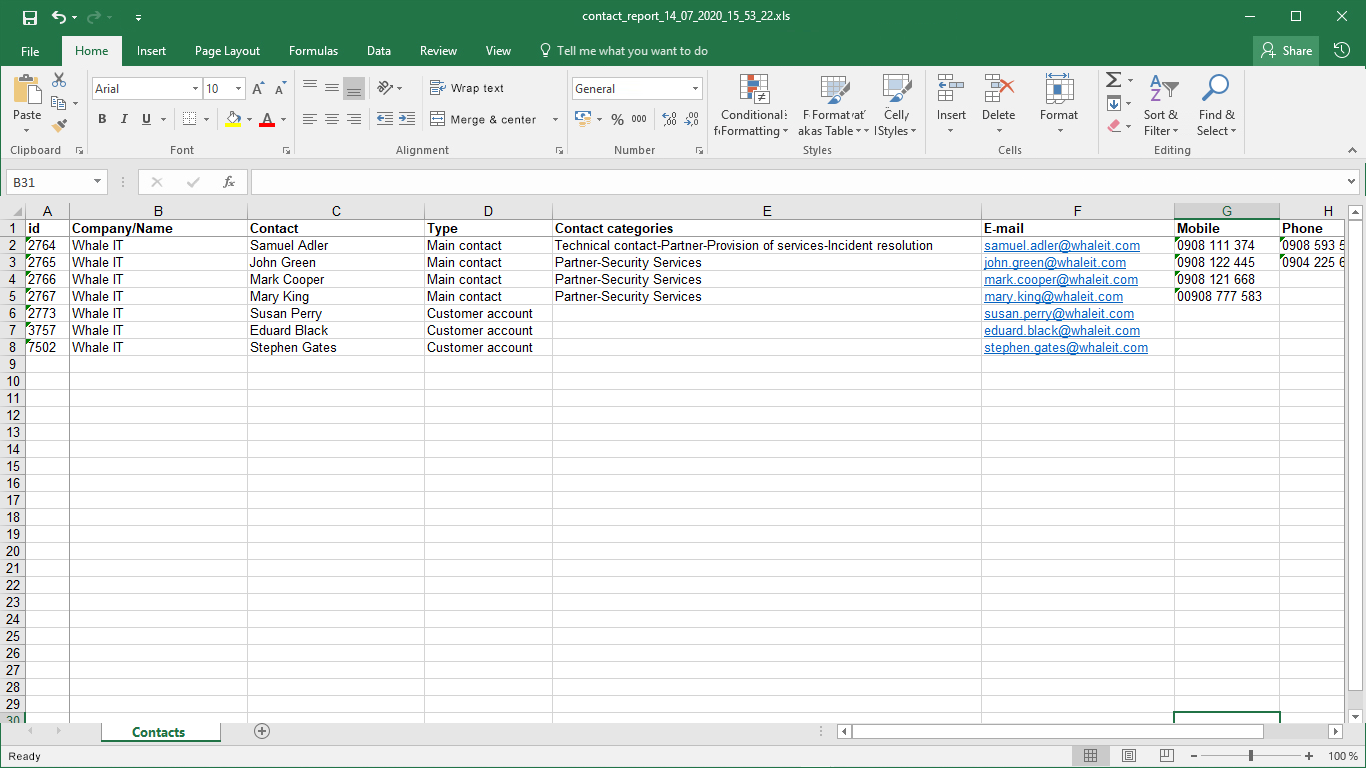
After selecting the columns, create an export using the Export button located in the bottom left corner of the window. Select Cancel to return to the list of tasks without creating an export.
Places
The Places tab will only become available after the company has been saved. The tab is only displayed if you have created and enabled the Places main group in the CMDB Configuration Database. For instructions on how to create a main group, see CI Main Groups.
The Places tab contains a list of locations assigned to the customer. In the module forms where locations are entered, it is possible to filter the records according to whether they contain/do not contain locations. These can be tasks or requests, for example

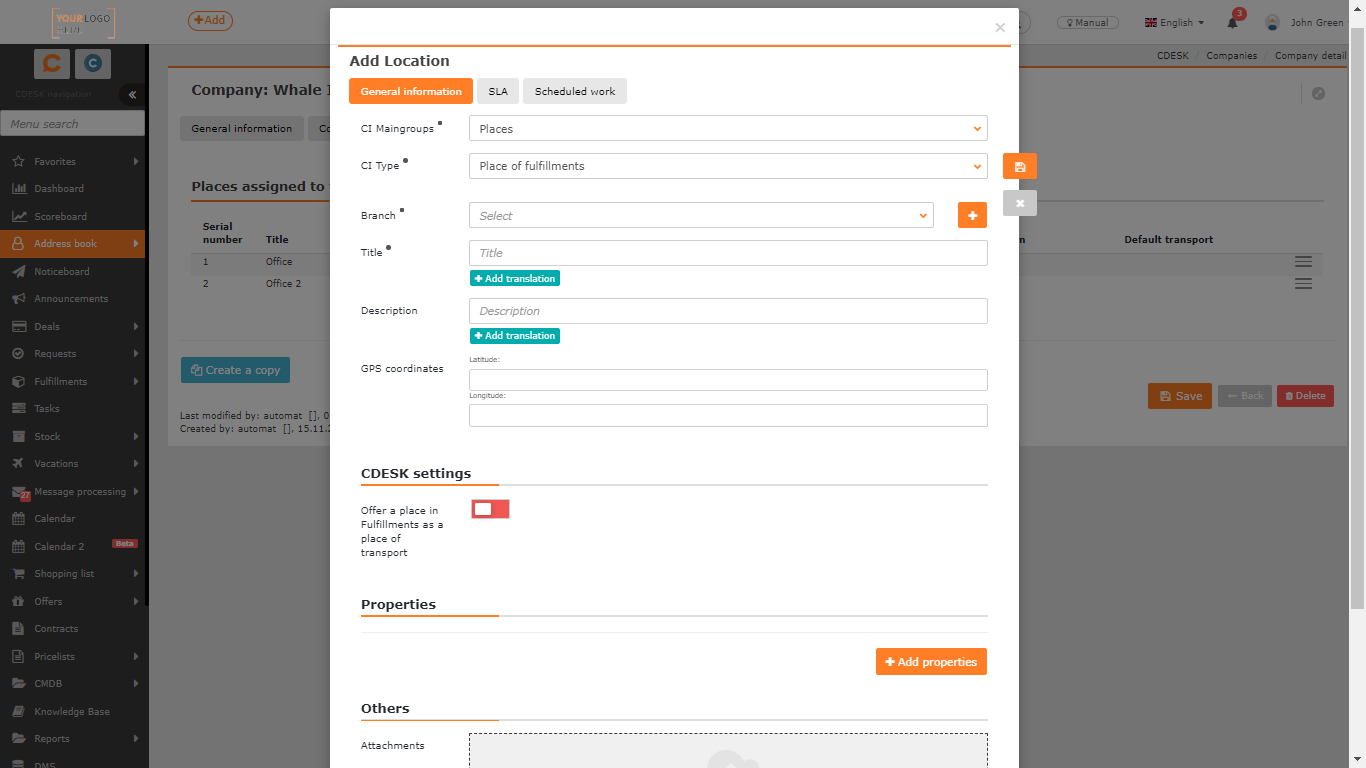
Add a Place to the Company
Places are added to the company using the +Add a place button at the top of the tab. Once clicked, a form will open to enter the parameters of the location. The meaning of fields is described in the text for main groups.
CDESK Settings
The CDESK settings tab will only appear after the company has been saved and only if the Requests module is enabled. If the tab still does not appear, check appropriate permissions. Permissions can be set in Users and Groups->Users->choose a user->Permissions tab->Address Book->Companies->Access to Tabs->CDESK Settings.
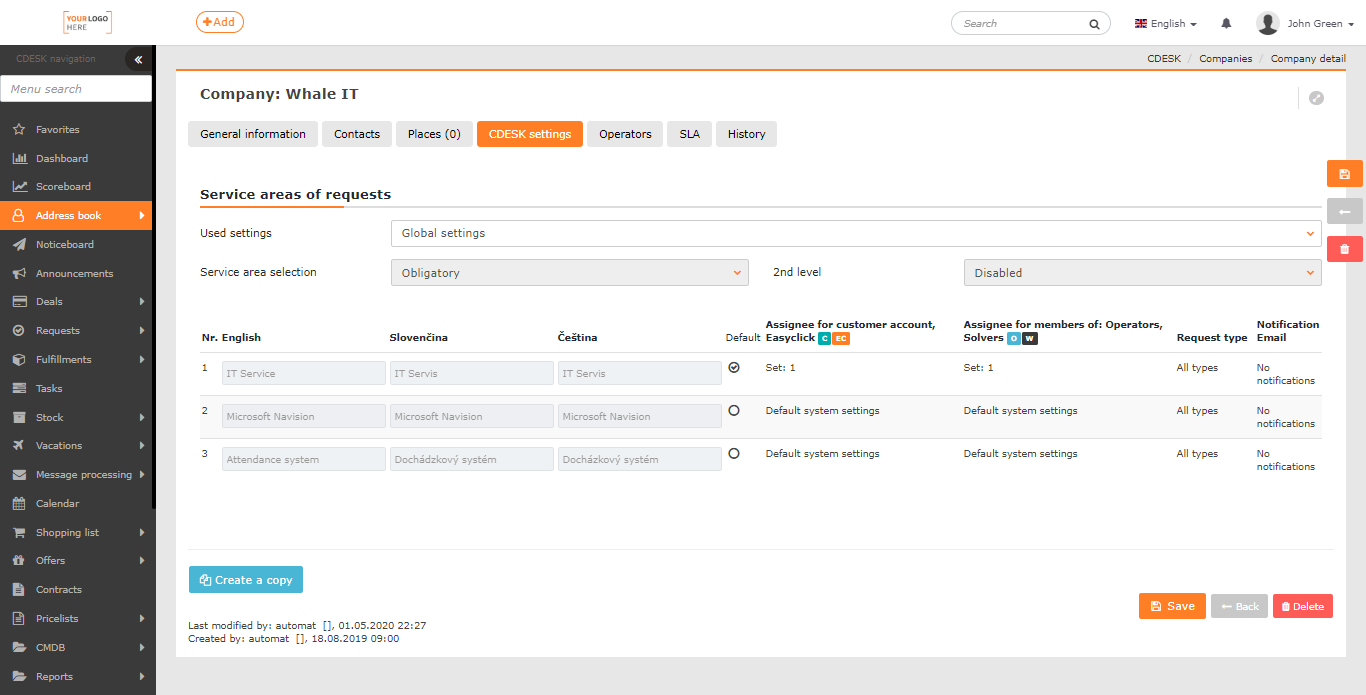
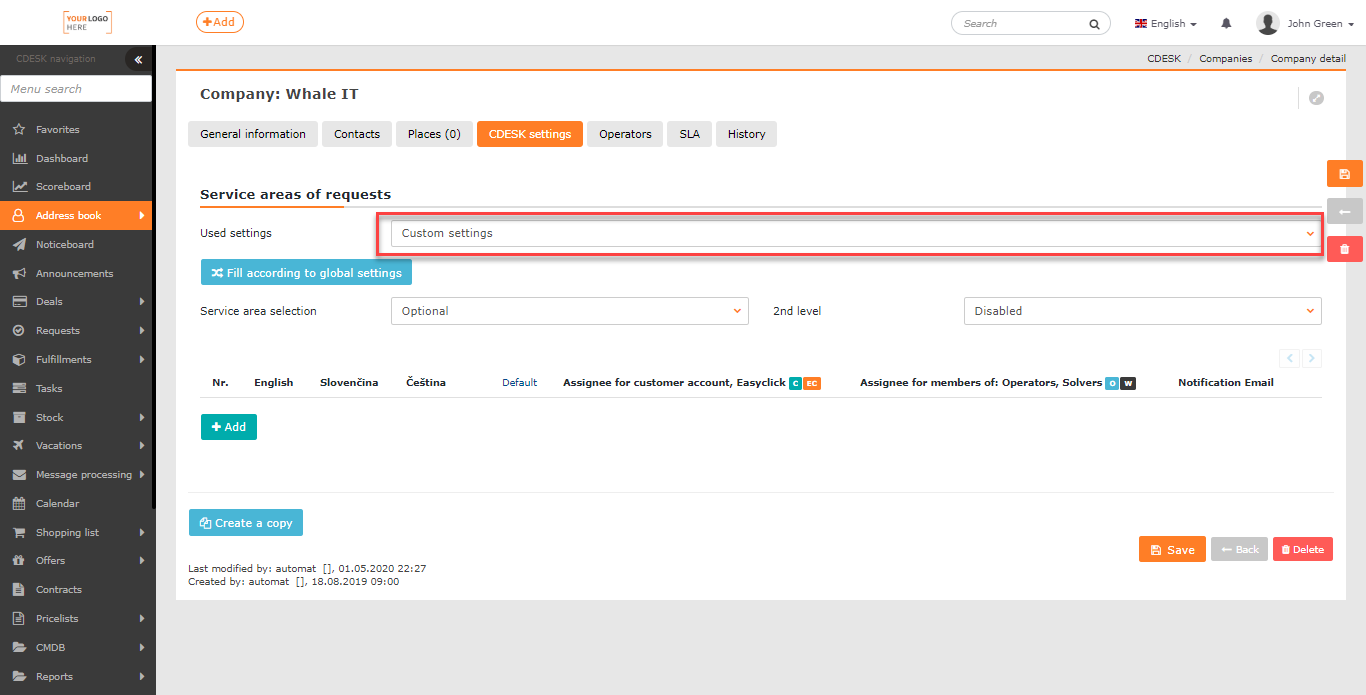
This tab lists service areas of the request for the selected company and also allows customization. The default option is to use Global Settings, i.e. the service areas defined in Global Settings->Requests->Types and Service Areas. Selecting the Custom Settings option allows for the selected company to:
- choose a different combination of request service areas than defined in the global settings, including assignees assigned to the service areas and notifications
- disable service areas if they are enabled in the global settings – by disabling the service area option → for the selected company it will not be possible to select service areas in requests
- enable service areas if they are disabled in global settings – by enabling the service area / 2nd level option
- modify the obligation to select the service area / 2nd level
If the Custom Settings are to be based on the Global Settings with only minor variation, use the Fill in according to the Global Settings button to modify them.
The method for setting up the request service areas is described in more detail in the article on Global Settings of Requests. Using the custom settings of service areas, a custom SLA is created and assigned to the customer which inherits the settings of the current Global SLA (more in the SLA section below).
Assignees
The Assignees tab is only displayed after the company has been saved.
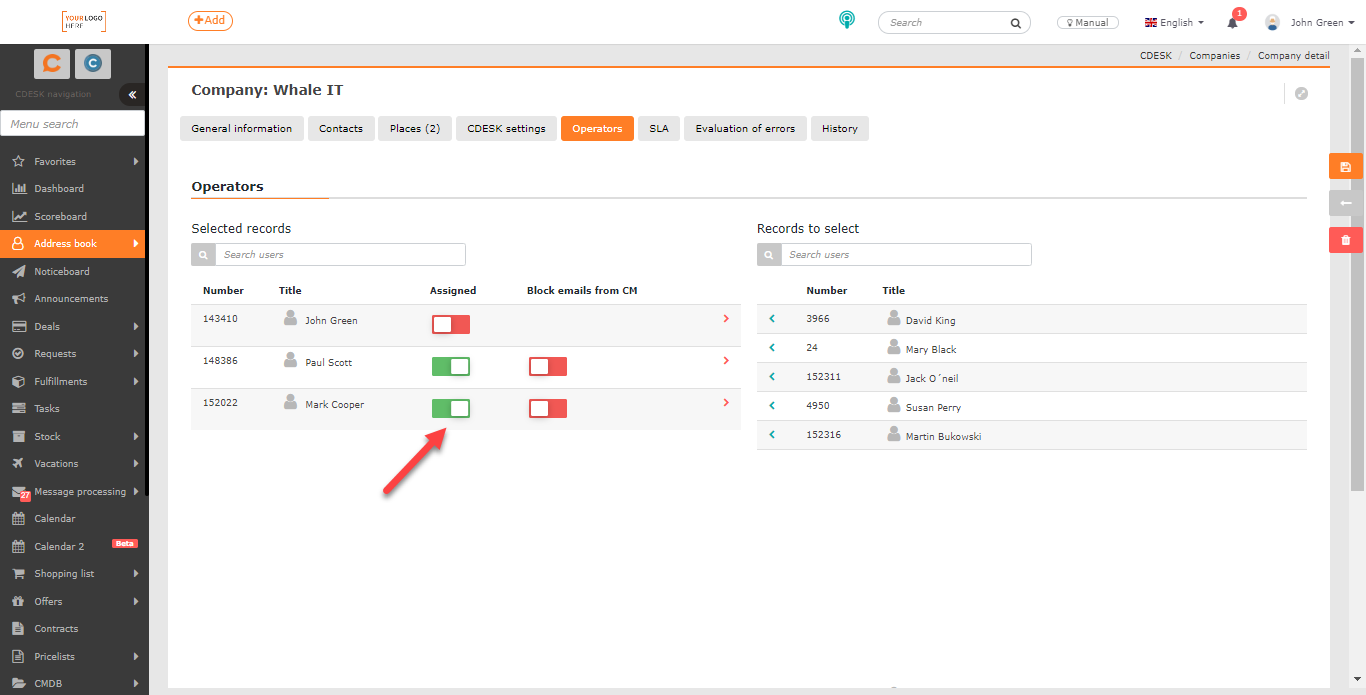
On the tab, you can assign Assignees to a company who are responsible for dealing with the company’s tasks, such as requests. The assignment means that the assignee is technically in charge of the given customer – he will be the default assignee for the customer’s requests and will start receiving email notifications from CM monitoring (if enabled) regarding the customer.
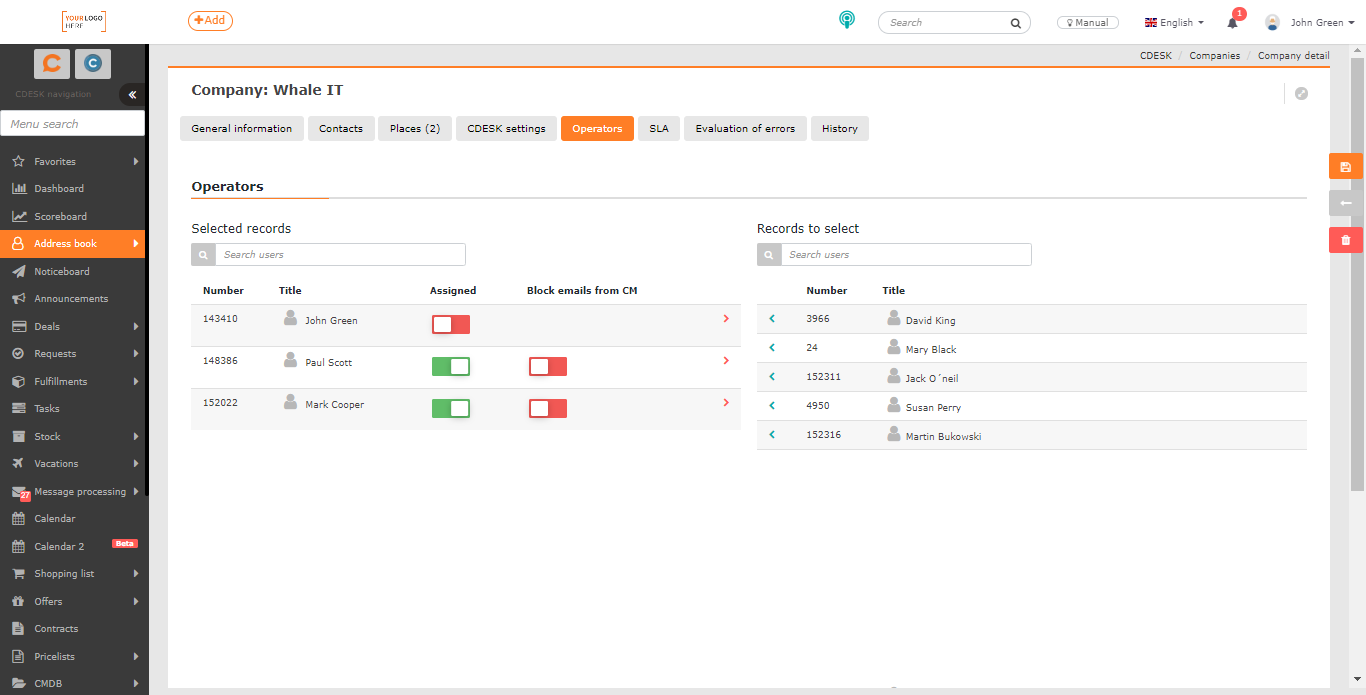
The tab is divided into two columns. On the left, there are assigned Assignees, and on the right, all available Assignees. Above both lists there are search bars for easier user search. To assign the selected user from the right column to a company, click on the < icon located at the beginning of the row.

In order to select an assignee from the company’s records, the assignee must be assigned. An assignee is assigned if the switch in the Assigned column is on ![]() . Next to it, there is a switch to block mail notifications from CM (if enabled). Notifications are blocked if the switch is on
. Next to it, there is a switch to block mail notifications from CM (if enabled). Notifications are blocked if the switch is on ![]() . If you need to unbind the assignee to a company, click the > icon located in each row of assigned Assignees. When clicked, the assignee is added to the list on the right.
. If you need to unbind the assignee to a company, click the > icon located in each row of assigned Assignees. When clicked, the assignee is added to the list on the right.
In the same way, you can assign an assignee to a company via the Users and Groups->Users->choose a user->Companies tab.
SLA
The SLA tab is only displayed after the company has been saved. If the tab is not displayed, check permissions. They can be set in Users and Groups->Users->Choose a user->Permissions tab->Address Book->Companies->Access to Tabs->SLA.
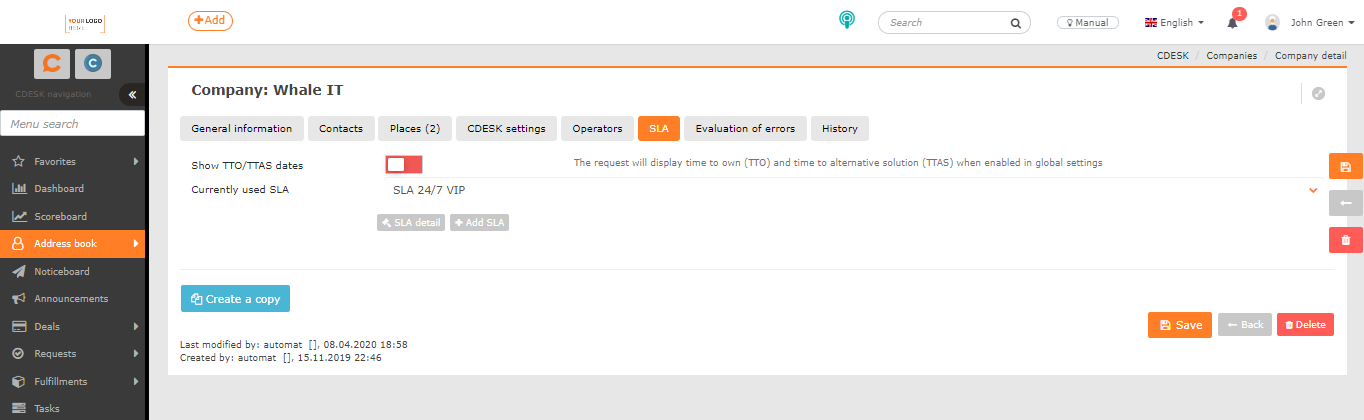
On the SLA tab you can set the SLA for the company, based on which the deadlines will be calculated in all forms where the company will be selected. This can be for example requests.
View TTO/TTAS deadlines – by toggling the switch to the on position ![]() , the countdown timer is activated until the request deadlines are met: time to own (TTO), response time (RT), time to alternative solution (TTAS), time to resolve (Time to Resolve). At the same time, it will make available in the requests the fields with the time of assignment (TTO) and the time of alternative solution (TTAS), if they are enabled in Global Settings->Requests->Basic Settings->Request Deadlines.
, the countdown timer is activated until the request deadlines are met: time to own (TTO), response time (RT), time to alternative solution (TTAS), time to resolve (Time to Resolve). At the same time, it will make available in the requests the fields with the time of assignment (TTO) and the time of alternative solution (TTAS), if they are enabled in Global Settings->Requests->Basic Settings->Request Deadlines.
The SLA used now – the default SLA is the so-called Global SLA. Each company can also be assigned a user-defined SLA that can be selected from the list of existing SLAs. The SLA cannot be changed if the company uses custom settings on the CDESK Settings tab. Details of the selected SLA can be viewed using the SLA Detail button. Working with SLAs is described in more detail in a separate article dedicated to SLAs.
Evaluation of Failures
The Evaluation of Failures tab is displayed after the company is saved and only if you have Custom Monitor software installed. The tab lists types of failures that Custom Monitor monitors.
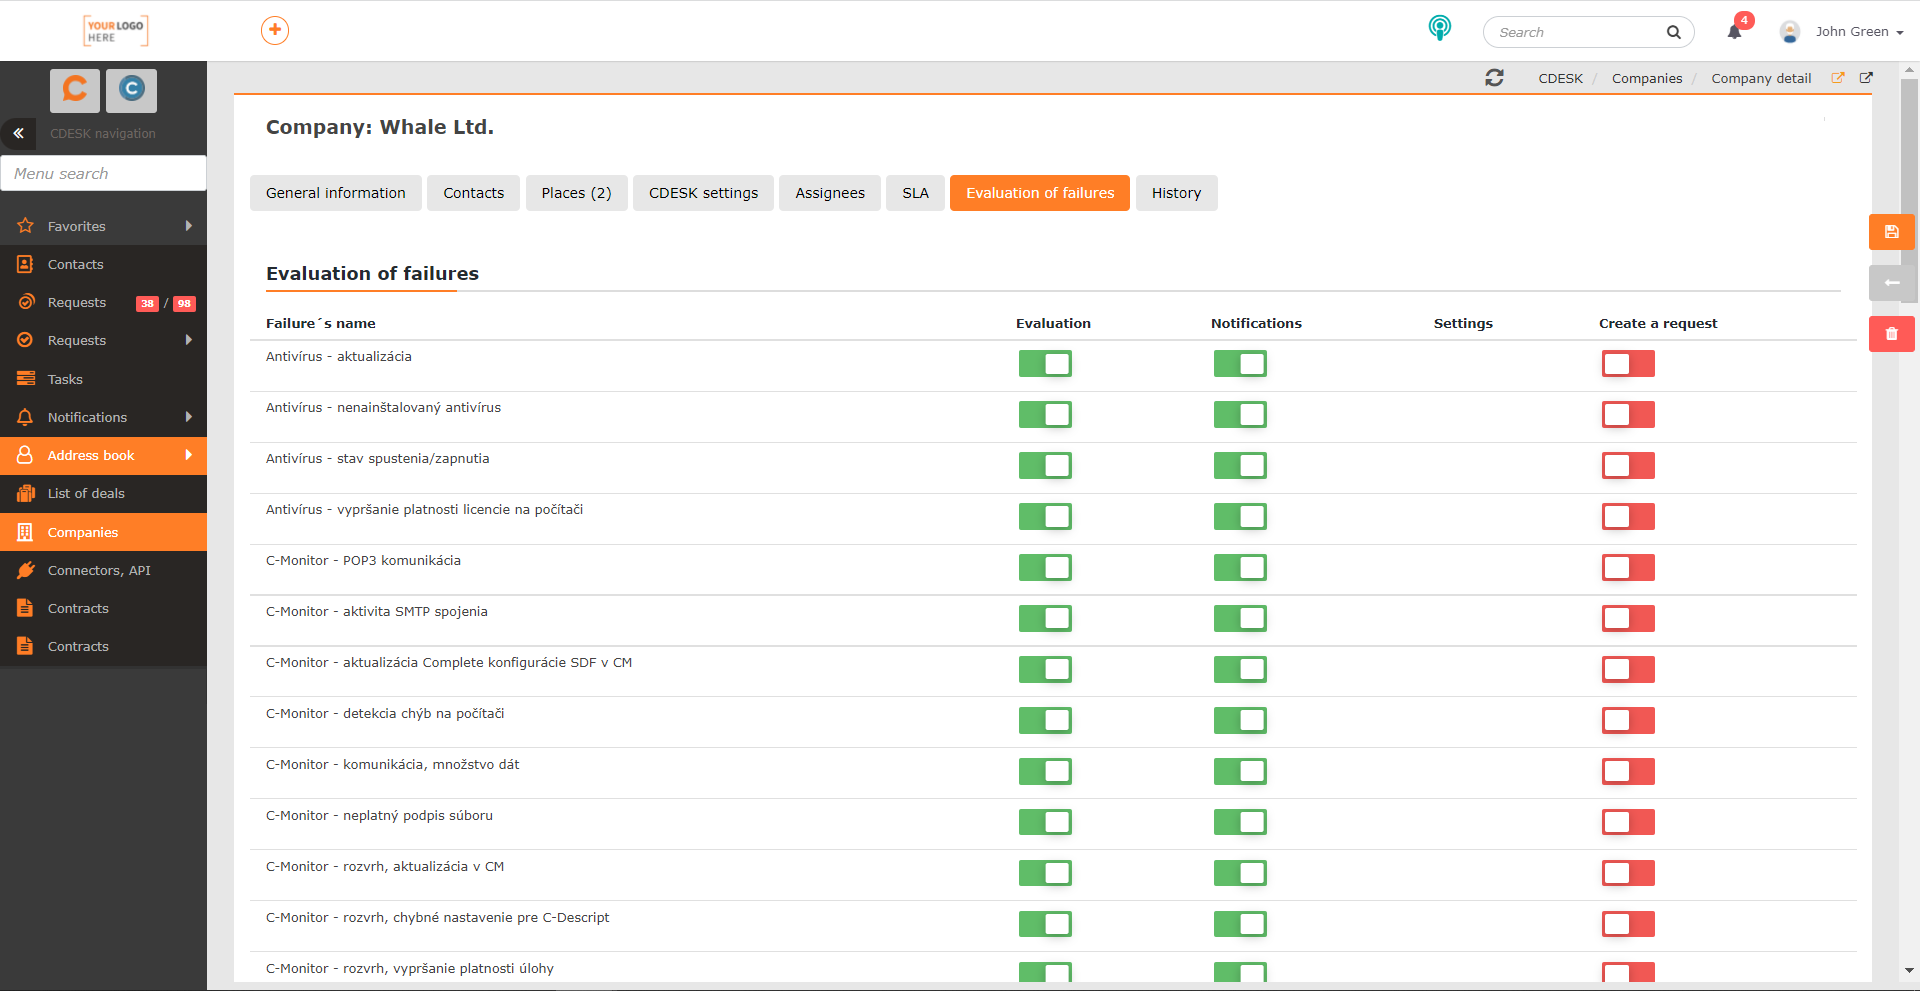
In each row there are switches for settings of the failure evaluation. These settings are:
Evaluation – if the switch is on ![]() , C-Monitor will register the failure.
, C-Monitor will register the failure.
Notifications – if the switch is on ![]() , customer will be notified of the outage via email notification.
, customer will be notified of the outage via email notification.
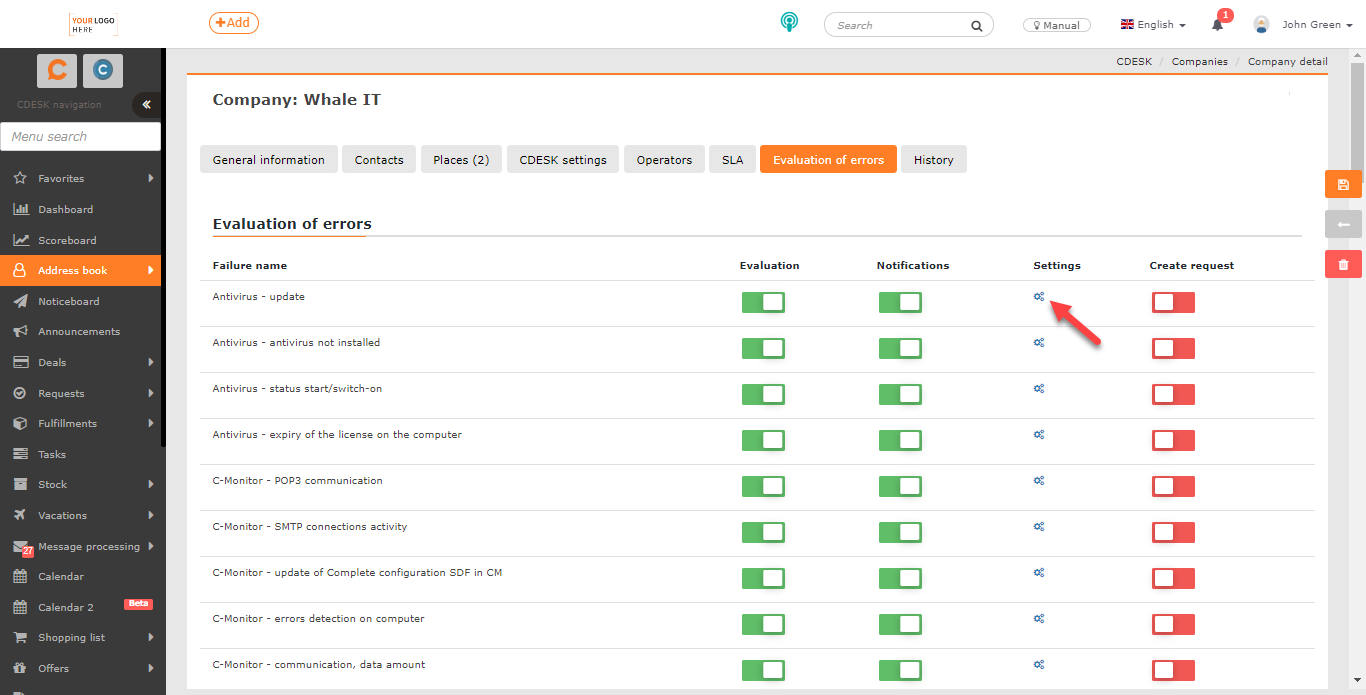
Settings – in this column you can configure parameters of the request that will be created in case of failure registration. The request will be created only if the switch in the Create a request column is in the on position . For the procedure on how to configure a request to report a failure, see the section How to create a request in case of failure registration.
Create a request – if the switch is on ![]() , a request will be automatically created in CDESK when a failure is registered.
, a request will be automatically created in CDESK when a failure is registered.
How to create a request in case of failure registration
If you need CDESK to create a request when a failure is detected, enable the switch ![]() in the Create a Request column. Set the request parameters in the Settings column. Click on the
in the Create a Request column. Set the request parameters in the Settings column. Click on the ![]() icon to open the form for request configuration.
icon to open the form for request configuration.
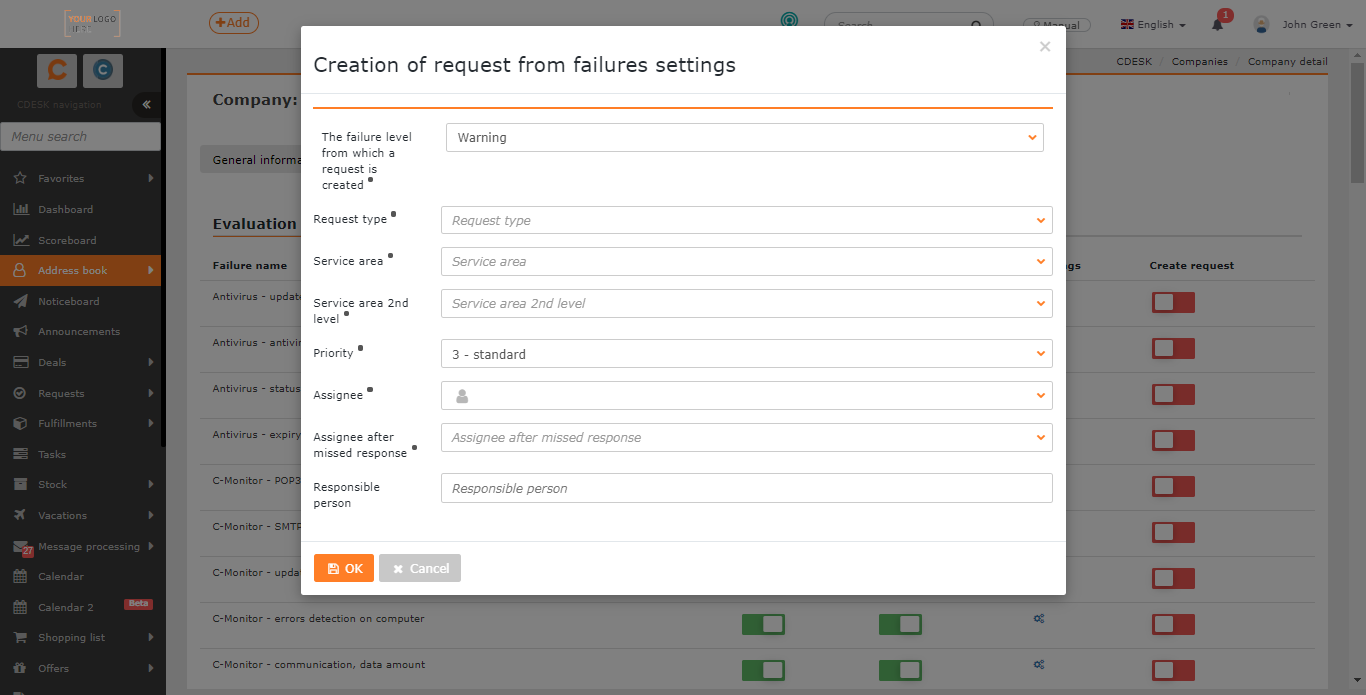
Mandatory items are marked with the • symbol. The obligation to fill in these items does not depend on the settings in Global Settings->Requests.
Level of the failure from which the request is generated • – the code list offers following options to choose from: Warning / Alarm / Critical alarm.
Request type • – offers a choice of request types, defined in Global Settings->Requests-> Types and Areas of Service, where it is also possible to specify which types to offer.
Service area • – selection of the service area defined in Global Settings->Requests-> Types and Areas of Service.
Service area of the 2nd level • – select the 2nd level of the service area defined in Global Settings->Requests->Types and Areas of Service.
Priority • – request priorities are defined in Global Settings->Requests->Requests.
Assignee • – select the request assignee.
Assignee after missed response • – select an assignee that takes over the request after the previous assignee missed the response.
Responsible person – a user who will be informed of changes in the request as well as of overdue deadlines, although they are not in charge of resolving the request.
Save your settings using the OK button in the bottom left corner. Click Cancel to close the form without saving the changes you have made.
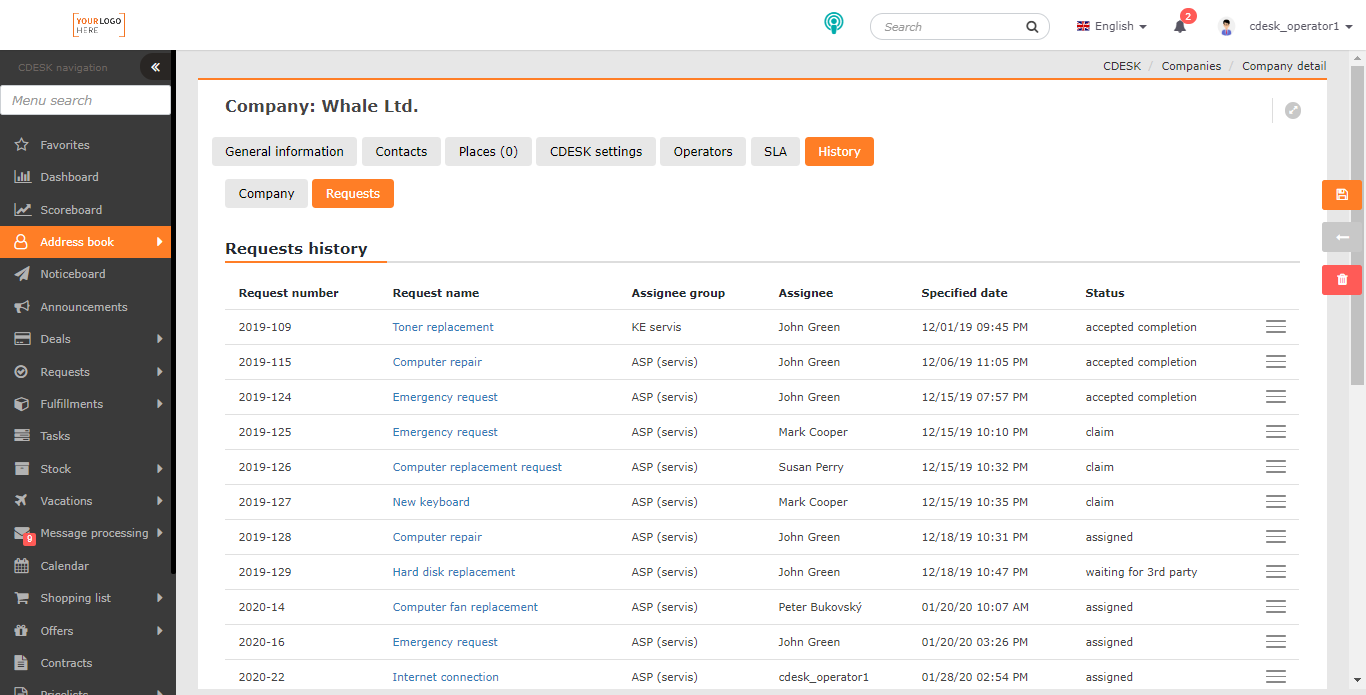
History
The History tab will only become available after the company has been saved. If the tab still does not appear, please check if you have the necessary permissions. Permissions can be set in Users and Groups->Users->choose a user->Permissions tab->Address Book->Companies->Access to Tabs->History.
The tab is divided into two sections Company and Requests. Click on the Company button to display information about the date and time the company was registered and other changes made to the company form.

Use the Requests button to view the list of all requests made on the company. Records are only displayed if you have permission to access requests. Permissions can be set in Users and Groups->Users->choose a user->Permissions tab->Requests->Records.
Search the List of Companies
In the list of companies, you can use the search field to search full-text by:
- Company / Name
- Street and number
- City
- Country
- Short name
- ZIP
- Business ID
- Tax ID
- VAT Number
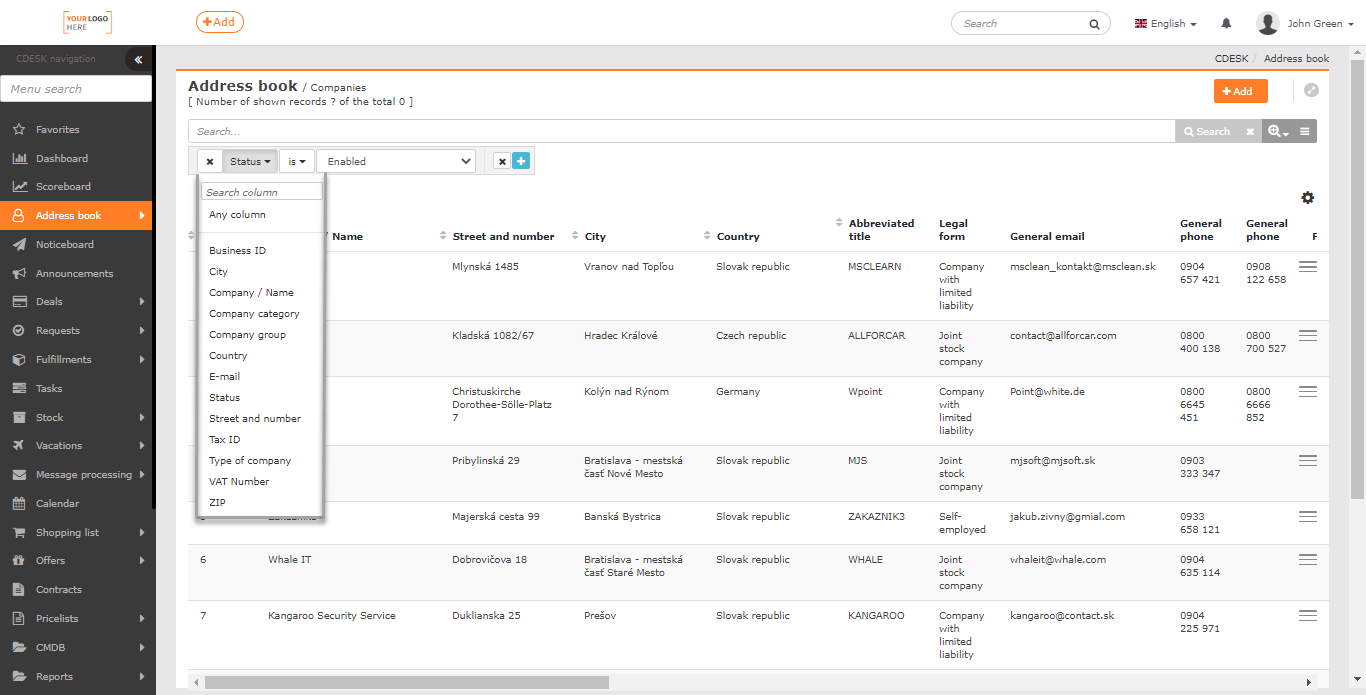
Below the full-text search, there is a field to configure the advanced filter. The following conditions can be inserted into the advanced filter:
| · Any column | · City |
| · Tax ID | · ZIP |
| · Company group | |
| · VAT Number | · Company / Name |
| · Business ID | · Status |
| · Company category | · Type of company |
| · Country | · Street and number |
Additional properties have not yet been included in the advanced filter.
For a more detailed description of the search tool, as well as procedures on how to save and submit a custom filter, see Search and advanced filters.
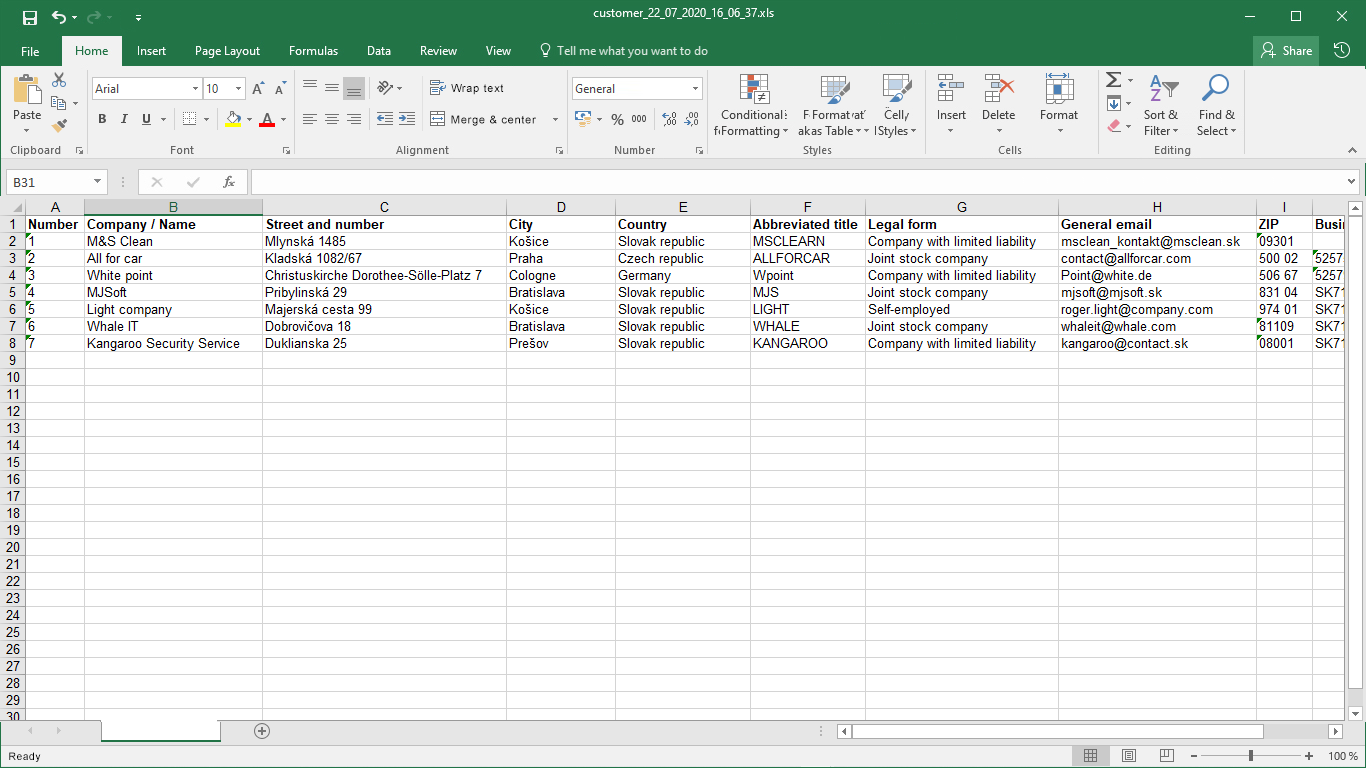
Export Records
In the bottom left corner of the list of companies you can find the XLS button that can be used to export the list in XLS format. The export button can be made available/unavailable to selected users in Permissions. Permissions can be set in Users and Groups->Users->choose a user->Permissions tab->Address Book->Companies->Export.
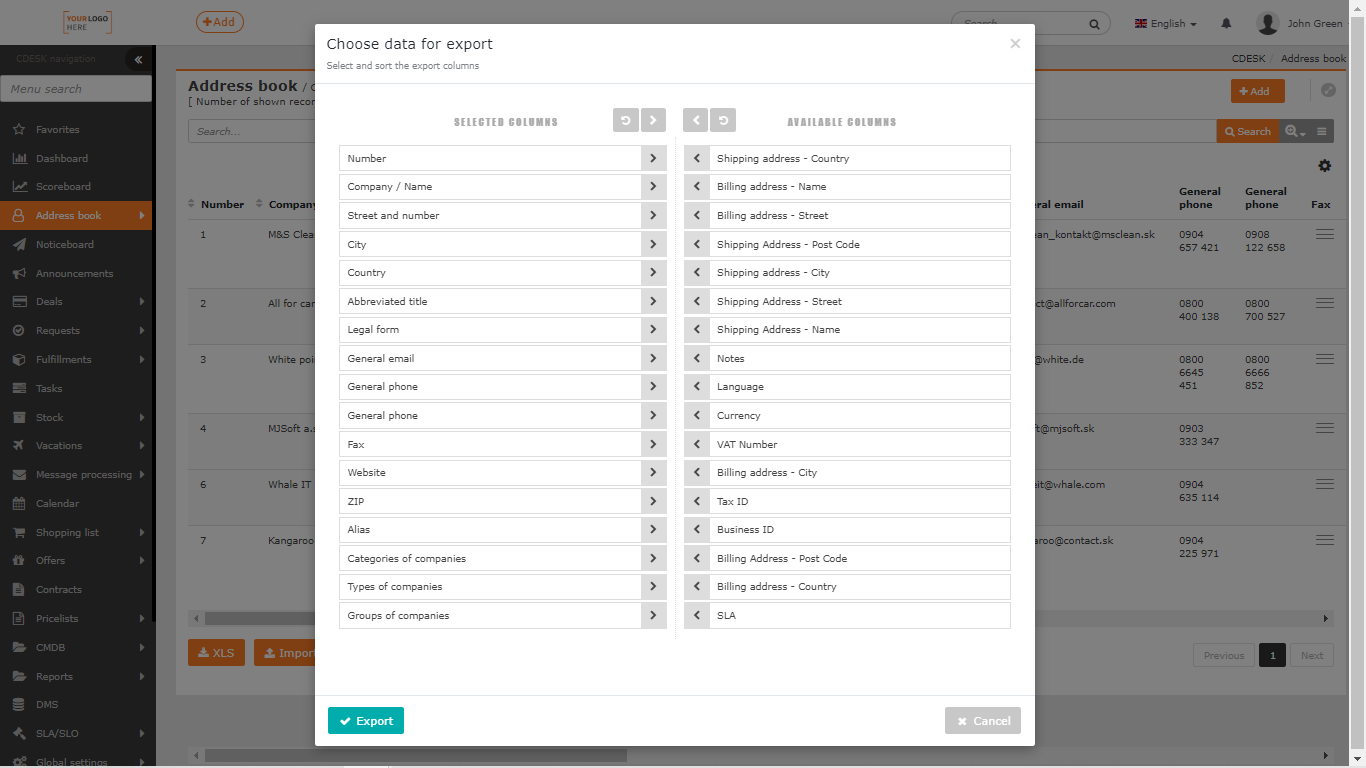
Click on the button to open a new window in which you can select columns to export. If you want to export all columns, no need to select them individually. Click on < to select them all. The order of the columns in this list also determines their order in the export. If you wish to have the columns in the default order, click ![]() and the columns will be sorted.
and the columns will be sorted.
After selecting the columns, create an export using the Export button located in the bottom left corner of the window. Select Cancel to return to the list of tasks without creating an export.
Deletion of the Company
There are two ways to delete a company record. The first way is directly through the list of companies. Once the record is found, click on the context menu ![]() in the right corner of the row and select Delete. It is not possible to delete a company that is assigned an active record.
in the right corner of the row and select Delete. It is not possible to delete a company that is assigned an active record.
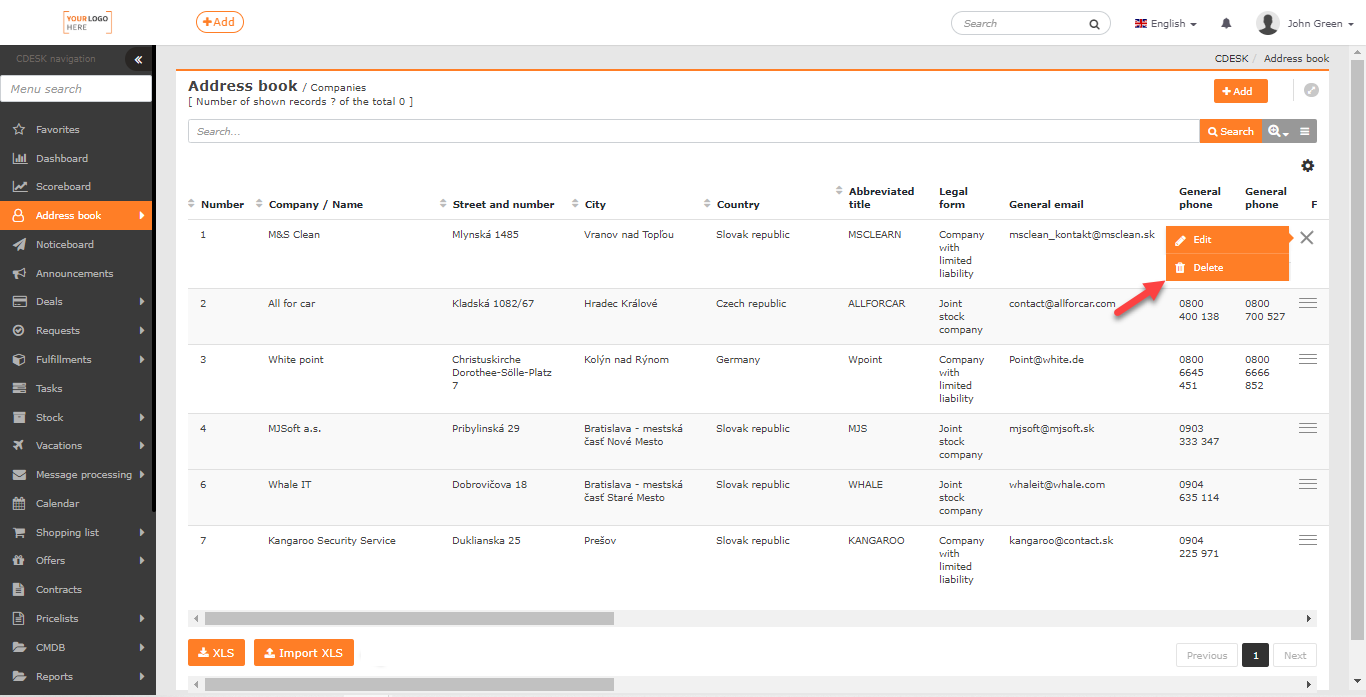
The second option is to open the company form. To delete the record, use the Delete button located in the bottom right corner of the form.
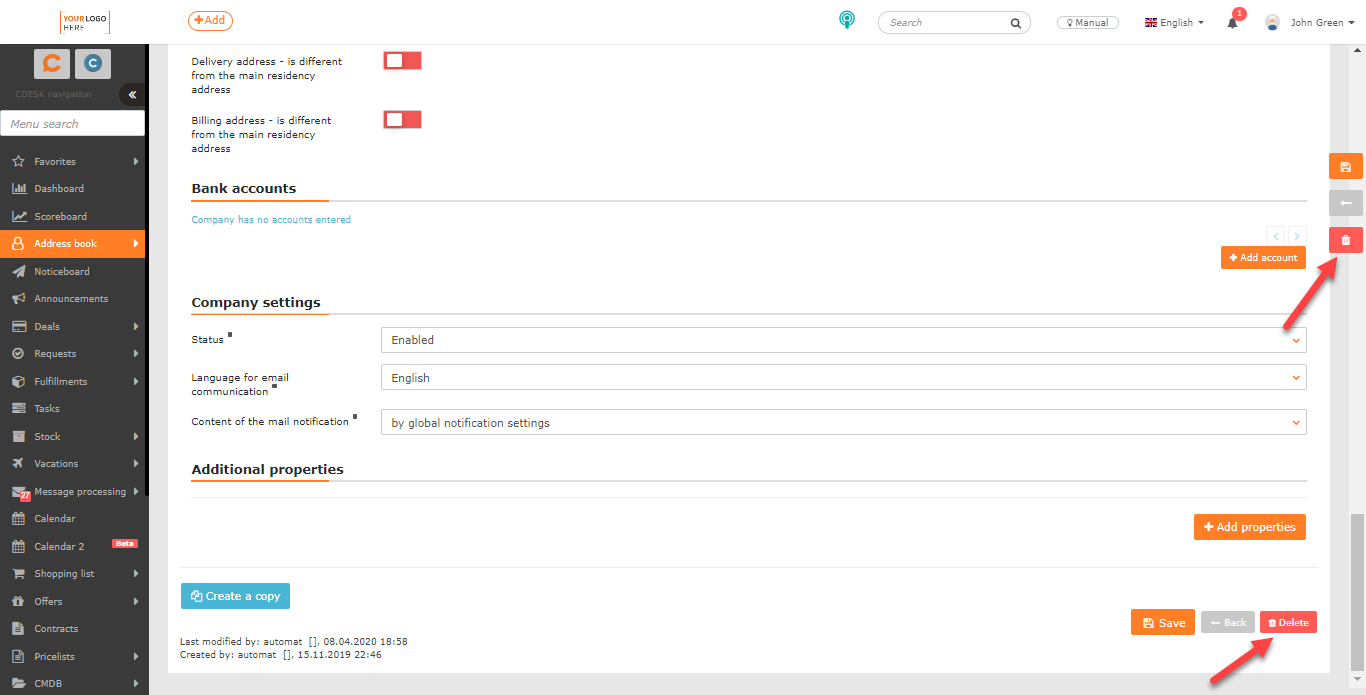
Only a user with permissions to delete customers can delete records. Permissions can be set in Users and Groups->Users->choose a user->Permissions tab->Address Book->Companies->Records. A user who does not have permission to delete records does not see the delete buttons.
If there are open requests or deals registered on the company, the record cannot be deleted. Records are not removed from the database after deletion, they are only moved to the archive.