LINK ACCOUNTS IN CDESK WITH ACCOUNTS IN AZURE ACTIVE DIRECTORY
Page Contents
Purpose of Linking Accounts
Linking a CDESK account to the Azure Active Directory simplifies logging in to CDESK. After synchronizing these two accounts, you can log in to CDESK using your Azure AD account.
For now, this link does not replace full integration with Active Directory. In addition to access authentication, with Active Directory you can load user accounts into CDESK, set up membership in CDESK groups by membership in AD groups, and take over the organizational structure from AD to CDESK.
Add API Connector of Azure AD
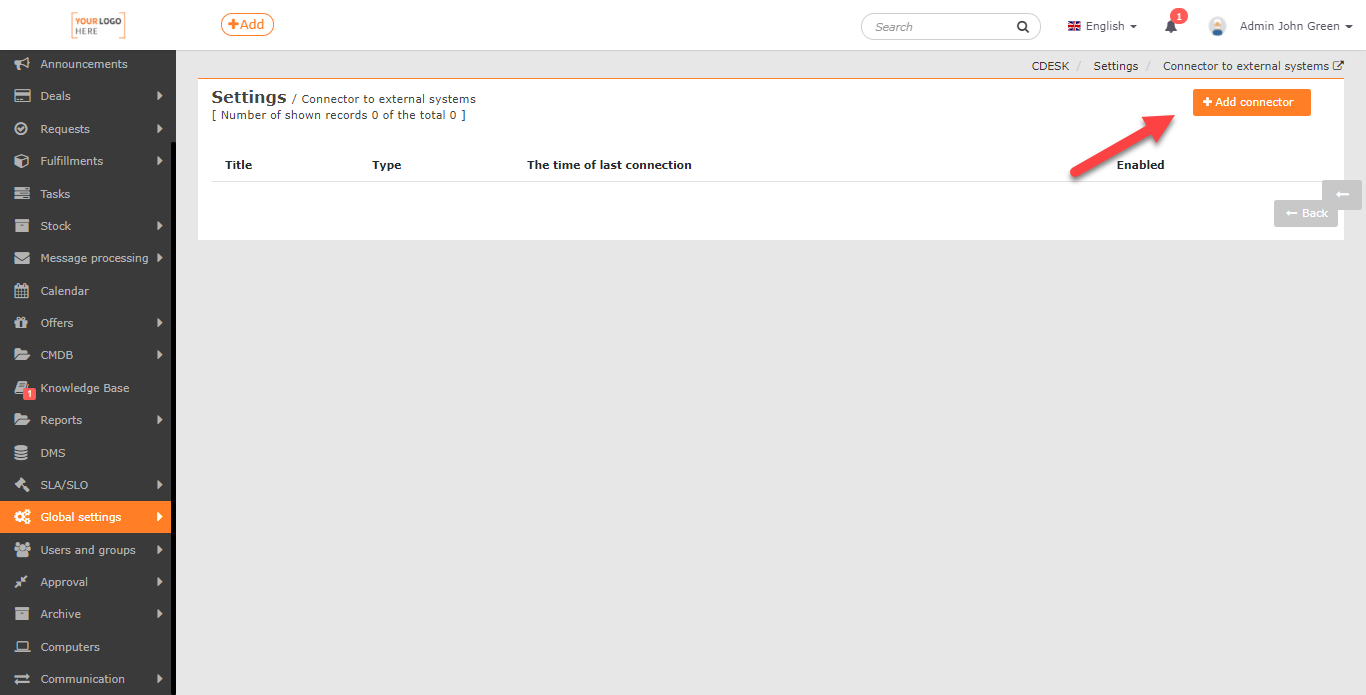
The first step in connecting a CDESK and an Azure AD account is to add the API Connector of Azure AD to CDESK. Go to Global Settings->API Connectors. Click on the module to open the window with a list of API connectors that are currently in CDESK. To add an Azure AD connector, click the + Add connector, button located in the upper right corner.
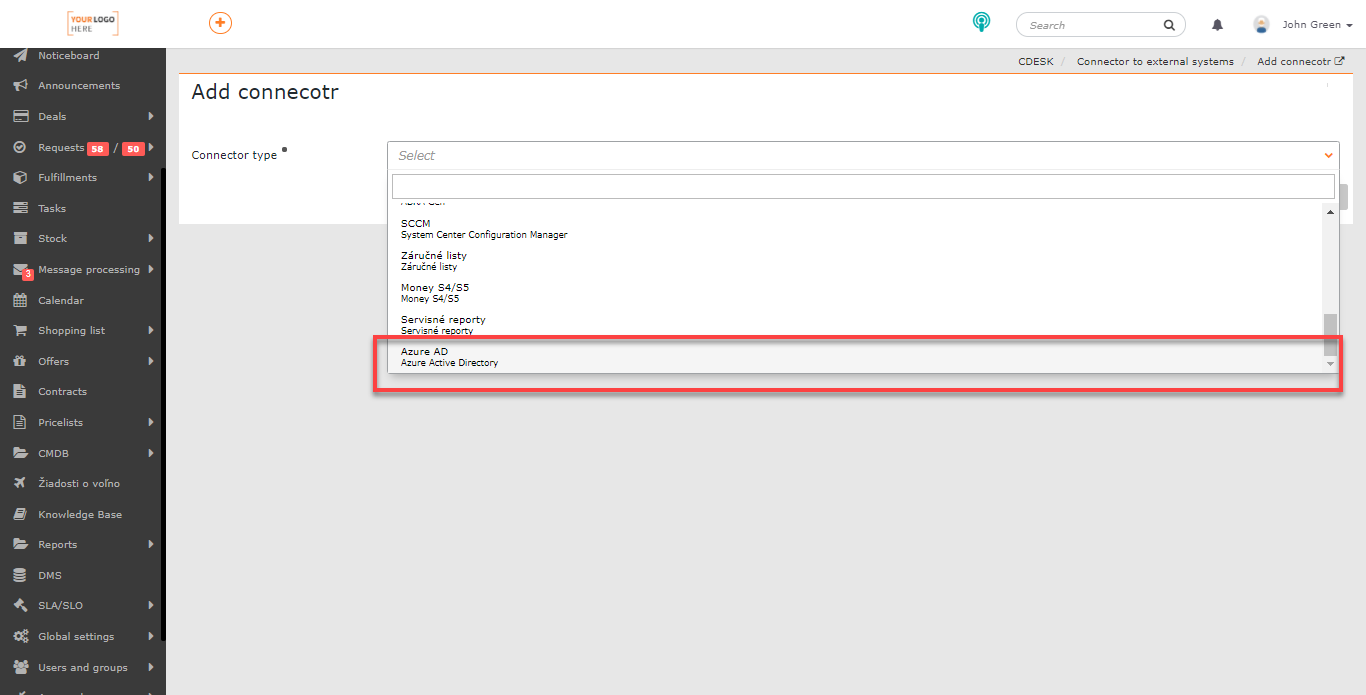
Click to open a new window with the selection of the connector type. Select Azure AD and click Continue.
The Azure AD connector configuration form will open. Required fields are marked with • .
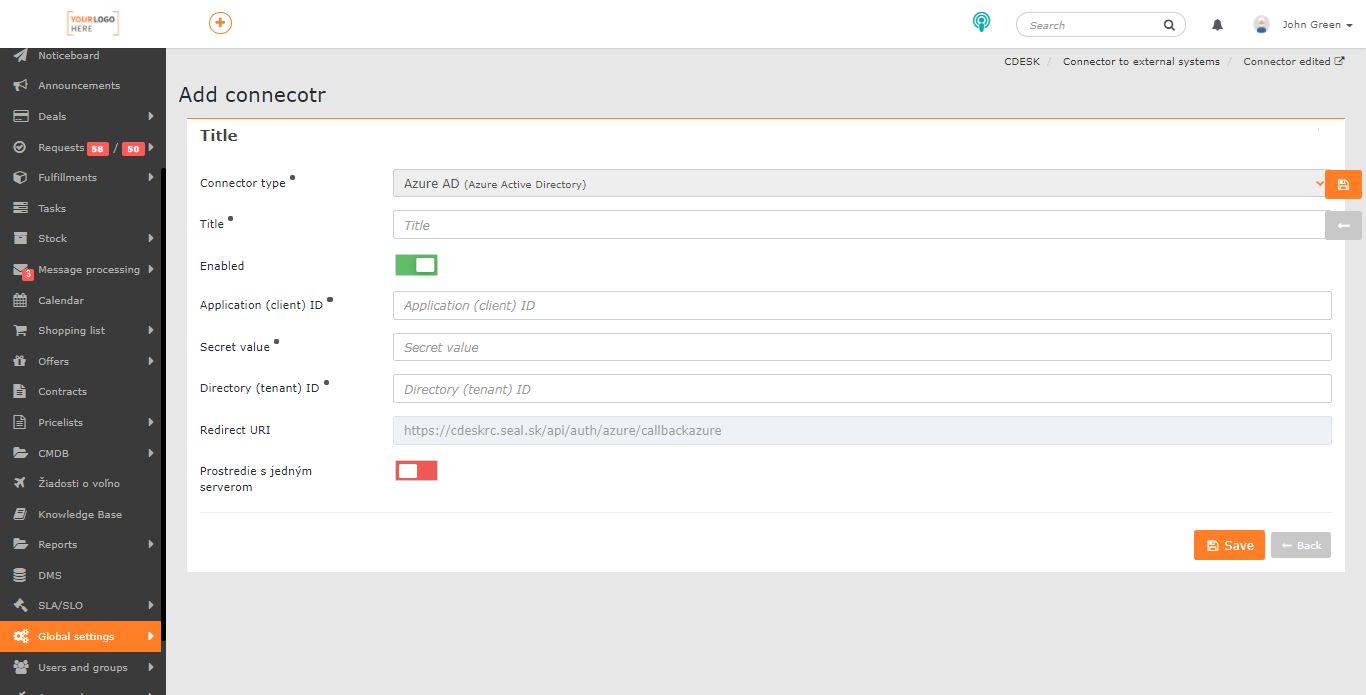
Connector type • – Azure AD (Azure Active Directory) is automatically pre-filled.
Title • – zadajte názov, pod ktorým sa konektor bude zobrazovať v zozname konektorov.
Enabled – The connector will be active if the switch is in the on position ![]() . If you no longer want to use the connector, turn the switch to the off position
. If you no longer want to use the connector, turn the switch to the off position ![]() .
.
Application (client) ID • – get this value in your Azure AD settings. The procedure is described below in the section Connect CDESK environment with Azure AD tenant.
Secret value • – get this value in your Azure AD settings. The procedure is described below in the section Link CDESK environment with Azure AD tenant.
Directory (tenant) ID • – get this value in your Azure AD settings. The procedure is described below in the section Connect CDESK environment with Azure AD tenant.
Redirect URI – address automatically generated by CDESK. Used when Registering the Azure AD connector. It specifies the address that can be accessed through Azure AD after successful authorization. This field cannot be edited.
Single-server environment – If you are in a cloud environment and use a shared server environment, leave the switch in the off position ![]() . If you are using your own server with a single CDESK environment, set the switch to the on position
. If you are using your own server with a single CDESK environment, set the switch to the on position ![]() .
.
Azure AD Registration
To obtain the Application (client) ID, Secret value a Directory (tenant) ID data, it is necessary to link the CDESK account with Azure AD. Only the environment administrator can perform this action. Go to office.com, to sign in with your Office 365 account. In the application menu on the left side of the window, find the Administrator application.
Click to open the administrator splash page. In the menu on the left, select Show All. In the advanced menu, click Azure Active Directory.
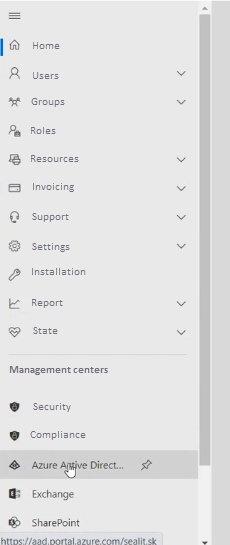
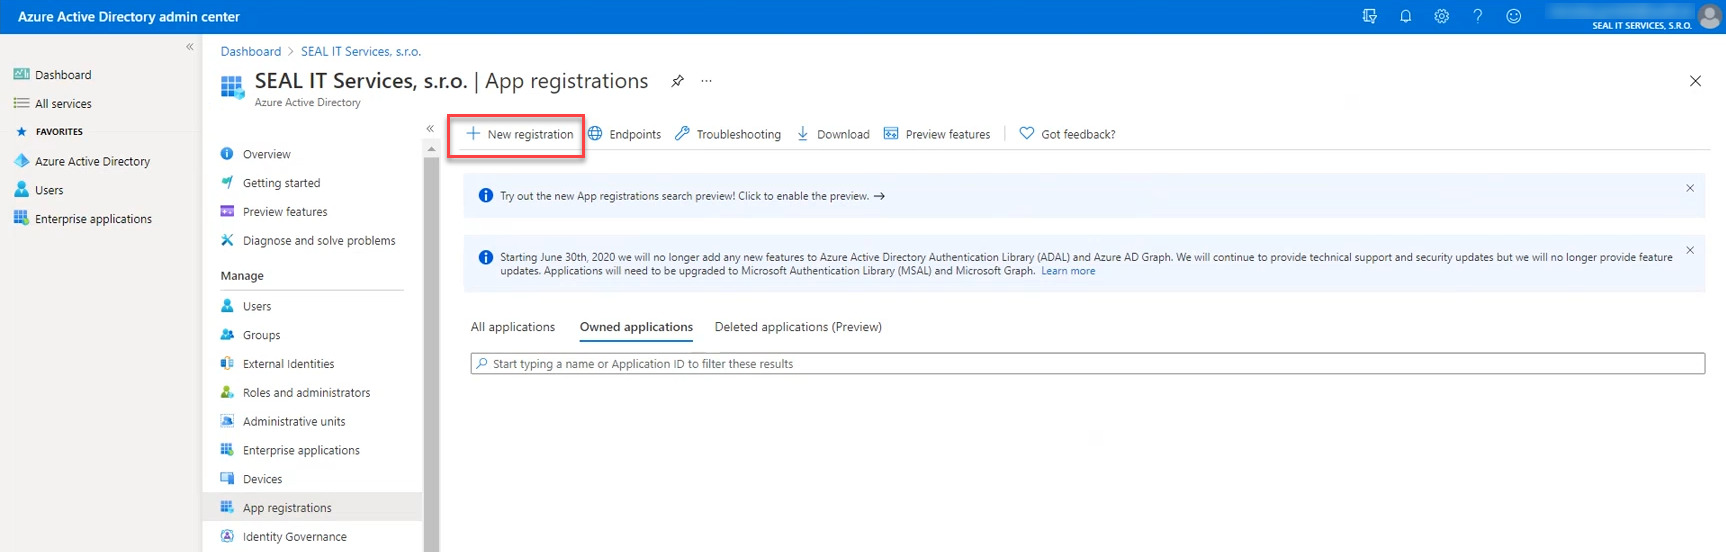
When the application loads, an overview is displayed. Click again on the Azure Active Directory button in the menu on the left. An extended menu will open, where you can select theApp registrations option.

A new window will open. Then select +New registration to register the application.
Click to open a window for registering the application with the following items:

Name – text field for entering the name under which the registration will be displayed in the list of registered links.
Supported account types – setting whether the authorization will be performed for other tenants as well. If you use an account registered under SEAL IT Services s.r.o., select Acconunts in this organizational directory only (SEAL IT Services s.r.o. only – Single tenant). If you have created an Office 365 account within another company, select Accounts in any organizational directory (Any Azure AD directory – Multitenant).
Redirect URI – select Web and copy the Redirect URIfrom Azure AD API Connector settings to the text box..
Then, to register the application click the Register button which is located in the lower left corner below the list.

Link CDESK environment with Azure AD tenant
After registering the application, you will be redirected to the Overview section, where you can find the registration information. Copy the Application (client) ID and Directory (tenant) ID data into the Azure AD configuration form in CDESK..

To complete the Azure AD configuration in CDESK, you still need to enter the Secret value. On the Azure AD registration page, go to the Certificates & secretsmodule that is located in the menu on the left side of the window.
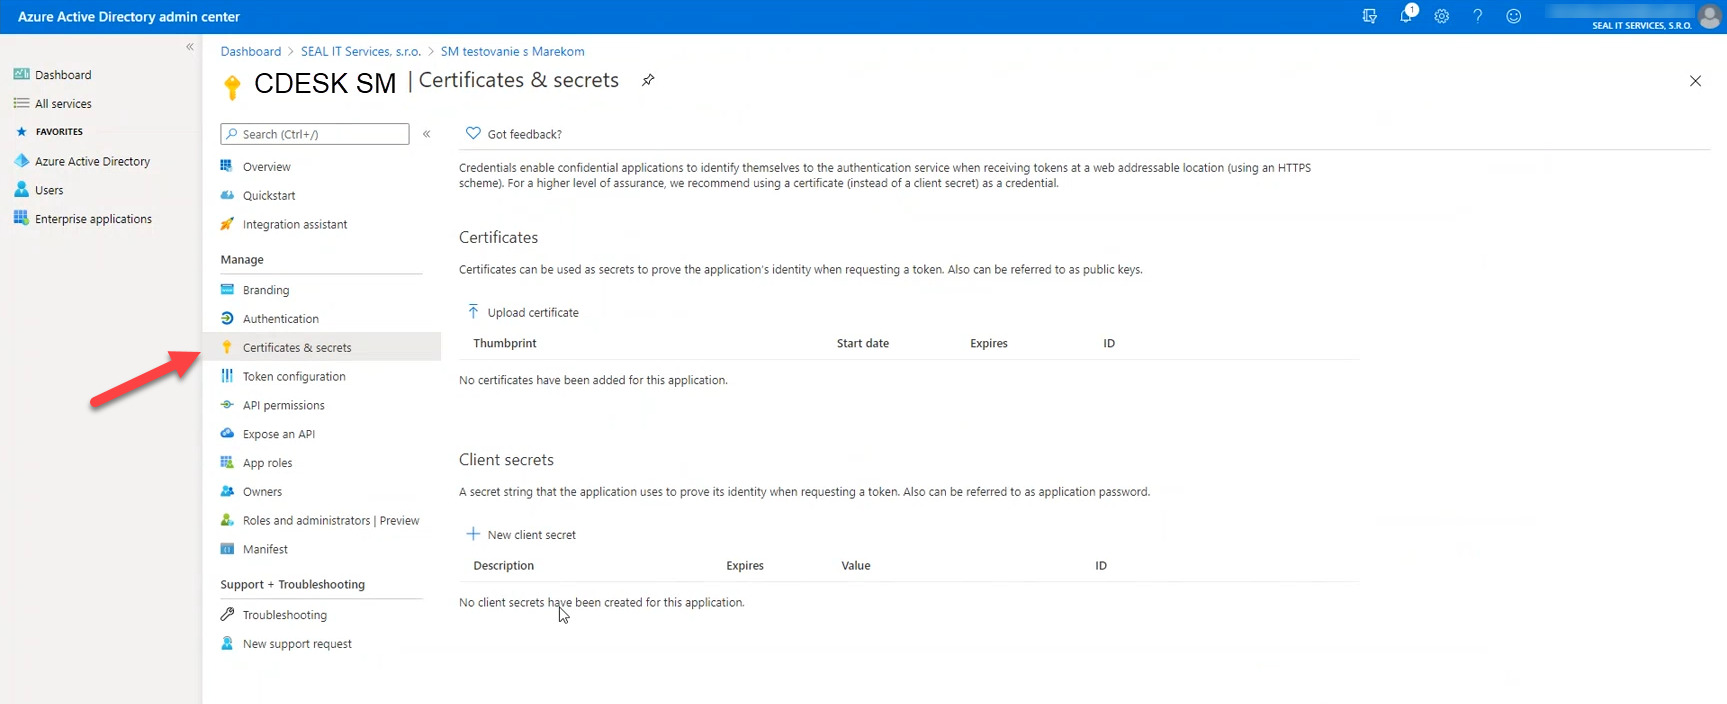
After opening the module, click the +New client secret button and then select the code expiration time. We recommend two years. You can enter a description in the Description field.
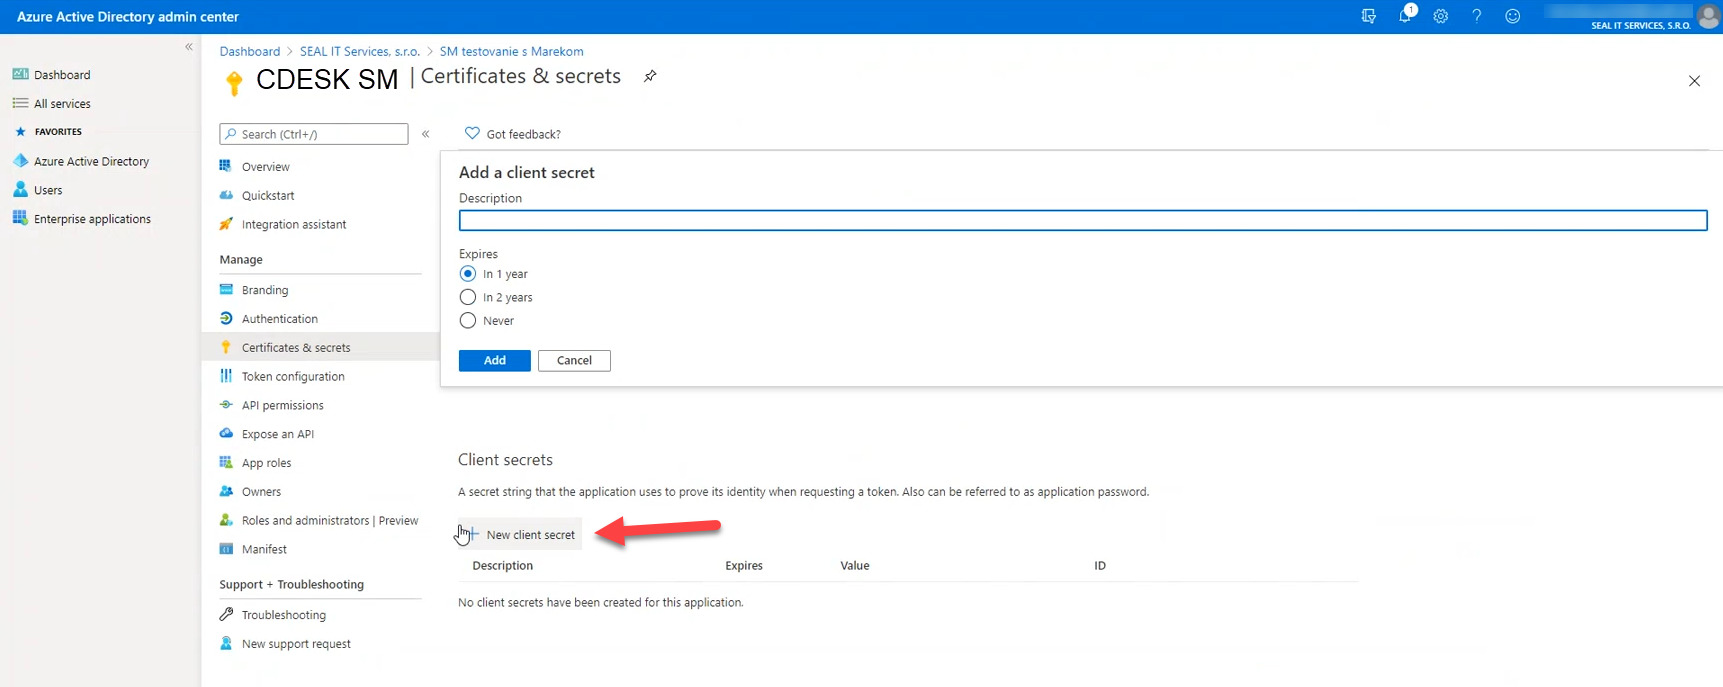
Click the Add button to generate the code. The generated code will be displayed in the Client secrets list. Select the Copy to cliboard option to insert it into the Azure AD connector form in CDESK.

After copying the code, go to CDESK and paste it into the Secret value field in the form of Azure AD connector configuration. Once all the necessary data is in the form, save the settings using the Save button in the lower right corner.
Link CDESK Account with Azure AD
After creating the Azure AD connector, go to the Users and groups -> User module. Open the profile of the user in the list for whom you are configuring the settings. On the General Settings tab in the Email Azure pairing account field type the email that the user has entered in their Azure account. Save the settings using the Save button in the lower right corner.
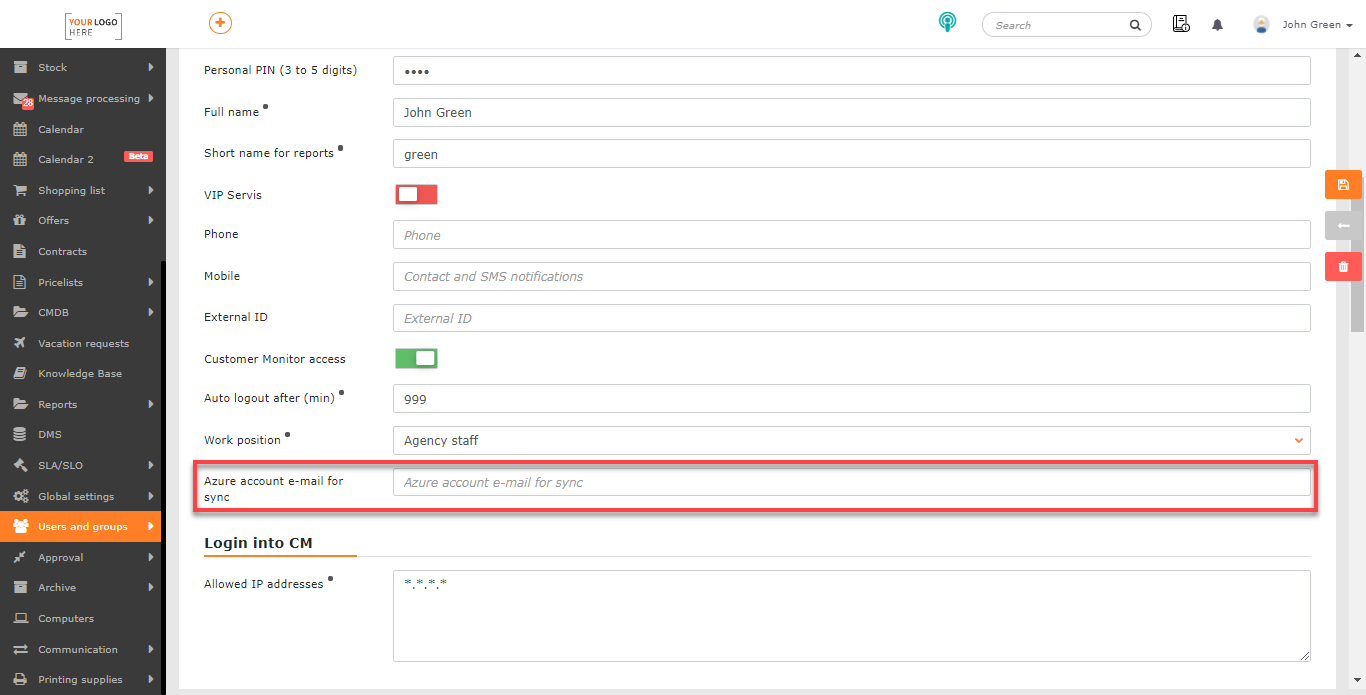
Once the Azure AD connector configuration is complete, all accounts are automatically set up through Azure AD. You can verify the status of the enablement within the user settings under Azure AD Login – use contact email. In this case, please do not enter email in the Email Azure Accounts to Pair field.
Log in to CDESK Using Azure ID
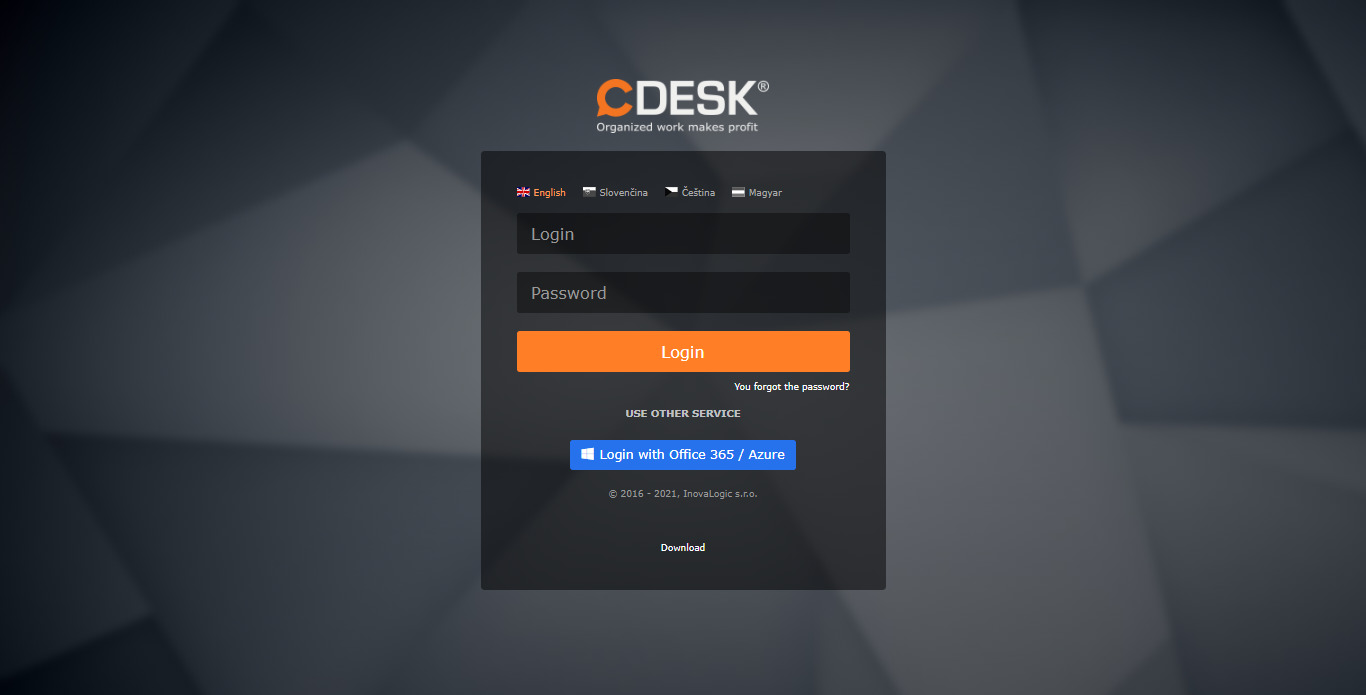
After configuring the Azure AD connector, a log in button using an Azure account will appear on the CDESK login screen.
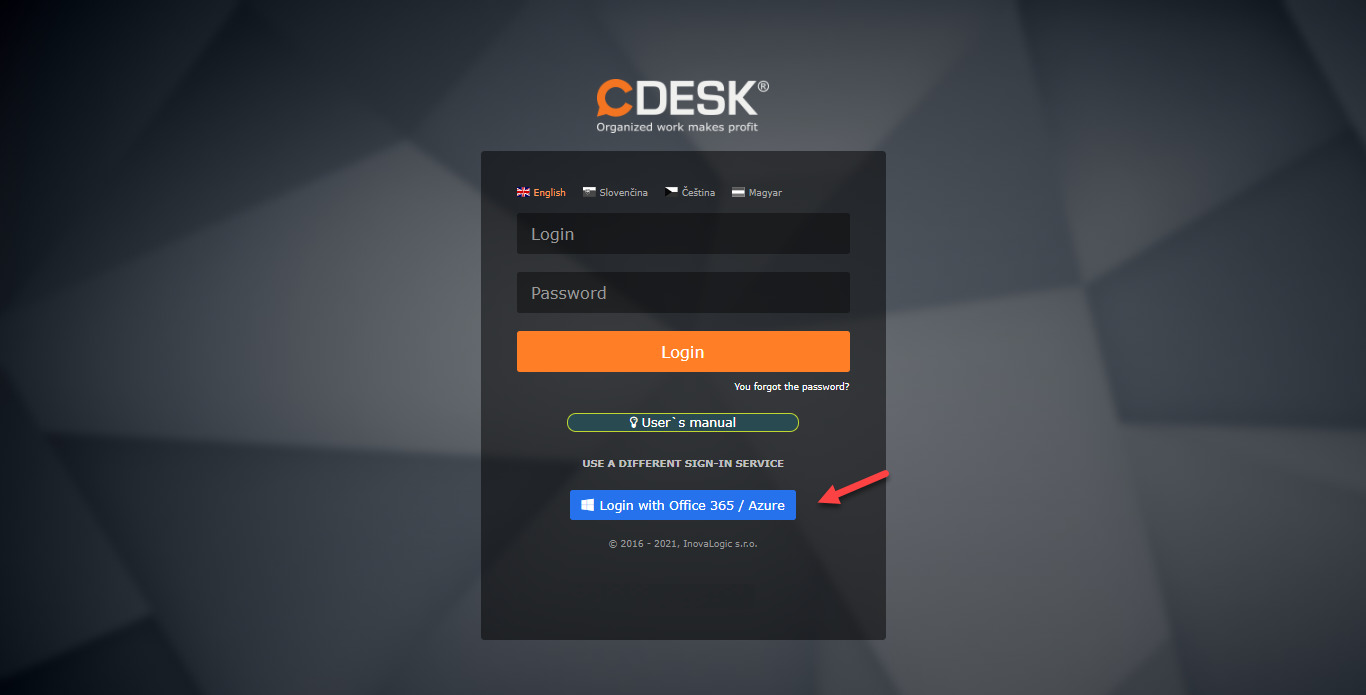
In the first setup, click on this button to display a window for signing into the Office 365 account linked with Azure AD. After logging in to your account, you will be redirected to CDESK. If you chose when logging in to stay logged-in, you will no longer have to enter your e-mail the next time you log in to CDESK via Azure AD, and you will be redirected directly to CDESK.