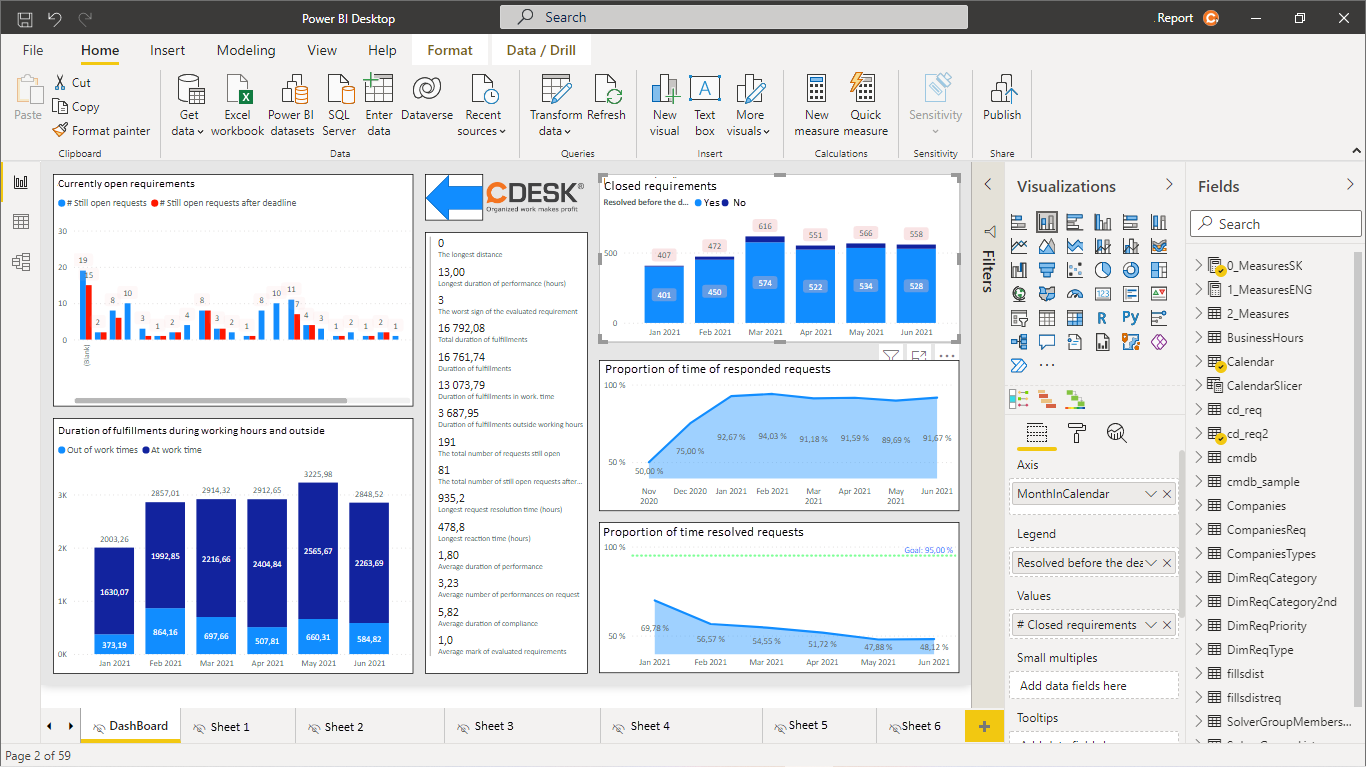
POWER BI MODEL
Page contents
Microsoft Power BI in connection with CDESK is used to create interactive and purposeful reports from data stored in CDESK. The preferred way of connecting to CDESK is via API. If you have your own installation, you can also retrieve data directly from the database.
You can work with the free version of Power BI Desktop or with the paid online version and buy at least Power BI Pro license. We recommend you to use the desktop version for creating and editing models and the online version for making them more widely available to users. Ideally, every user should have a paid version, but through the publish-to-web feature such reports can be made available free of charge to any user.
Download and install Power BI Desktop
Power BI Desktop software is designed for Microsoft Windows systems. You can download it via the Microsoft Store at this link.
Download the software and start the installation. Initially, select the installation language and then proceed as you would with a normal software installation on a Microsoft Windows operating system.
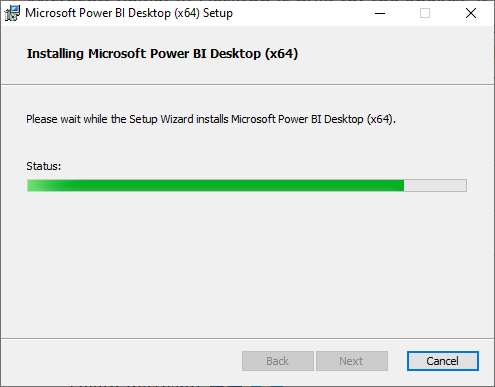
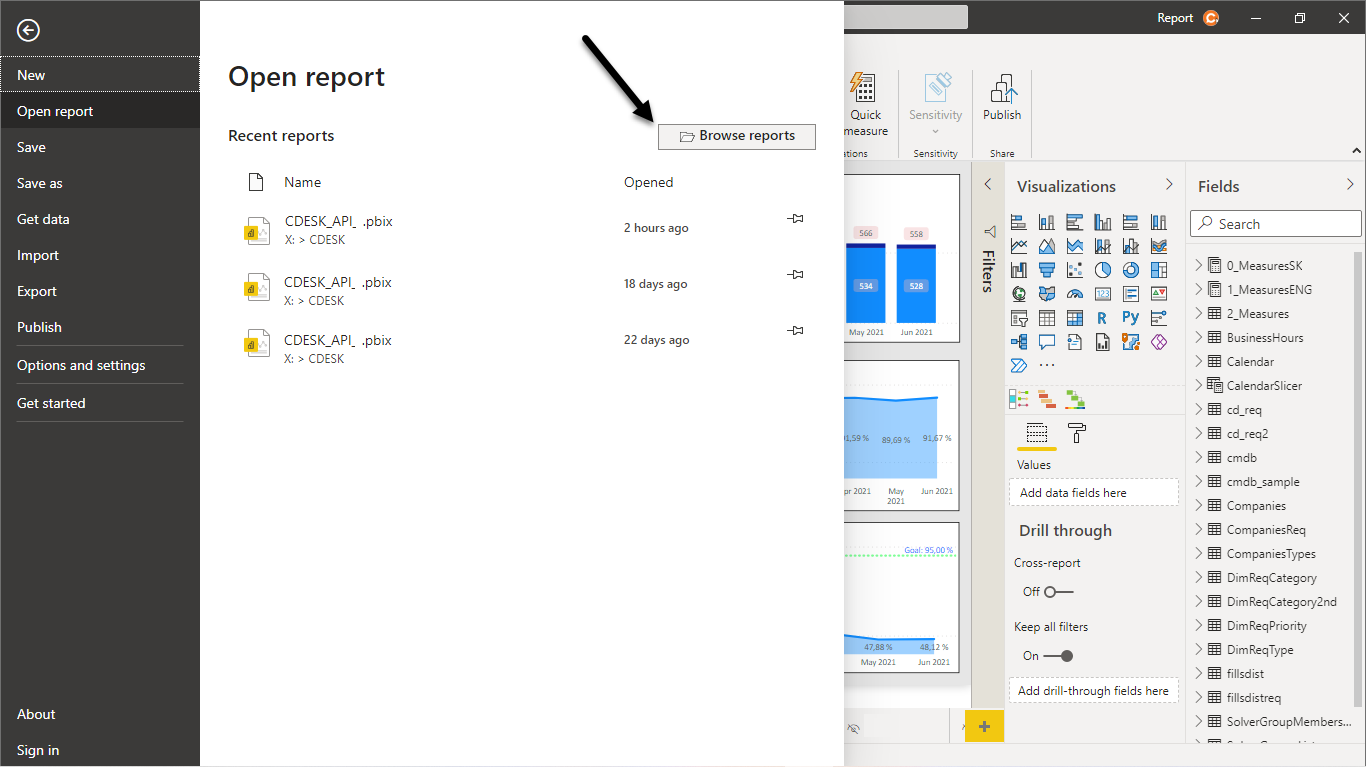
After installing Power BI Desktop, you can open .pbix files on your computer.
Settings for connection to CDESK
To connect the .pbix model to retrieve data from the CDESK server via API, click the Transform Data button located on the top bar under Home.
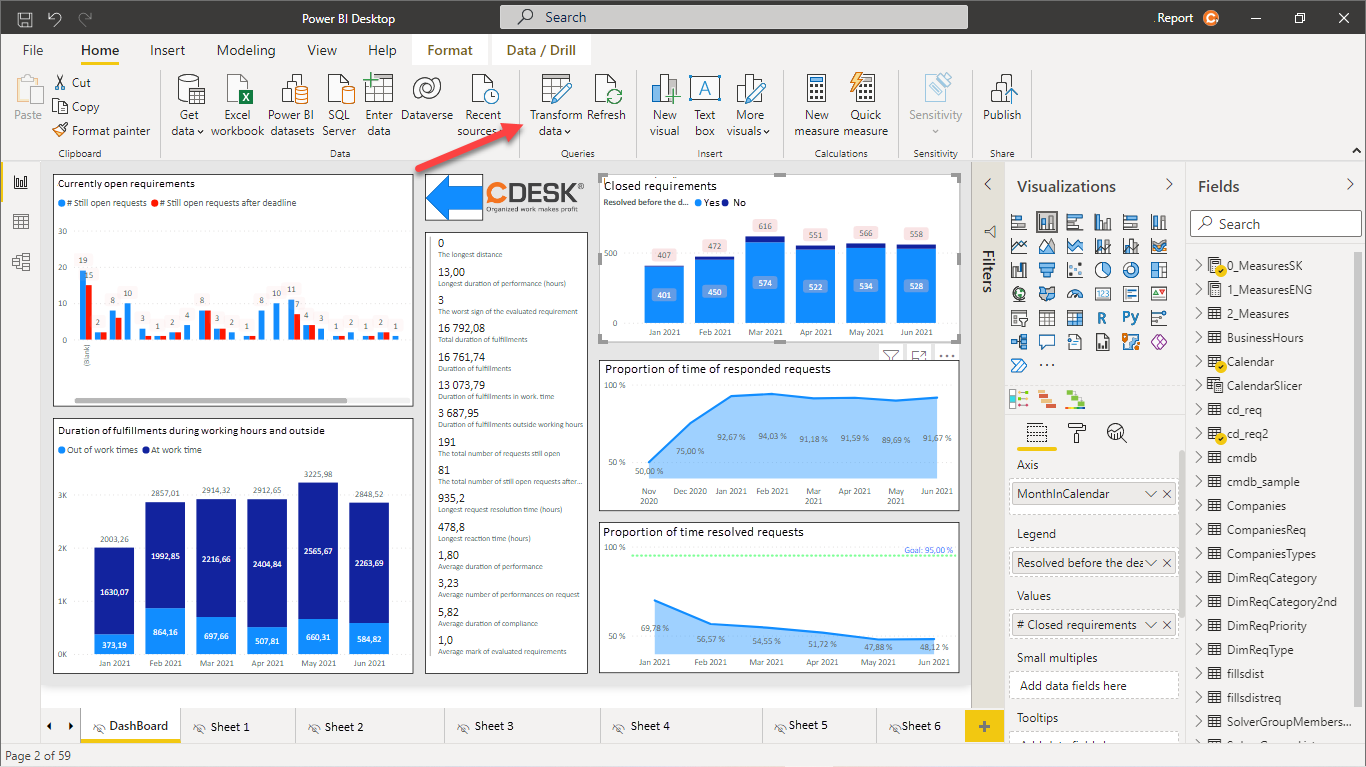
Click on this button to open a selection with several options. Select Edit Parameters.

A modal window with the following fields will open:

Mytoken – remains empty. The token is generated based on the login name and password entered below.
apiurl – the address of the server you will connect to. The address must be entered in the form: https://servername.domain/ . Please note that it must ends with /.
Mycompanyld – Company Identification Number. If this field is empty, all accessible companies will be available.
Mymonths – the number of months in the past for which requests will be displayed.
UserLogin – userʼs login name.
UserPassw – userʼs password.
RecordsPerPage – number of records on the page for memory paging. Recommended is 200 to 400.
BussHourStart, BussHourEnd – start and end of working hours for indicative calculation of the time of out–of–hours performance. In the reports in CDESK this calculation is accurate based on the set SLA.
2ndLanguage – selection of language variations.
Once you have set your data, click OK in the bottom right corner. A warning will appear below the top bar: There are changes pending in your queries that have not been applied. In this case, click the Apply Changes button.
Depending on the scope of the data being loaded into CDESK, loading can take from one minute (e.g. 2 months, hundreds of records) to over 10 minutes (12 months, tens of thousands of records).
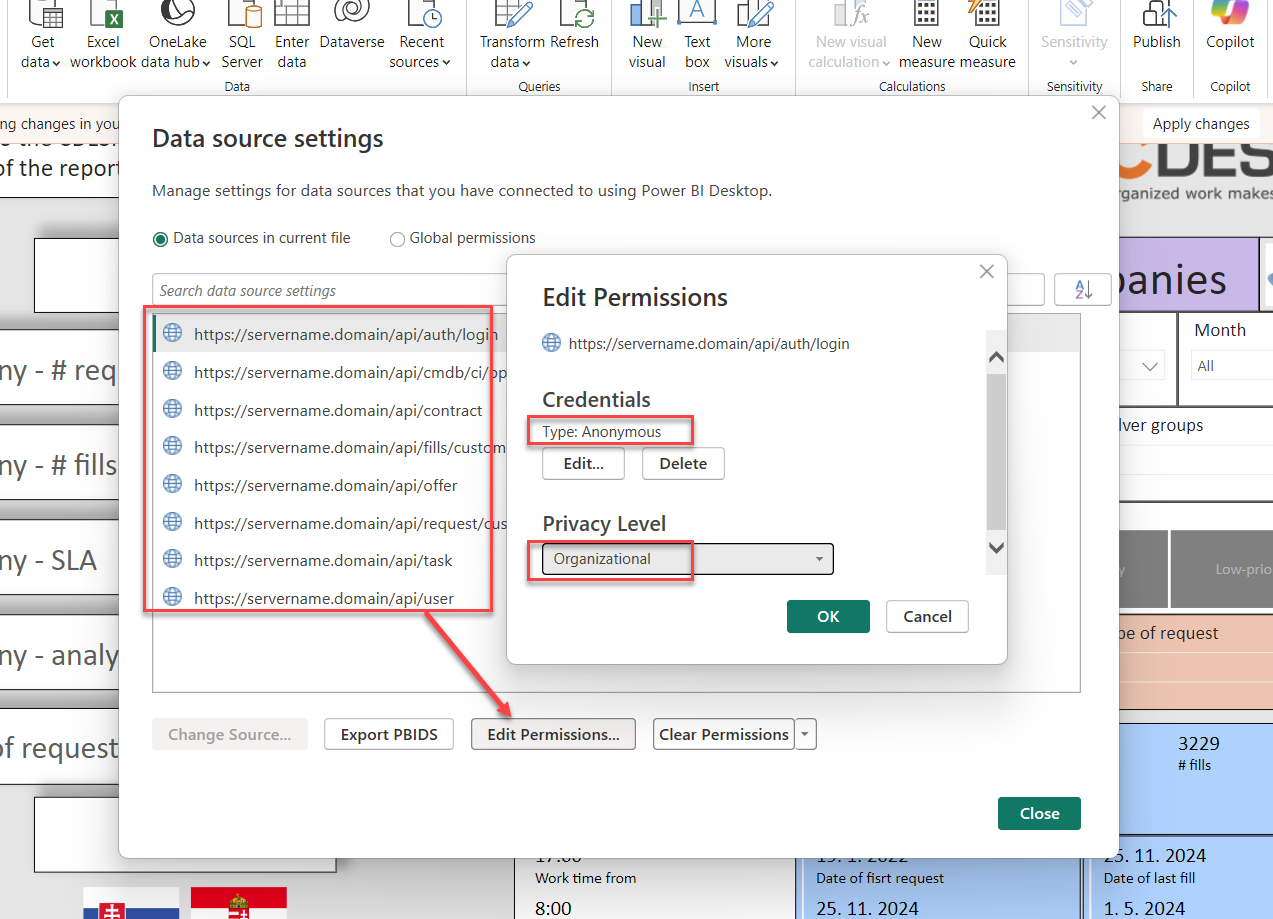
To complete the PowerBI model connection, you need to set the permissions for the data source. From the main menu, select „Transform data“ -> „Data source settings“. Select each data source in turn and press „Edit permissions“. Then set the combination: Anonymous + Organizational.
Then apply the changes and the data will start loading into the model from the CDESK server. Successful loading is indicated by closing the data loading window, and no error will be displayed.
The following screenshots illustrate the above procedure.


Publication of reports
If you are going to publish the .pbix report on the web and make it available to any user, you need to log in. To log in, click the Login button in the top right corner.

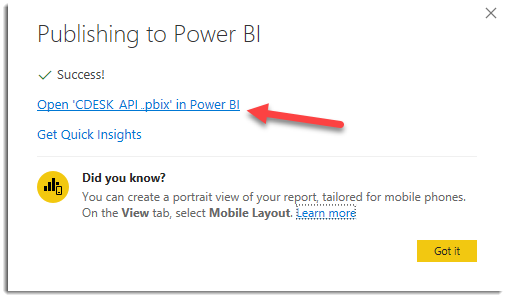
Once logged in, click on the Publish button located in the top bar.

After clicking the system asks you if you wish to save the changes you have made. Select Save. A window will then appear in which you can select the location of the report. After selecting the destination folder, click the Select button. Another window will then appear to inform you on the progress of the publication. When the folder is published, you will see a link that you can use to open the report on the web.
The report can also be accessed via the office.com website. First, log in with your Office 365 account. Once logged in select Power BI in the list of applications located on the left side of the window.

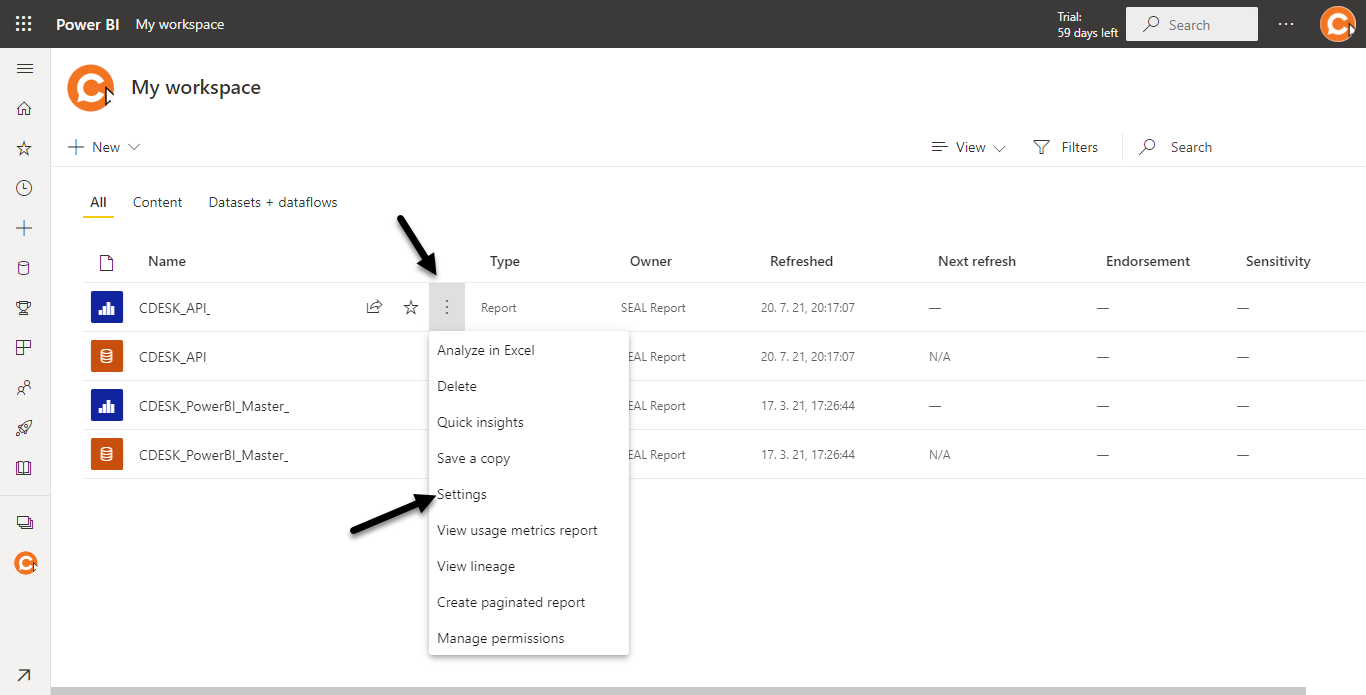
When clicked, the available folders in which reports are located are displayed. Open one of them to display the list of reports. There are two types of files in the list: Report marked with a blue icon and the Dataset with an orange icon. If you want to view a completed report, open a file of the Report type.
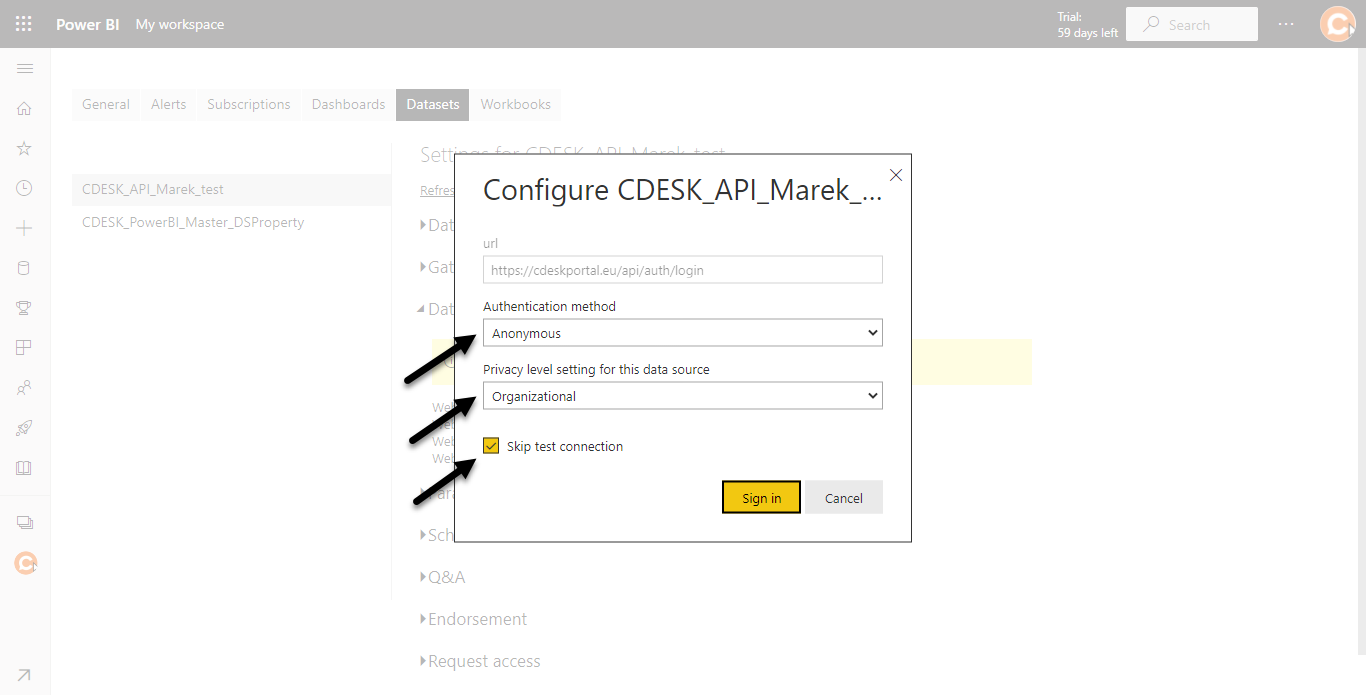
If there is a problem when opening the report, the access needs to be set. To set up accesses, search for the file of the Dataset type that belongs to the report, and then click the More Options icon and select Settings.
When clicked, a new window will open. Go to the Data source credentials section. Click to display a list of sources.

For the first source, click Edit credentials.
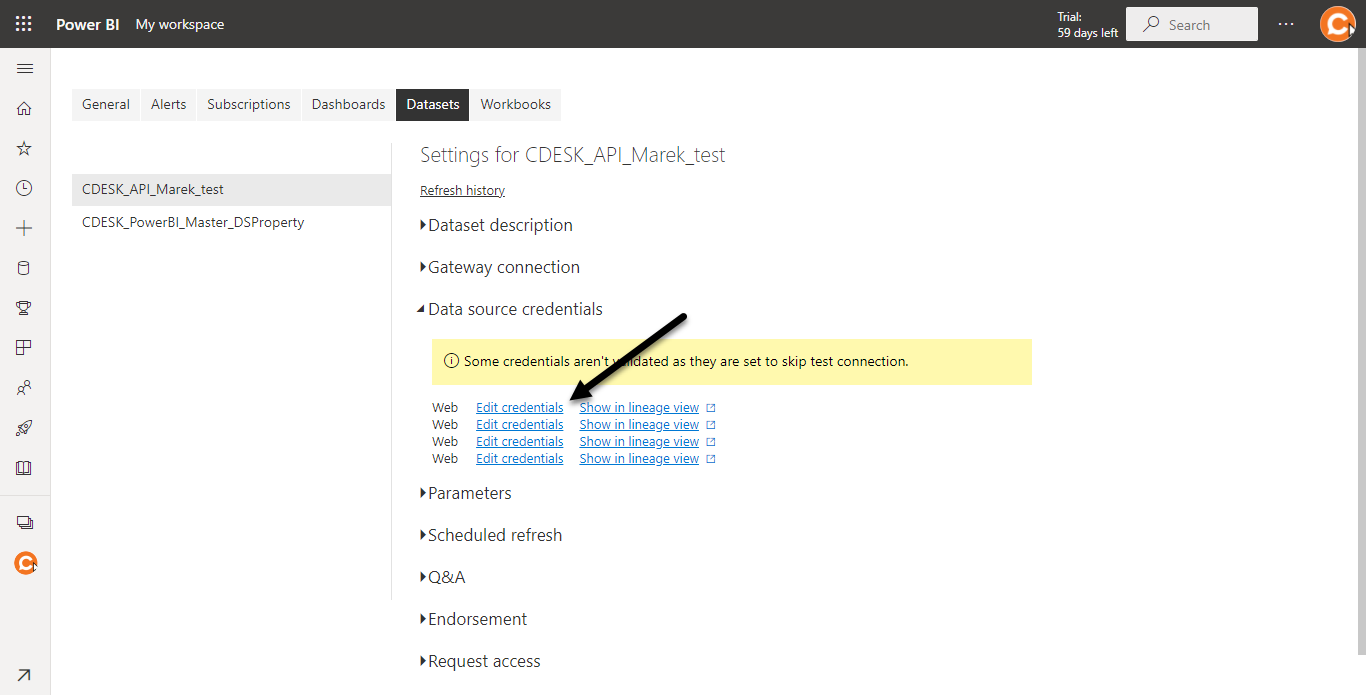
After clicking, a new modal window will appear. In the Authentication Method section select Anonymous. In the Privacy level setting for this data source, select Organizational. Also check the Skip Test Connection option and at the end click the Sign In button located in the bottom right corner.
Repeat this procedure for all sources.