CDESK OUTLOOK PLUGIN
Obsah stránky
CDESK Outlook Plugin is a tool that combines the desktop application Microsoft Office Outlook and CDESK. It allows you to create requests, tasks, discussion posts and internal notes (internal discussion) directly from an Outlook e-mail. This tool is for Microsoft Windows operating systems only and may only be used by users with a valid CDESK license.ň
Installation of CDESK Outlook Plugin
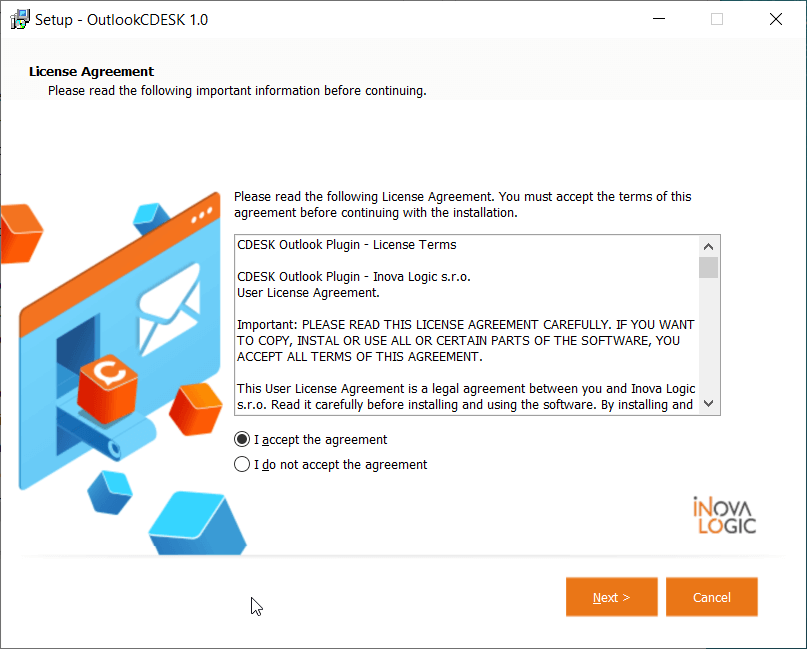
To start the installation, open the OutlookCDESKSetup.exe installation file, which you can find on the CDESK download page. After opening the file, a new window appears. You can only install the program if you agree to the terms and conditions that are displayed. Please read the terms and conditions carefully before installation. Accept them by ticking I accept the agreement. Once approved, the Next button is enabled to continue the installation.
The next step is to set the location for the installation file.
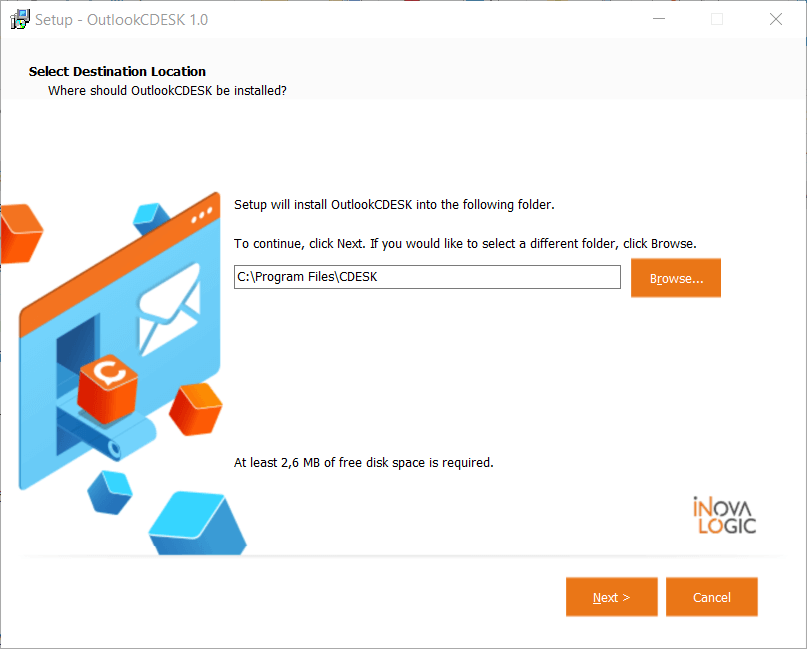
You can change the settings by clicking Browse or by entering your own path in the text box. The condition is to have at least 2.6 MB available at the selected location. Click Next to continue. Select Cancel to close the window and cancel the installation.
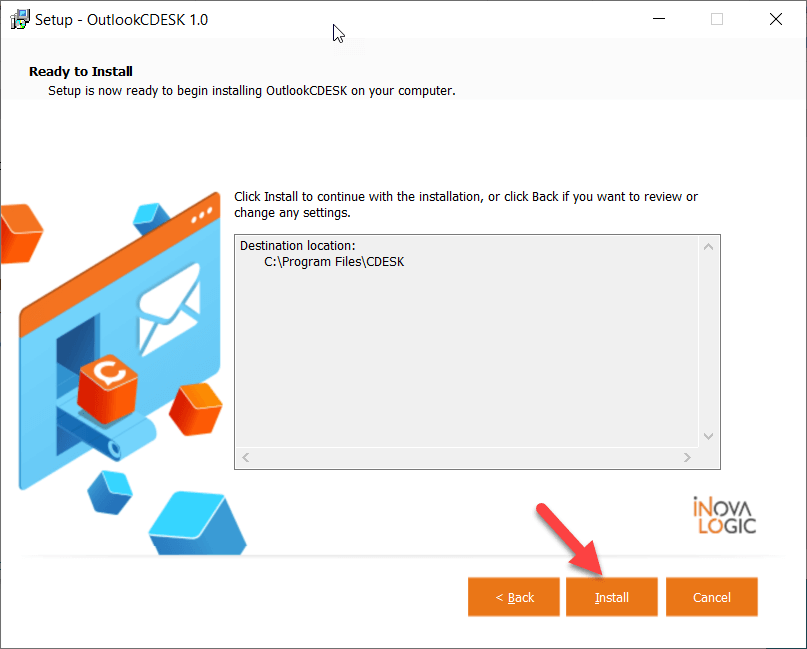
Then the window listing the location of the Outlook Plugin file shows. Click the Install button in the lower right corner to start the installation
Configuration of the CDESK Outlook Plugin Component
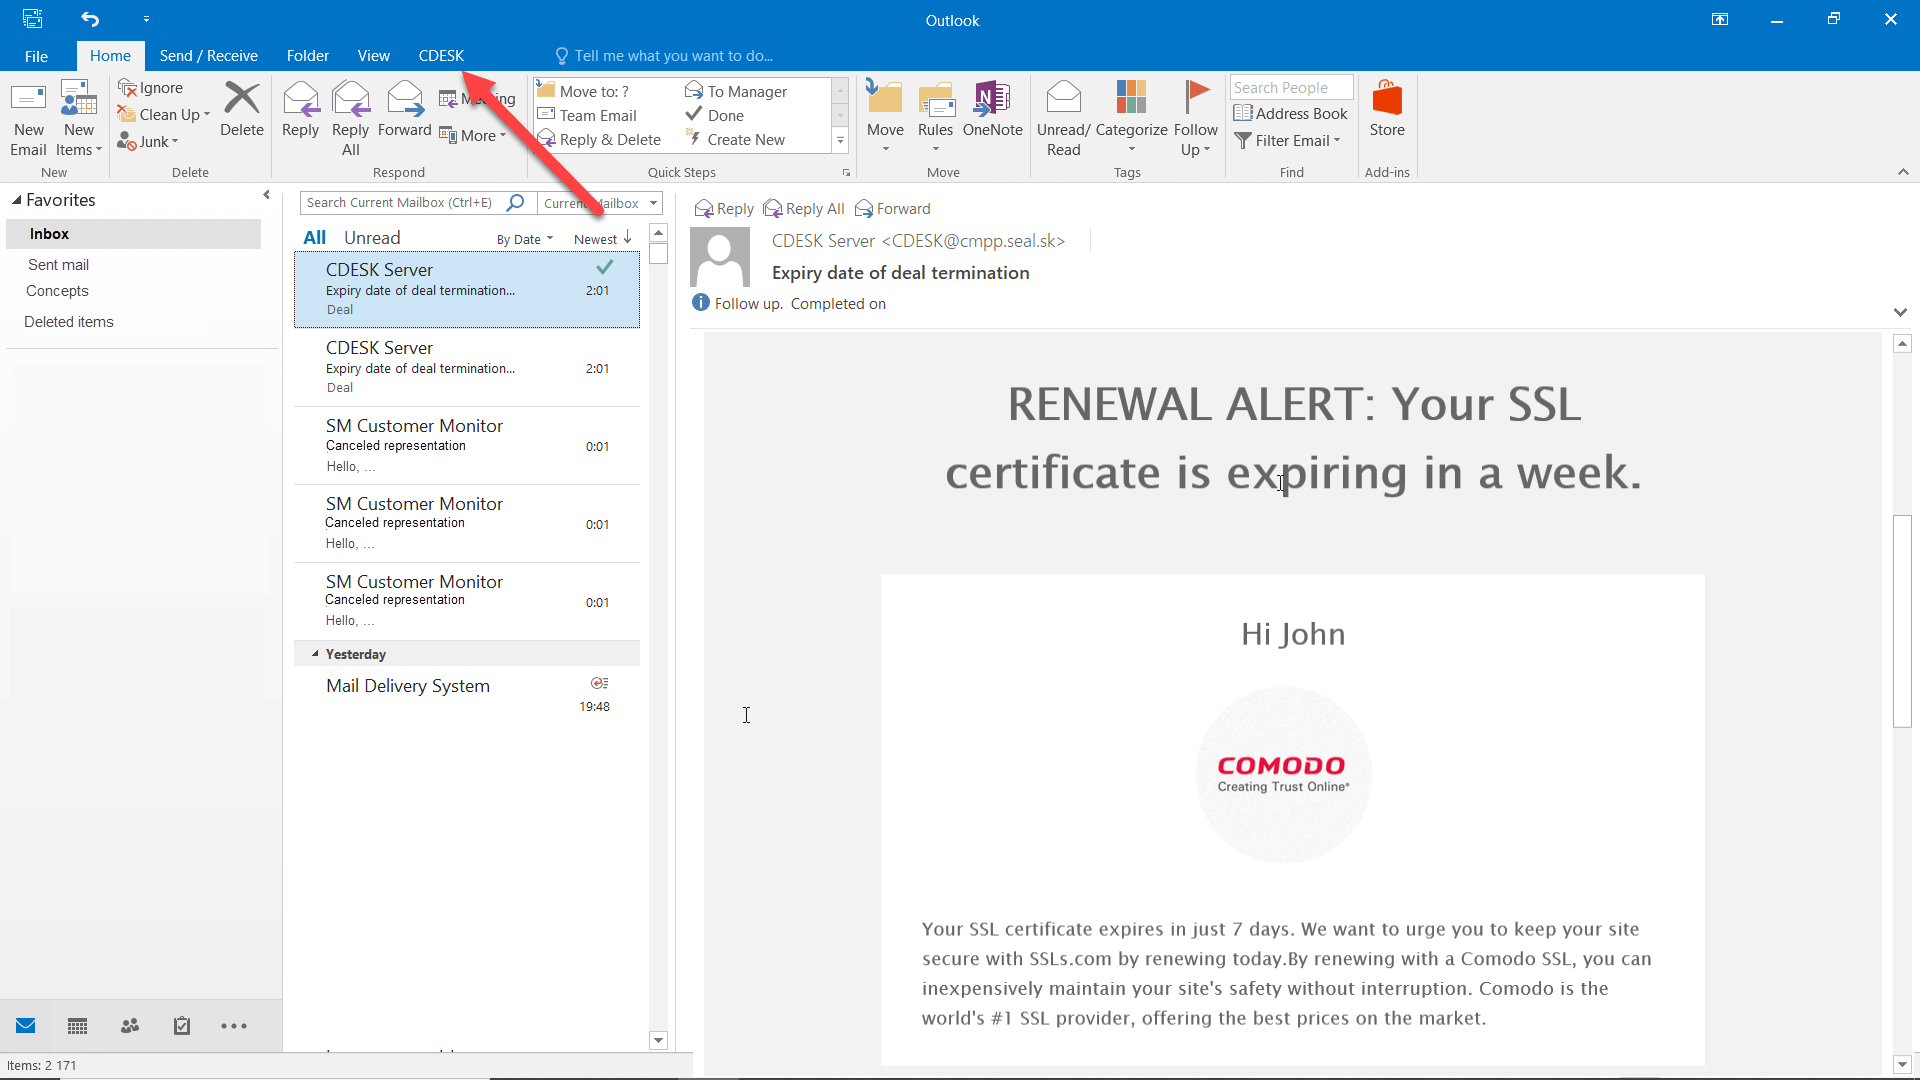
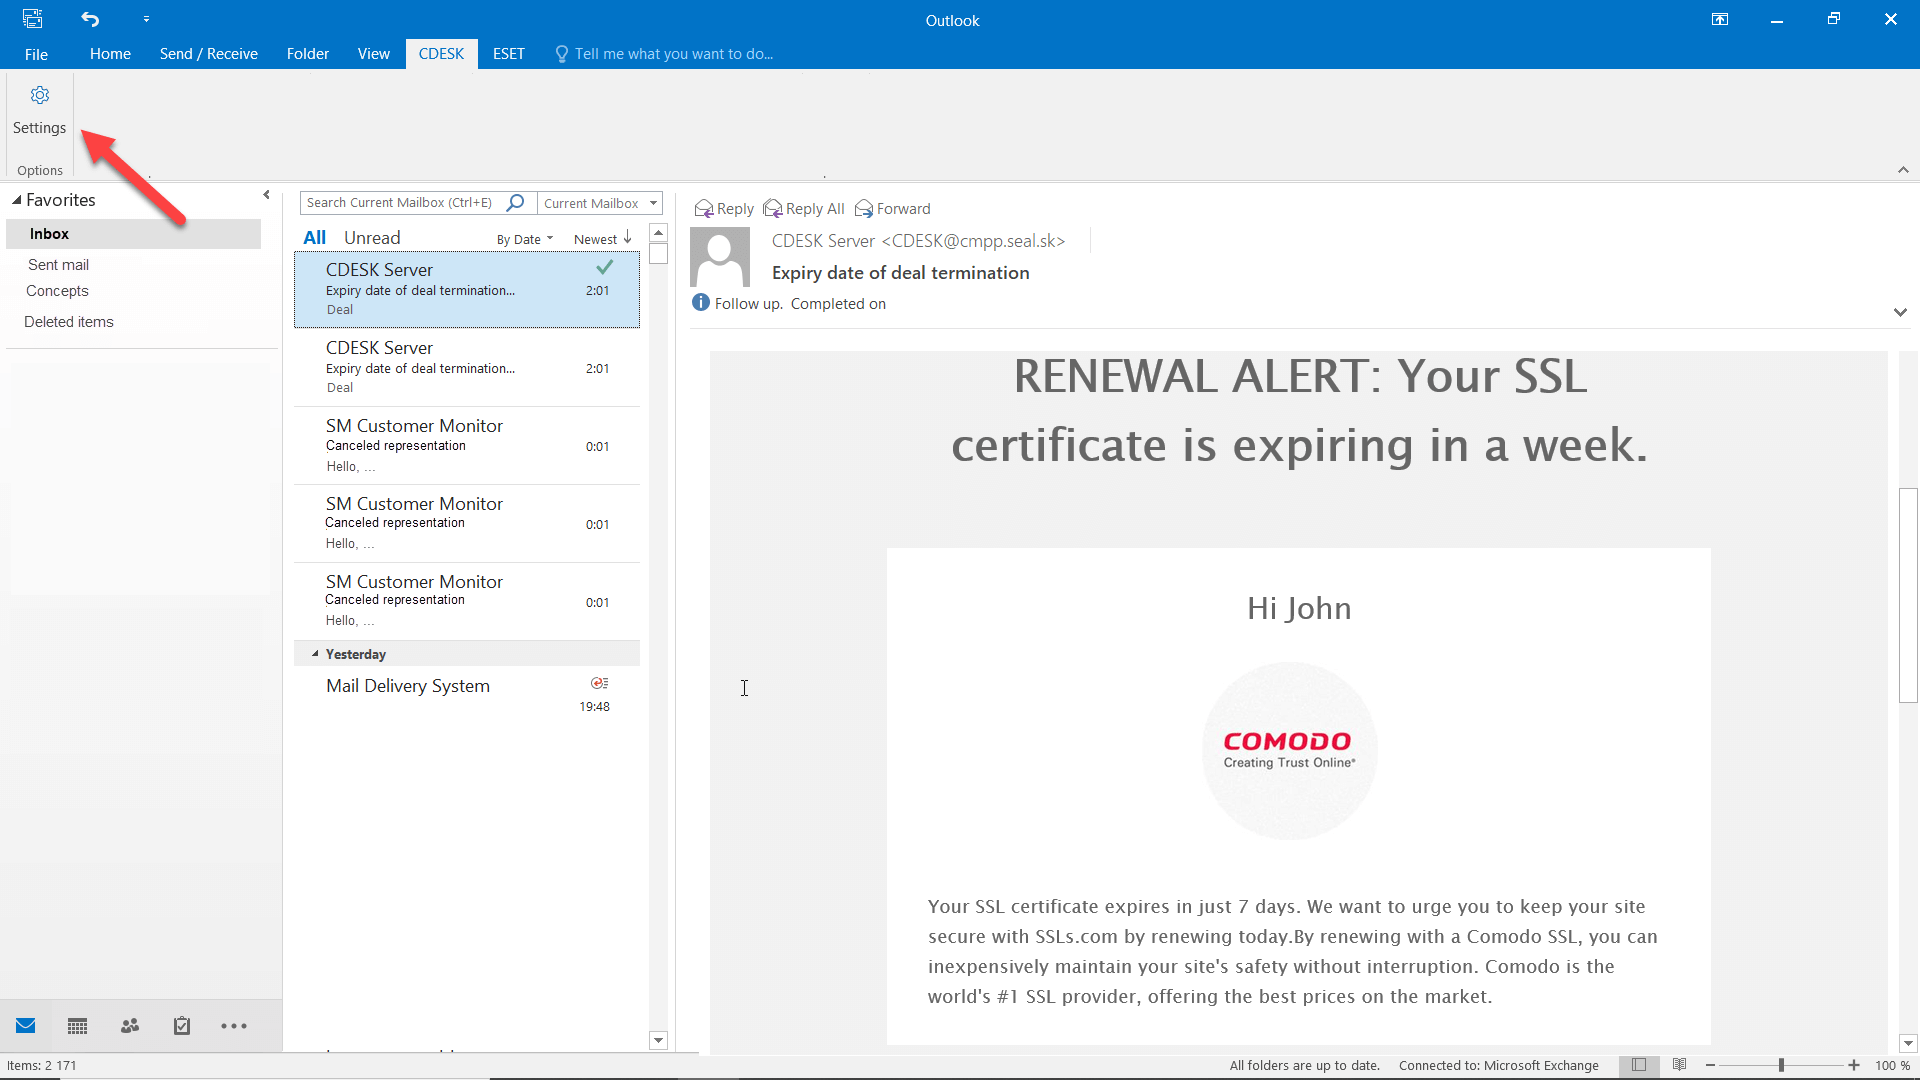
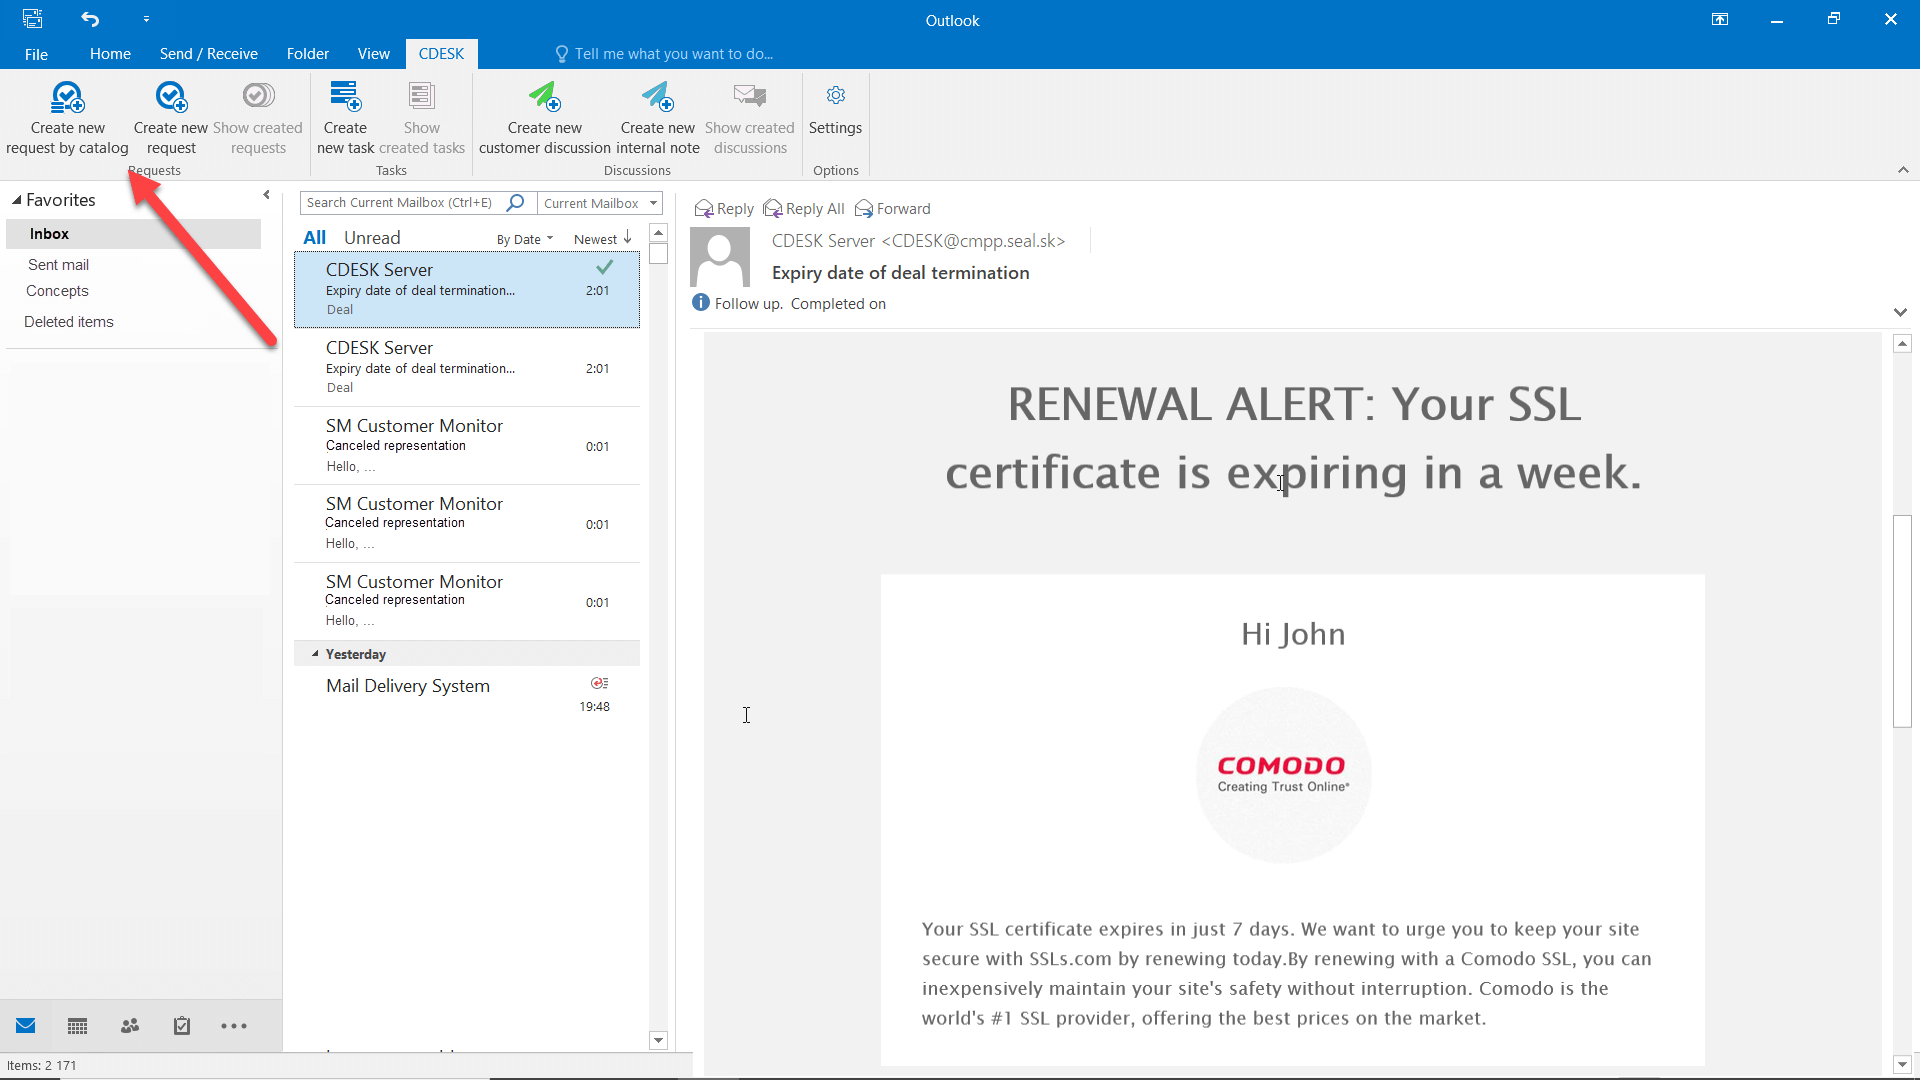
Once CDESK Outlook Plugin installed, the CDESK tab shows on the Outlook top bar.
Click on the CDESK button to display a toolbar. Click on the Settings button to continue.
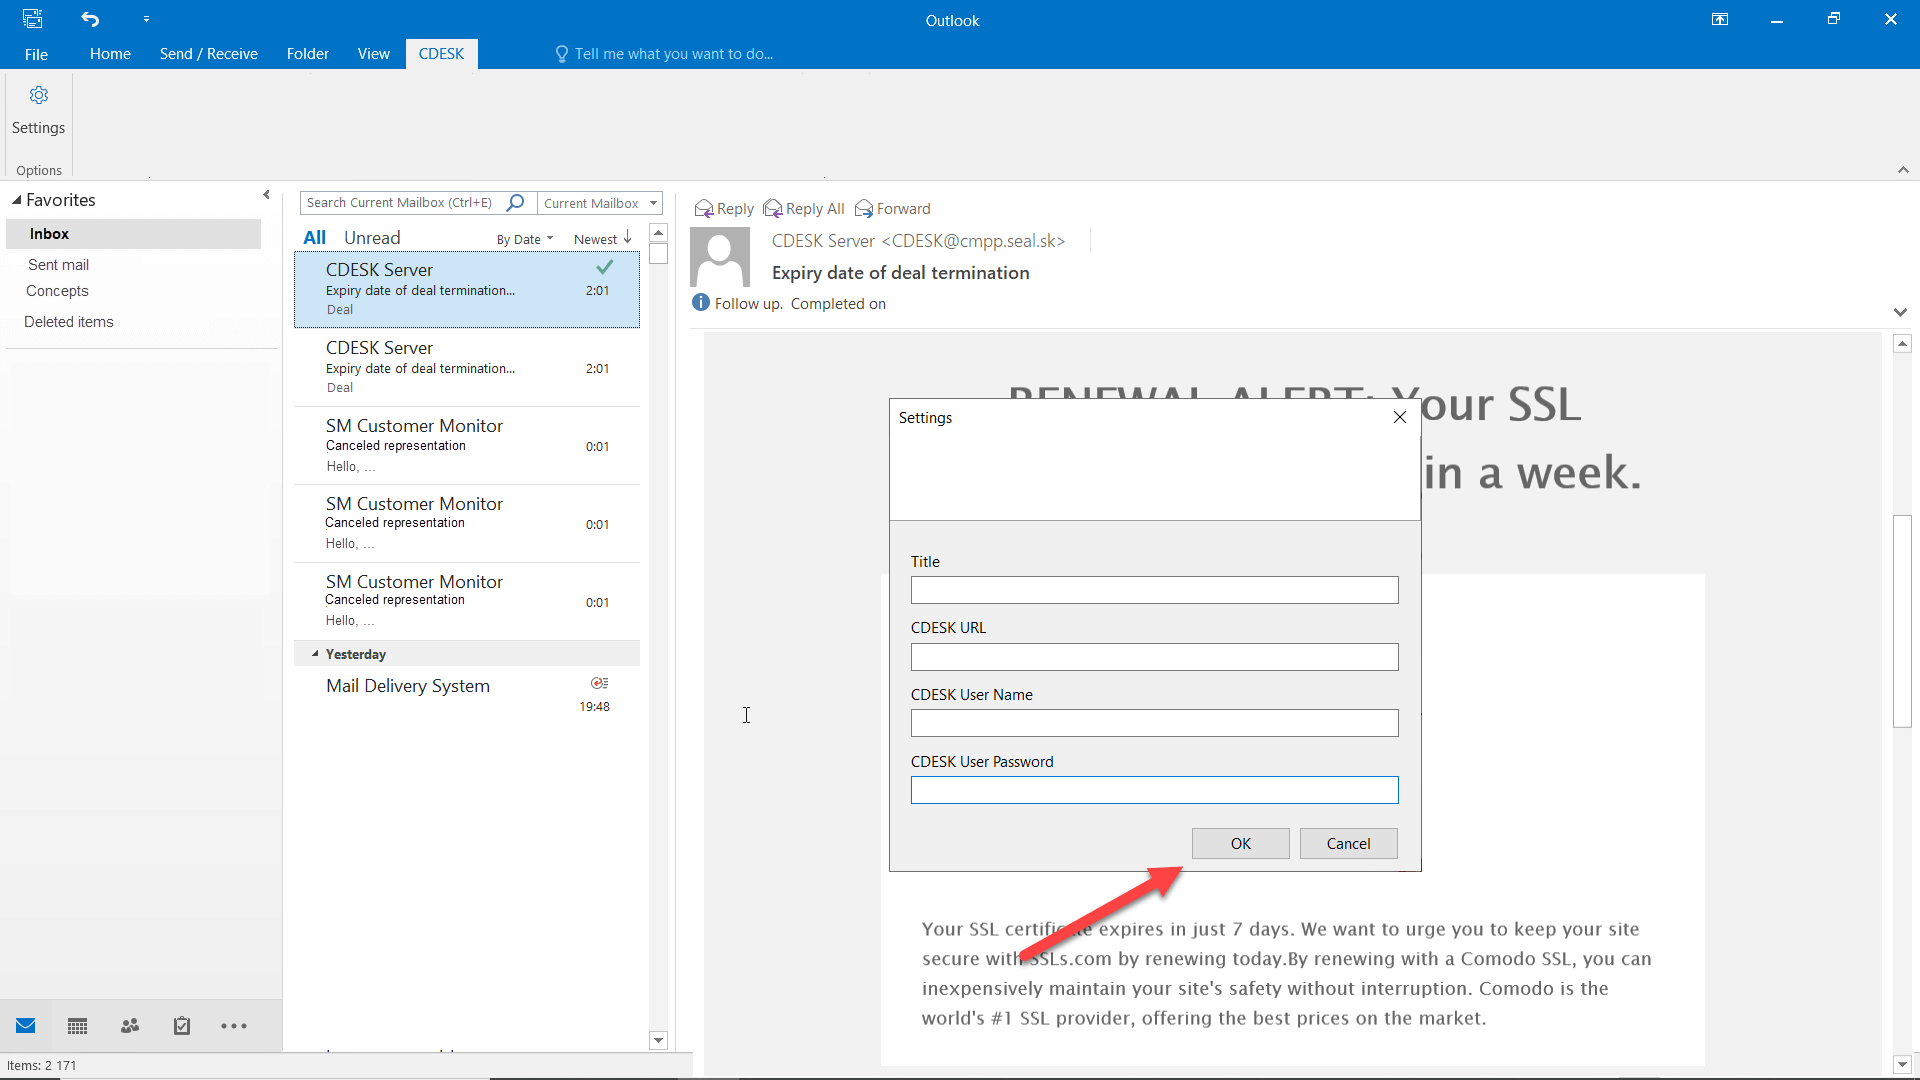
Click to display the login window.
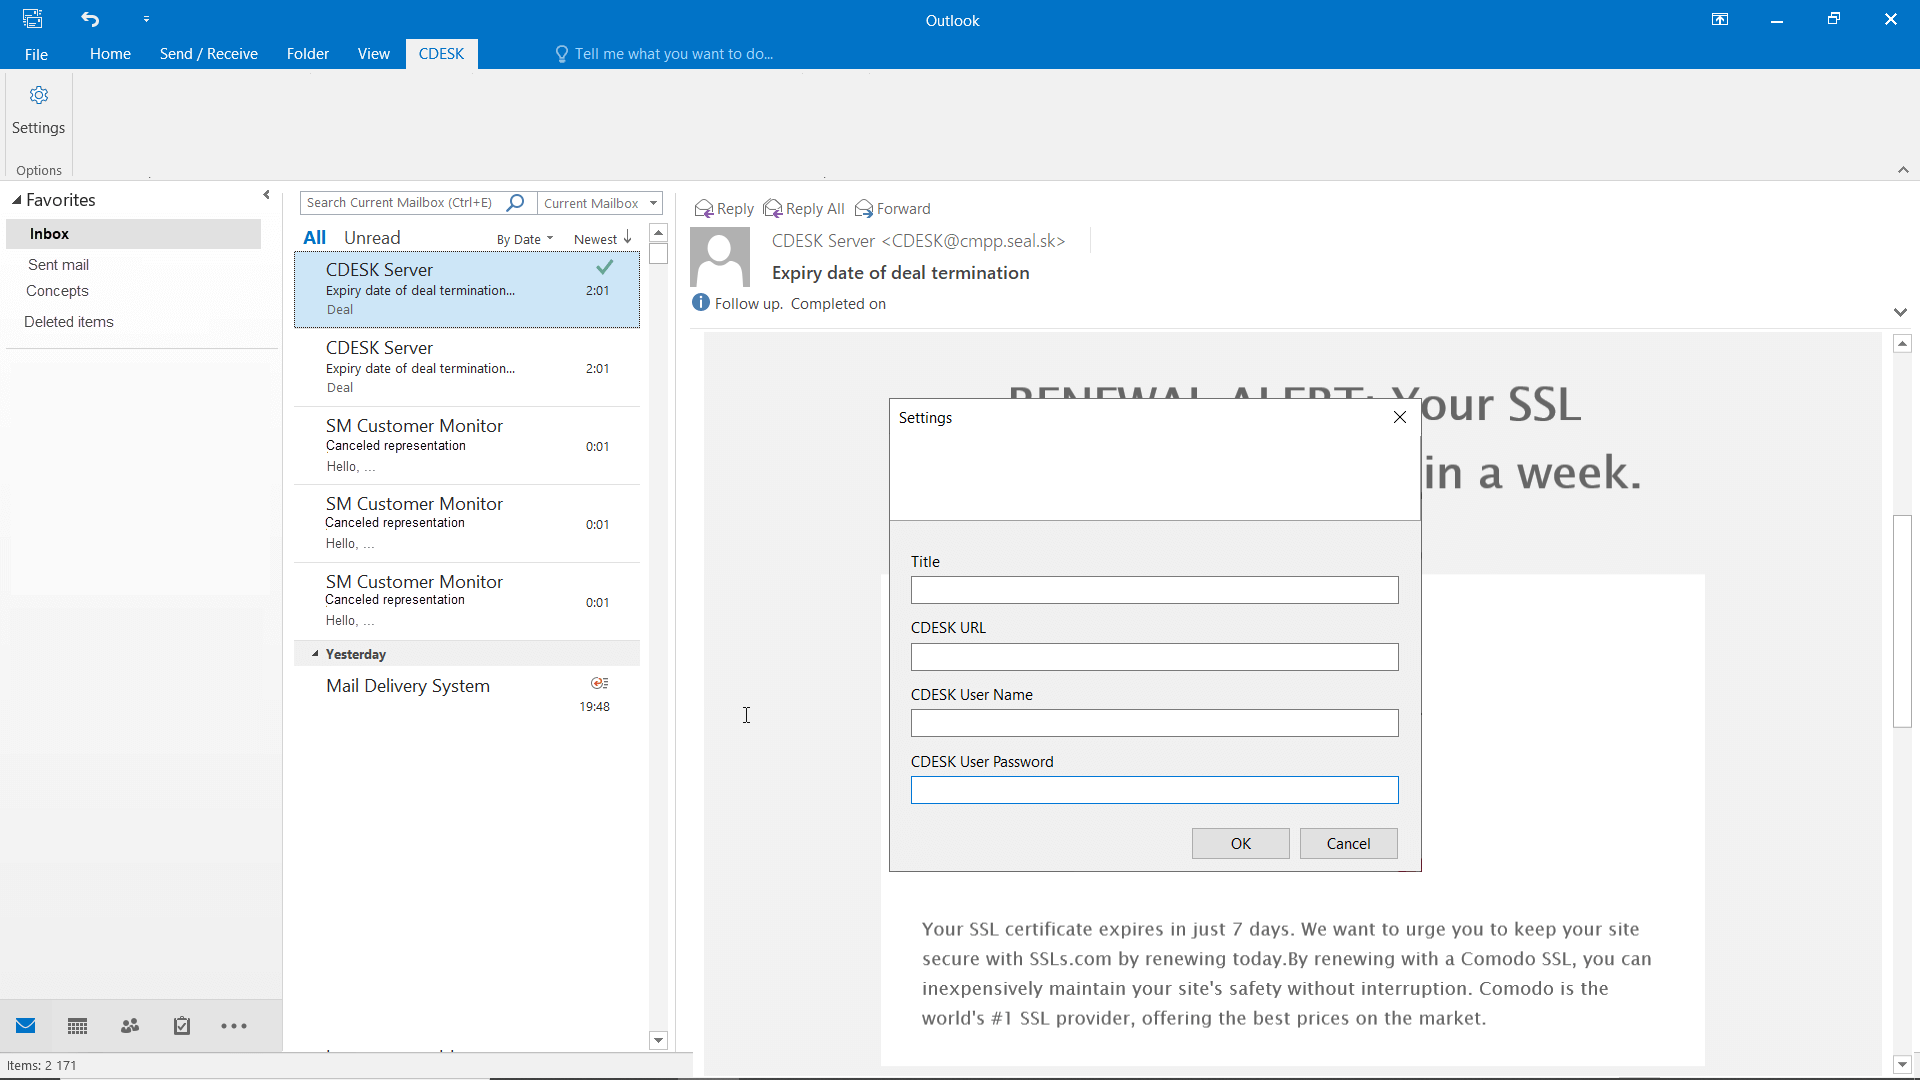
The window contains the following lines:
Title: The title of the tab to get to the toolbar of CDESK Outlook Plugin. The tab is displayed on the Outlook top bar.
CDESK URL: URL address of your CDESK server. Enter the address in the form https://
CDESK User Name: Your CDESK login name. The name will be provided to you by your environment administrator.
CDESK User Password: Your CDESK login password. The password will be provided to you by your environment administrator.
To complete the configuration, click the OK button in the lower right corner of the window. Click the Cancel button to close the window without setting the connector.
After a successful configuration, the following buttons show under the tab from the CDESK Outlook Plugin:
- Create a new request by the catalog of requests
- Create a new request
- Show created requests
- Create a new task
- Show created tasks
- Create a discussion with the customer
- Create an internal note
- Show created discussions
Their functions are described in other texts.
Add Additional CDESK Accounts to Outlook Plugin
It is possible to connect multiple CDESK accounts to Outlook Plugin at the same time. Add more accounts through add-in settings in Outlook Plugin. How to get to the add-in settings is described in the section How to Fix Not Showing CDESK Tab.
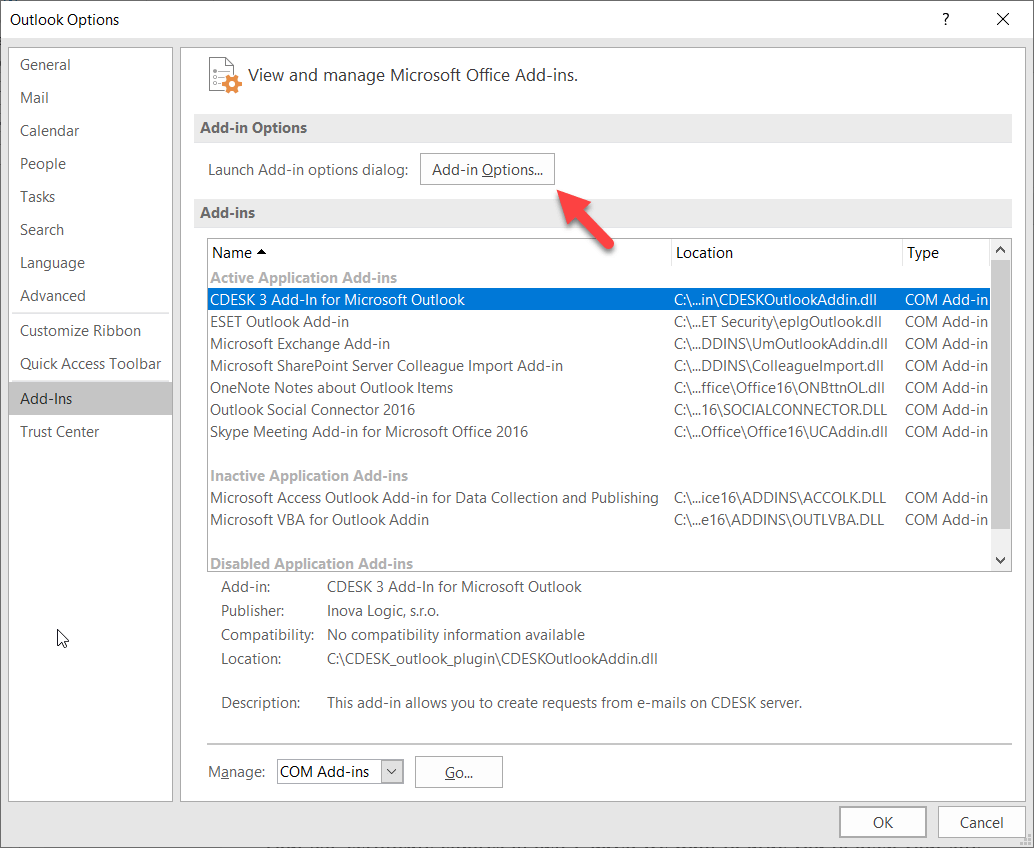
In the list of add-ins, select CDESK 3 Add-in for Microsoft Outlook and click the Add-in Options button.
Click to open a modal window that contains the CDESK settings sets option. Click to open the selection where you can choose how many CDESK accounts you want to connect. The maximum number is 10.
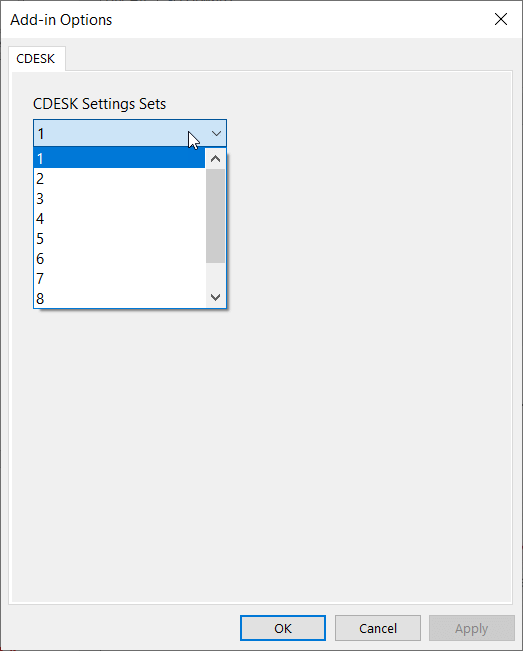
To apply the settings, click the Apply button in the lower right corner. Click the Cancel button to close the window with no settings applied.
You need to restart Outlook for the changes to take effect. When turned back on, there will be as many CDESK tabs on the top bar of Outlook as there are accounts you have selected in the settings

How to Fix Not Showing CDESK Tab
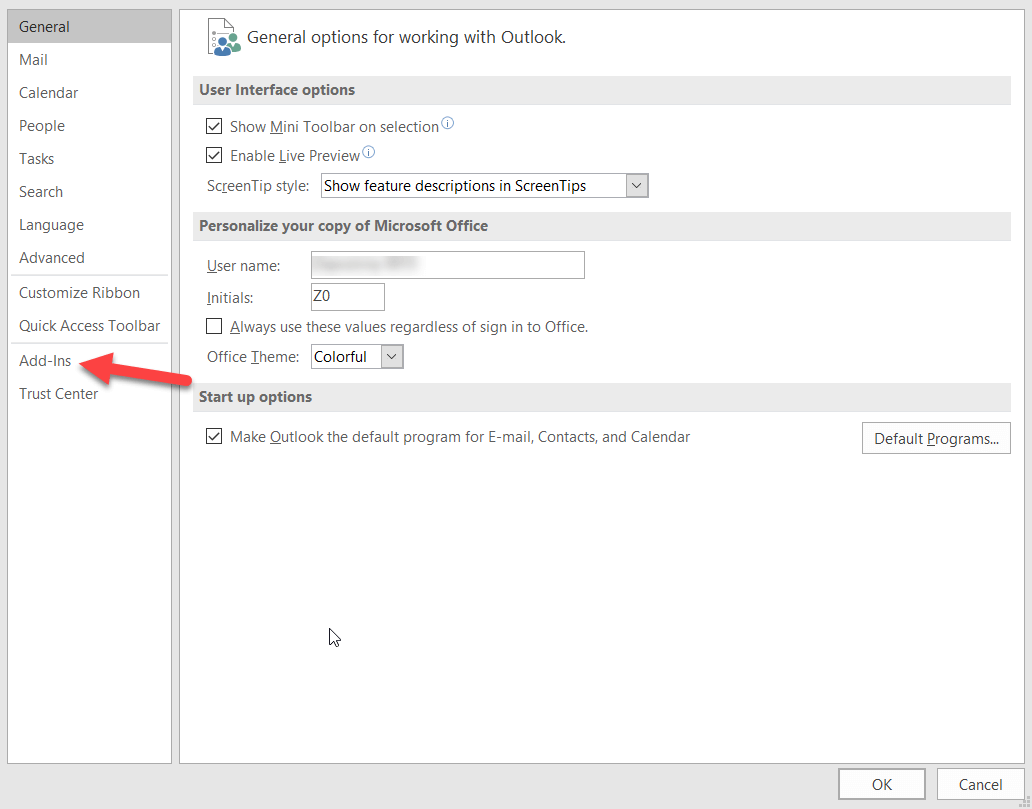
If the CDESK tab does not show before configuration and the add-in was installed correctly, make sure that the CDESK Outlook Plugin add-in is enabled in Outlook. To enable it, click the File tab in the Outlook top bar.
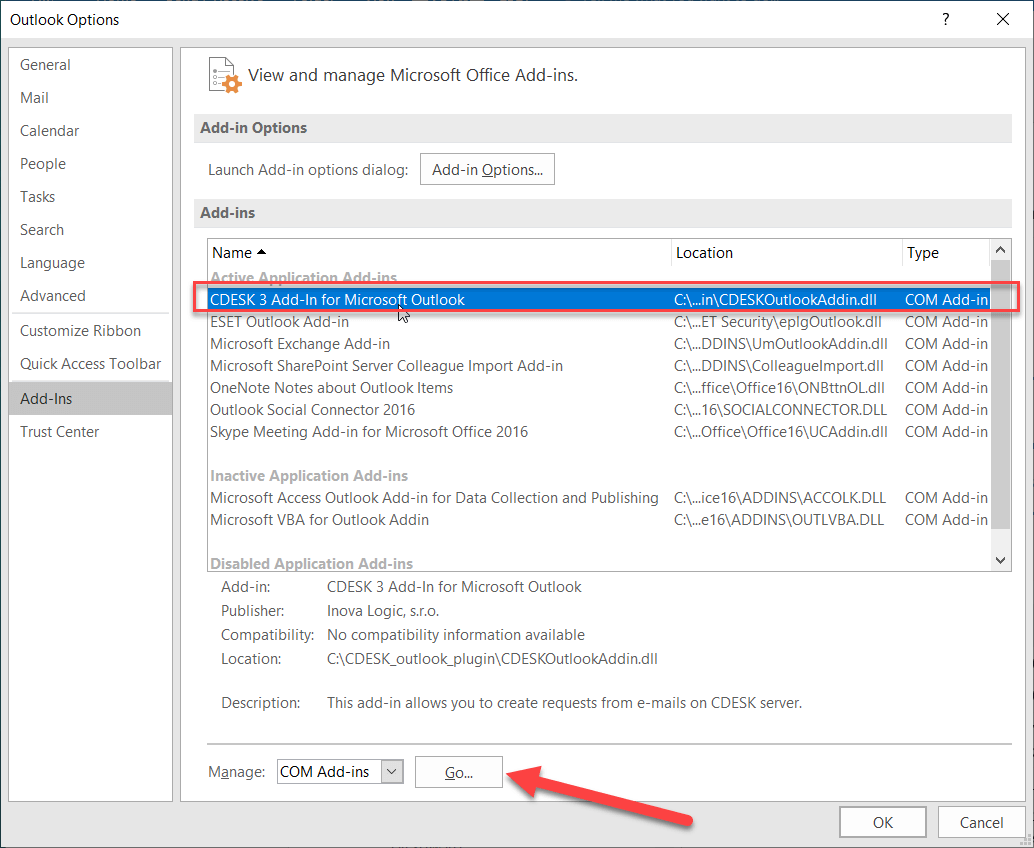
Click on it to get to the Information tab. Click the Options button in the sidebar. A new window opens. Go to the Add-ins section.
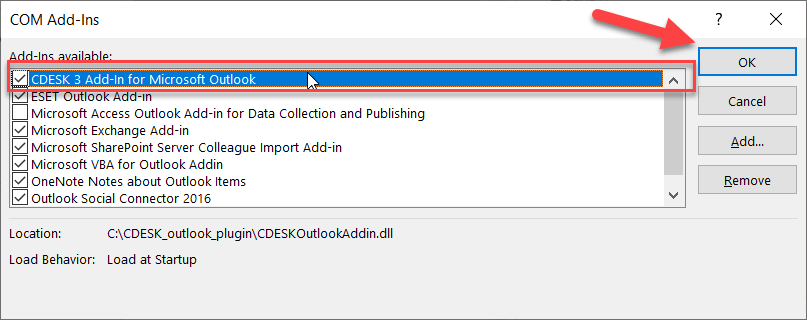
Click to open the window with a list of all add-ins. Find CDESK 3 in the list and click Go.
Click to open a new window and tick CDESK 3 Add-In for Microsoft Outlook. Click OK to enable the add-in.
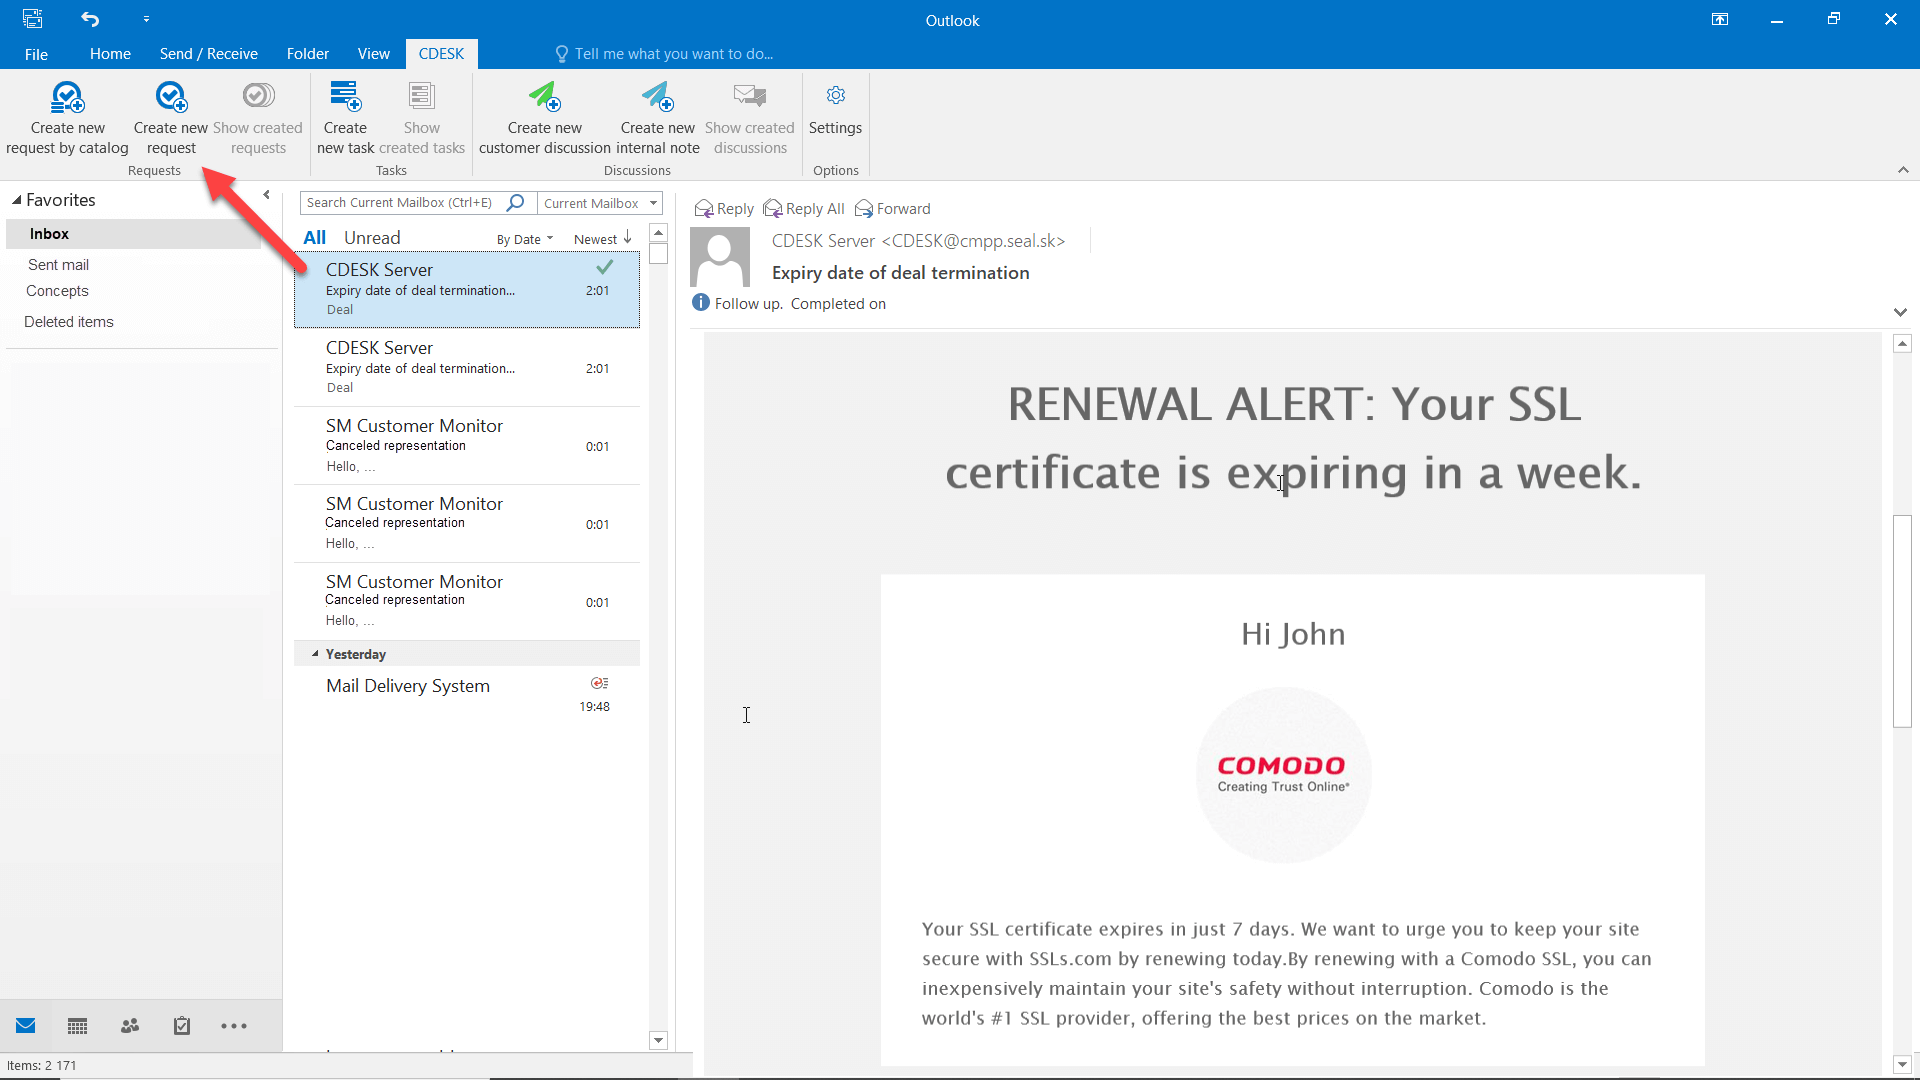
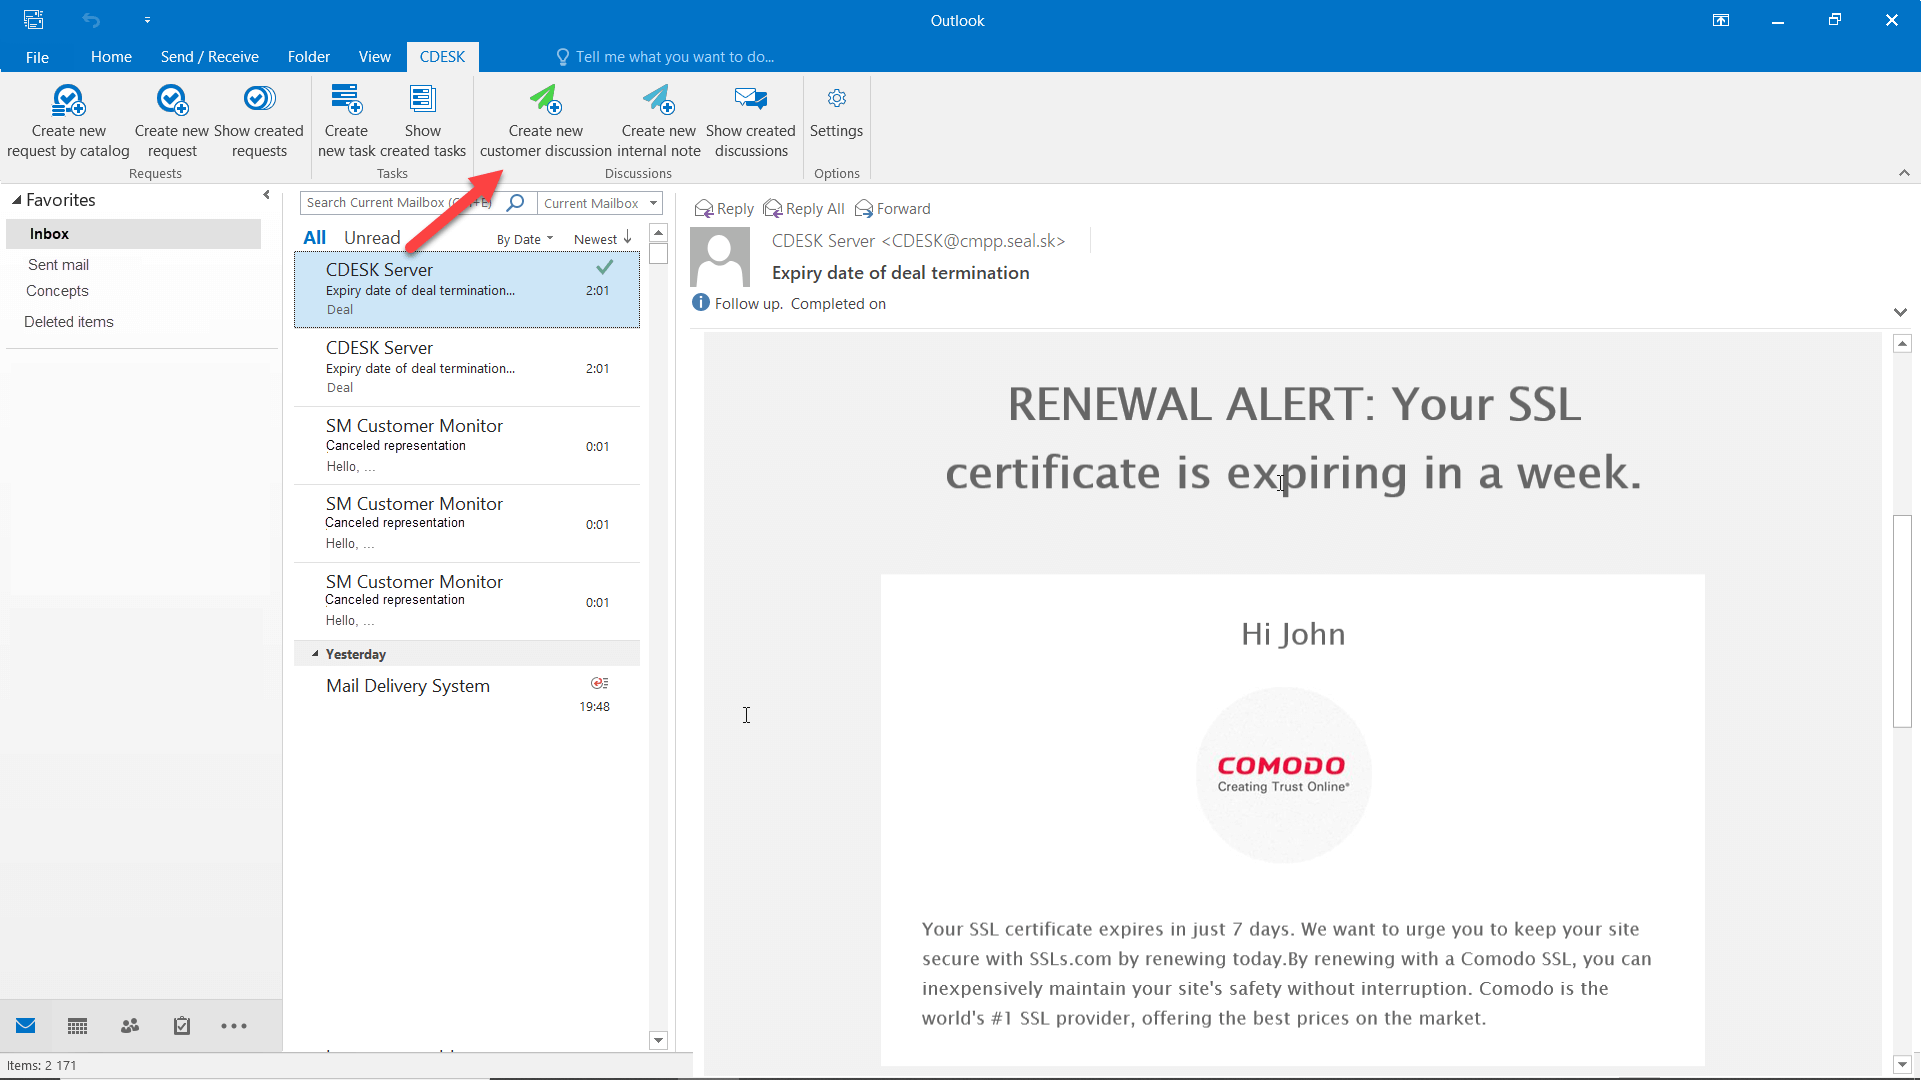
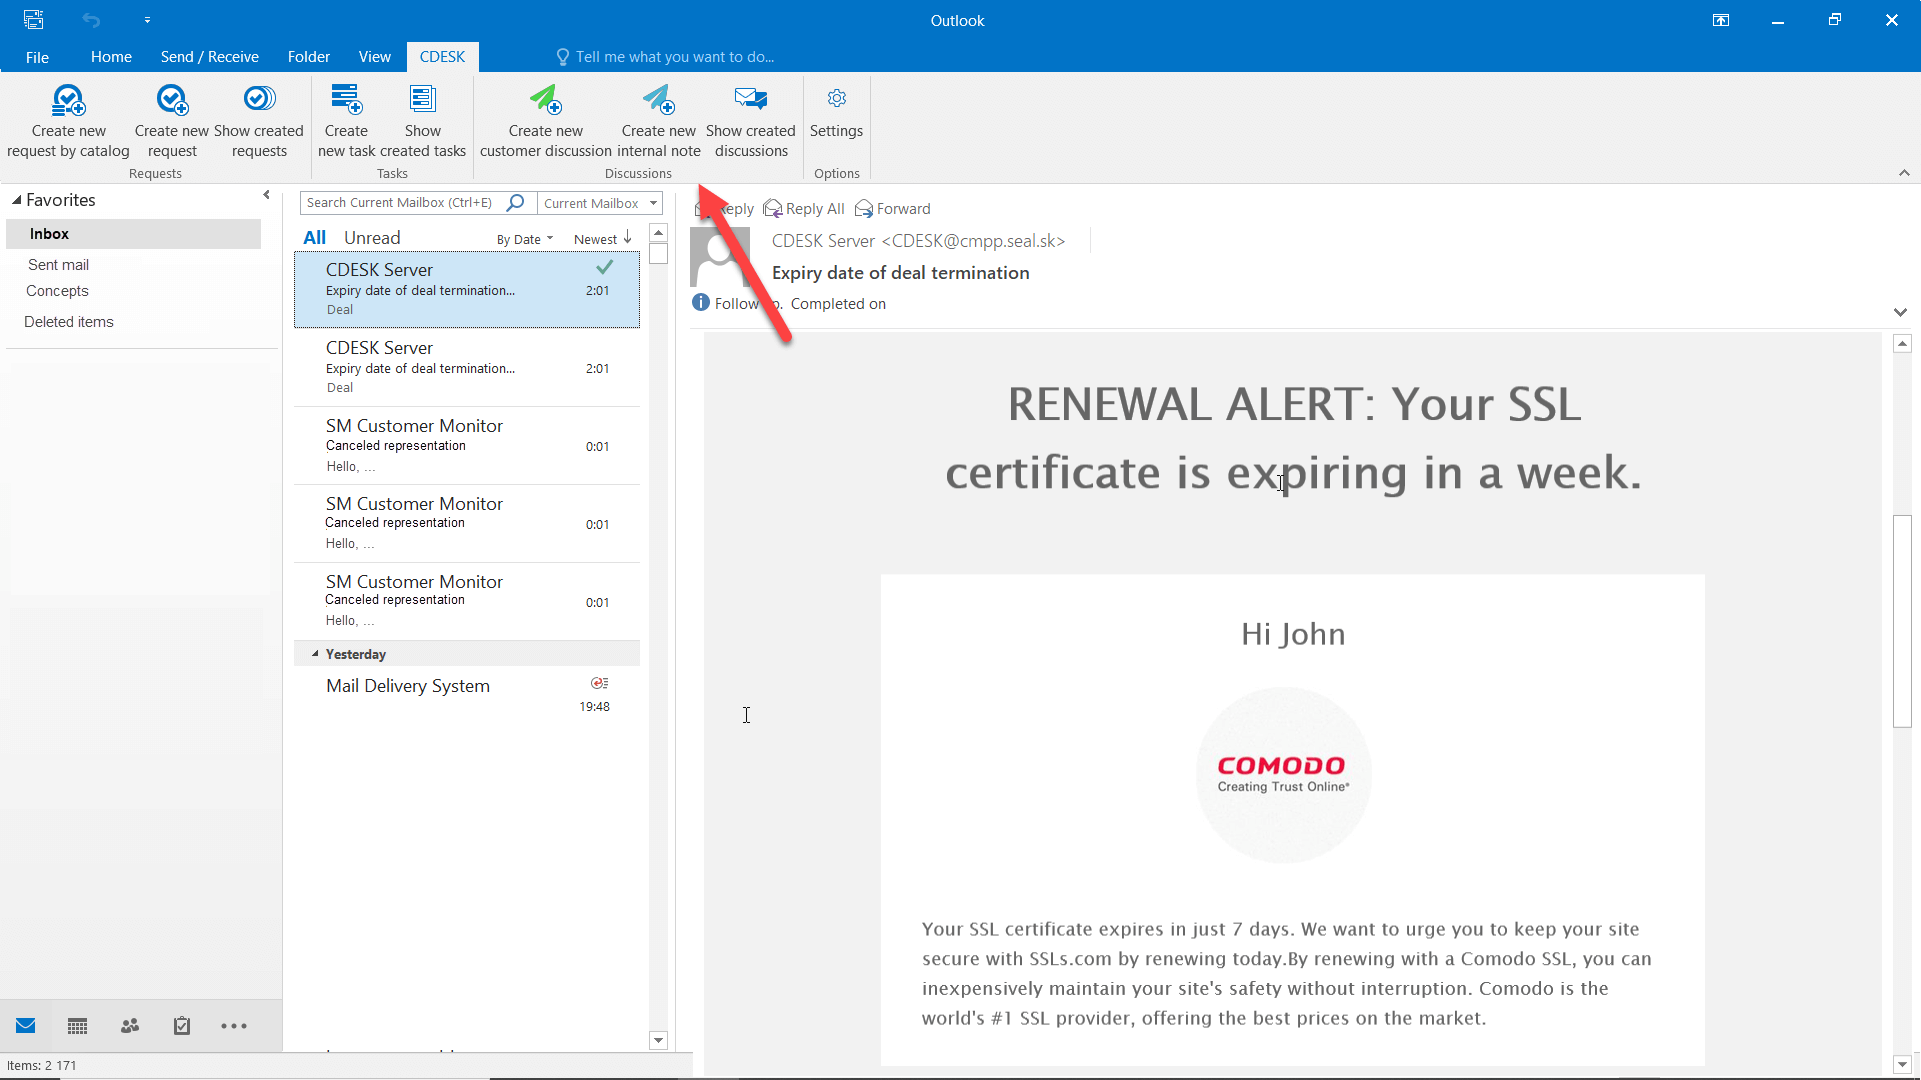
Create a New Request by the Catalog of Requests
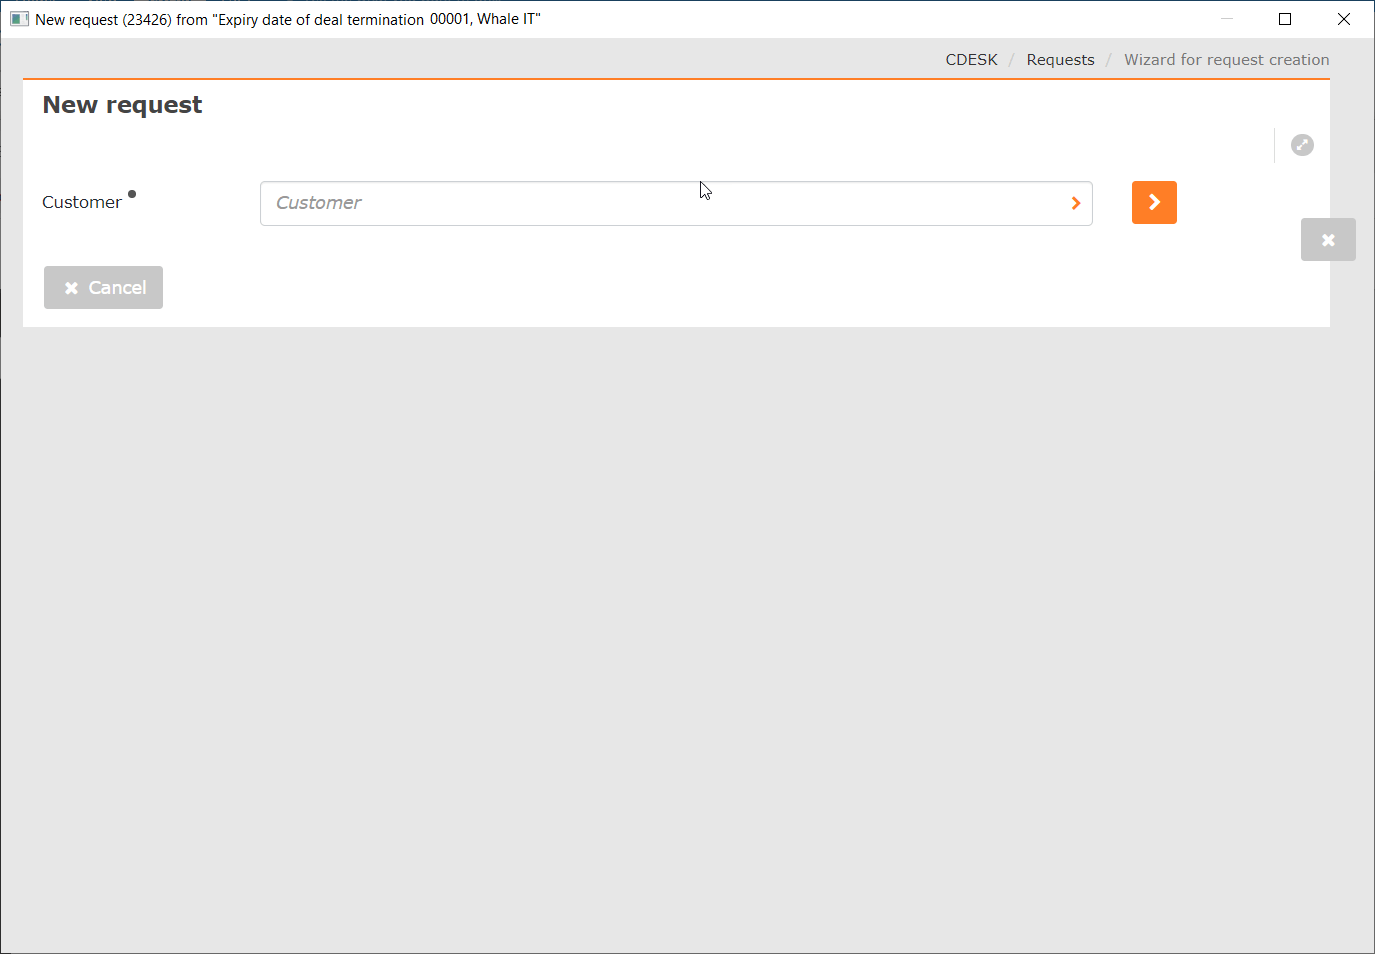
To create a request through the catalog of requests, select a mail and click the button Create new request by catalog.
The button to create a request from the catalog is displayed only if the catalog is switched on in CDESK. To turn the catalog of requests on, go to Global settings -> Requests -> Catalog of requests. If the button doesn’t show, check if you have permission to create requests from the catalog of requests. Permissions in CDESK can be set in Users and Groups-> Users-> specific user-> Permissions tab-> Requests-> New Records via the Catalog of Requests.
Click on the Create new request by catalog button to open a new modal window to select a customer. If the sender of the selected e-mail is already registered in CDESK as a contact or a customer account, the customer is preselected.
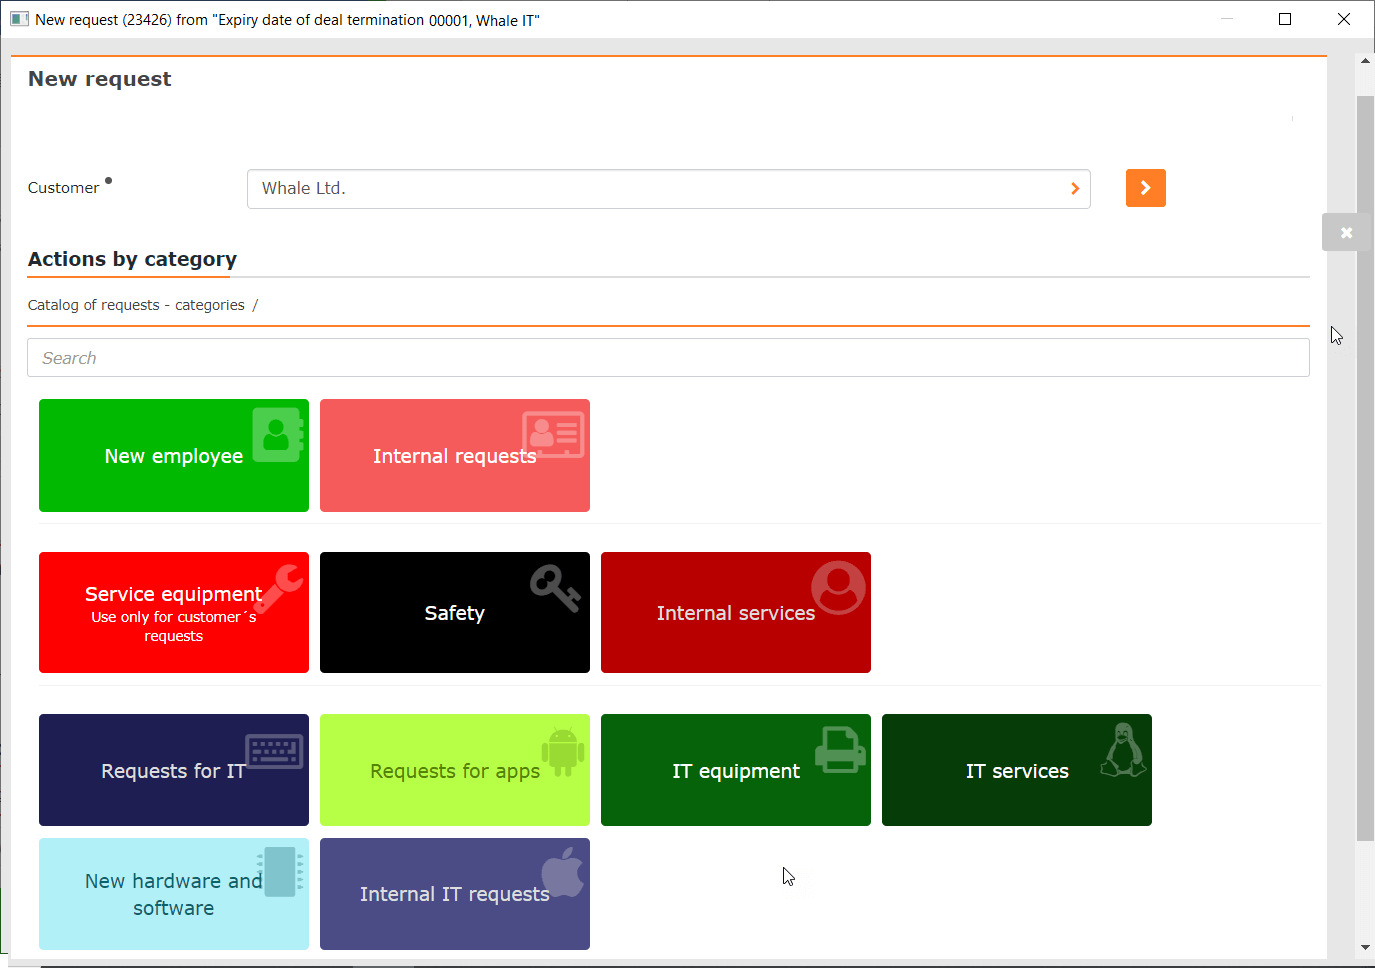
Next steps when entering a request are the same as when entering a request from the catalog via web access. The procedure is described in How to Work with Requests – operator, some fields are pre-filled, based on the email used when submitting the request.
Request name – if it is free under the tile, it will be taken from the e-mail subject.
Request description – pre-filled from the message content.
Attachments – e-mail attachments and images are automatically inserted into the attachment, as well as the original e-mail in .msg format.
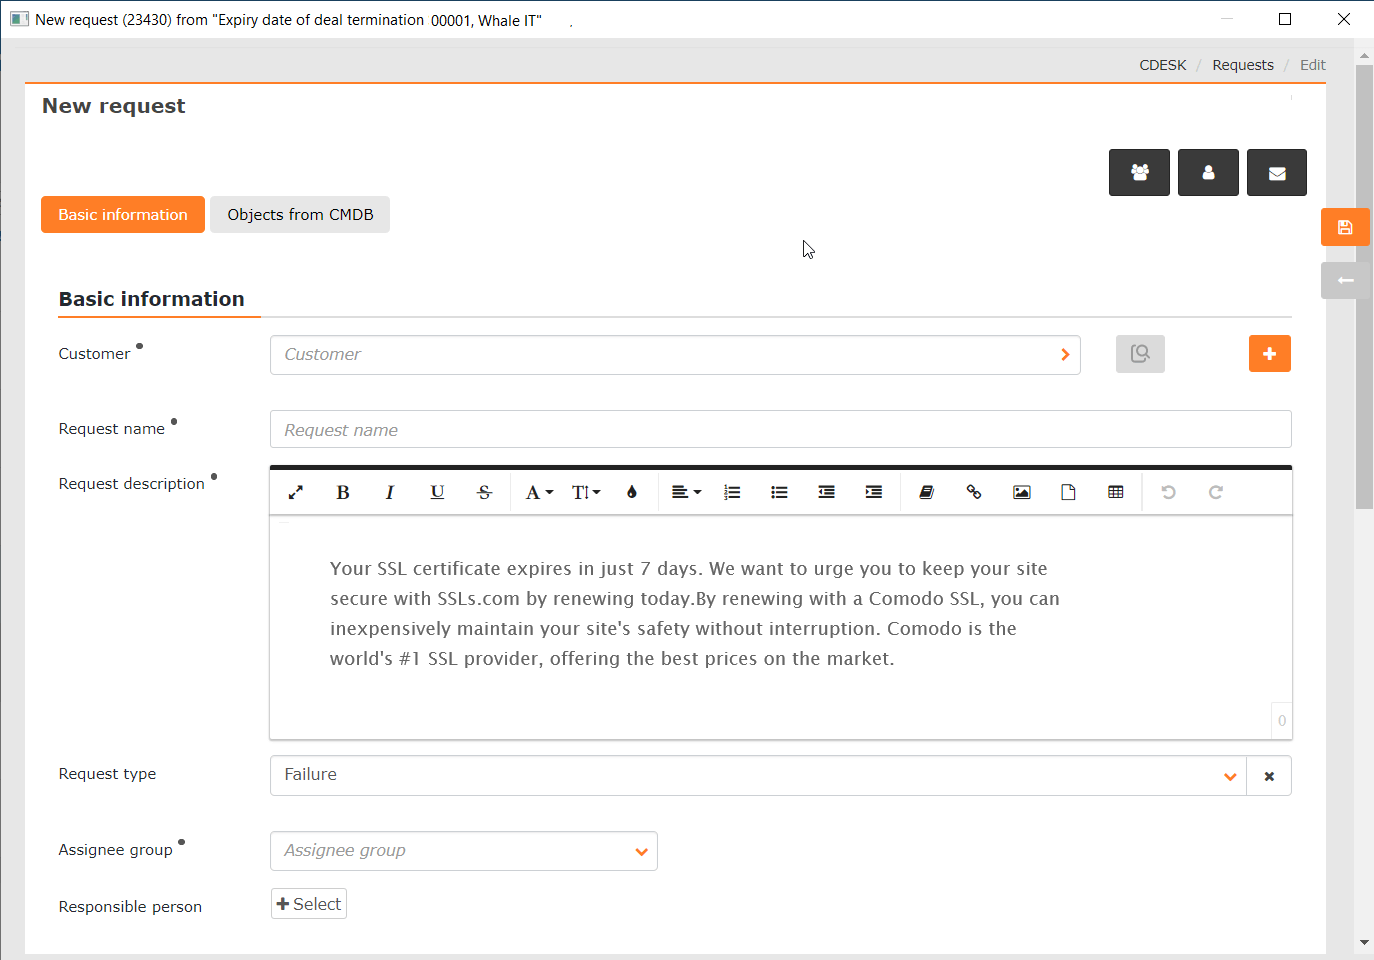
Create a New Request
To create a new request, select an email and click the Create new request button.
The button to create a new request is displayed only if you have permission to create requests. Permissions can be set in CDESK in Users and Groups-> Users-> specific user-> Permissions tab-> Requests-> New records with manual filling (new request).
Click on the Create New Request button to open a modal window with a form used as when entering a request via web access. The meaning of individual fields is described in detail in Work with requests – operator, some fields are pre-filled based on the email used when submitting the request.
Request name – pre-filled from the message subject
Request description – pre-filled from the body of the message
Attachments – the original e-mail is inserted into the attachment, as well as attachments and e-mail images..
Show Created Requests for Email
If a request has been created previously for a selected email, the Show Created Requests button is enabled. Click to display the request in a modal window directly from the CDESK server. If the request was not finished in the past and only a draft has been created, the draft is displayed in the modal window.

Create a New Task
To create a task, select an email and then click the Create new task button.
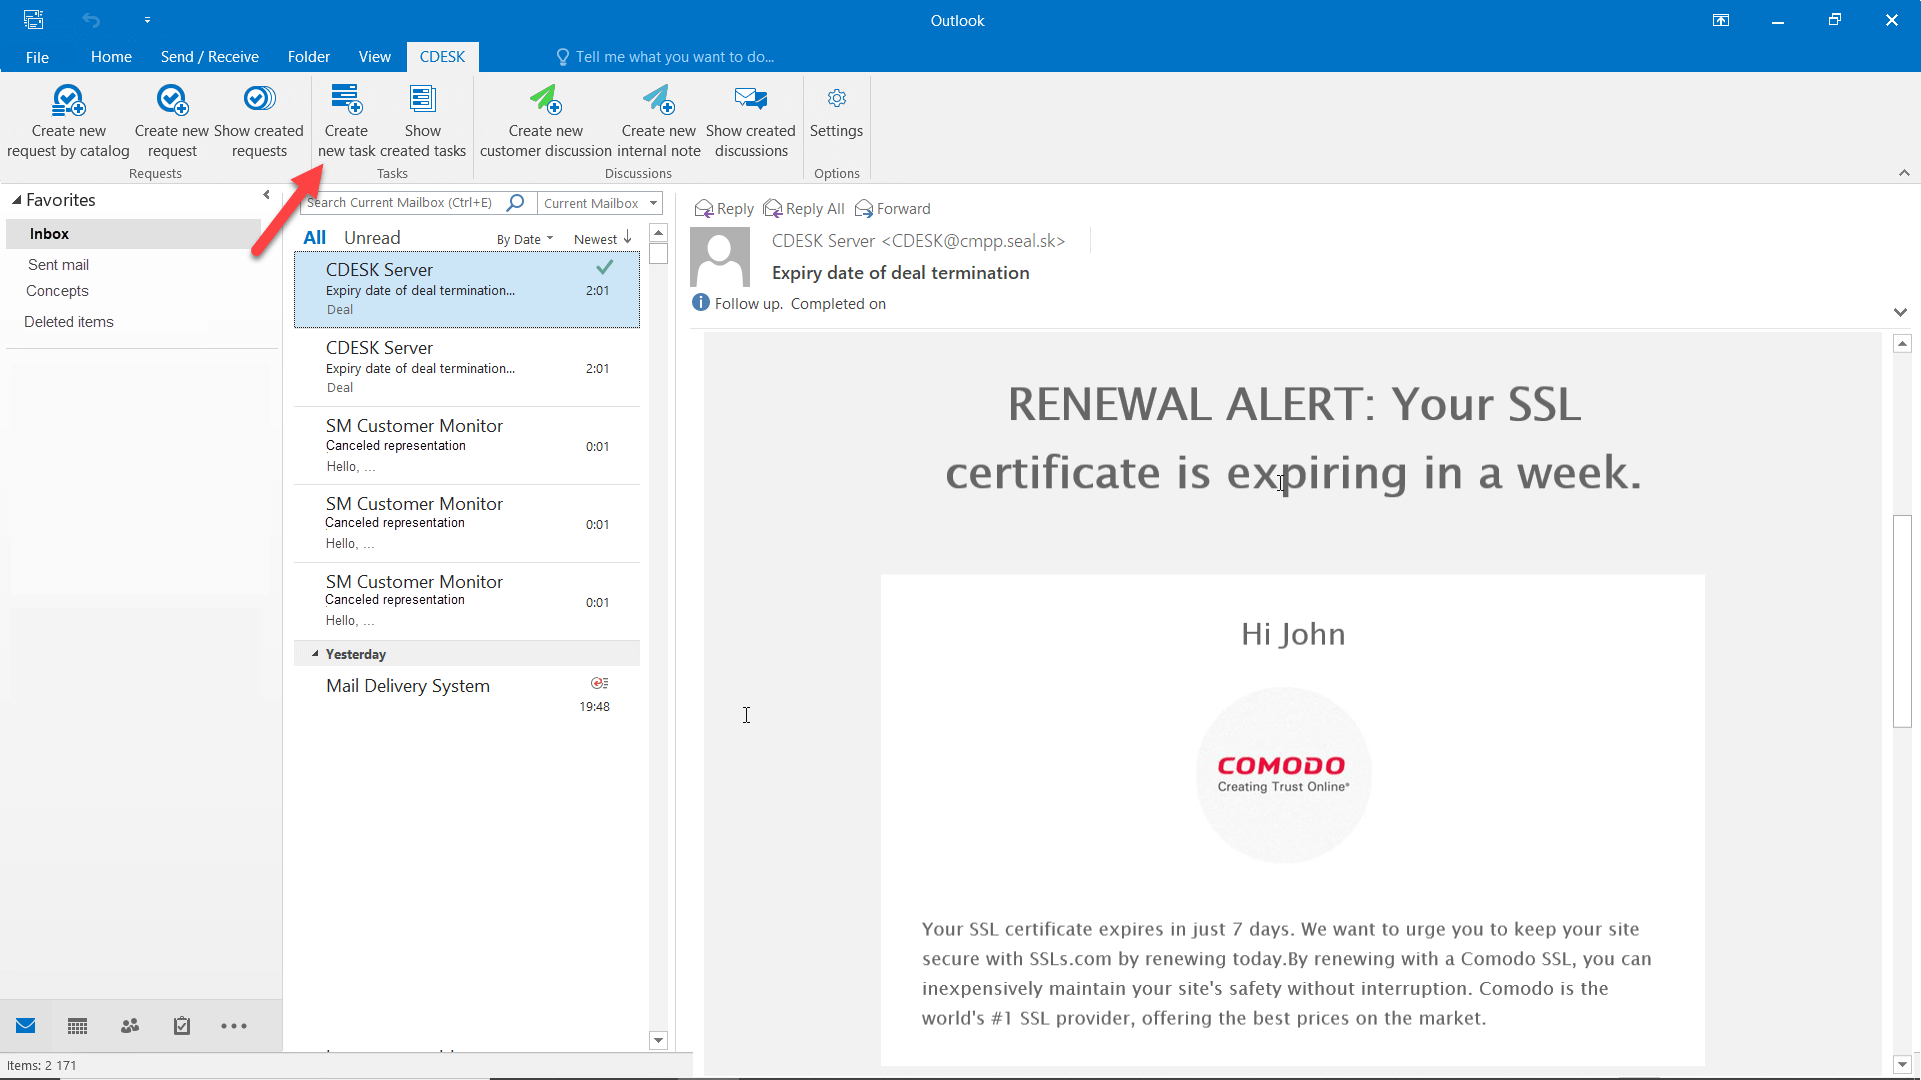
The button to create tasks is displayed only if the Tasks module is enabled in CDESK. The module can be enabled in Global settings -> Tasks. If the button does not appear, check your permission to access the Tasks module. Permissions in CDESK can be set in Users and Groups -> Users -> specific user -> Permissions tab -> Tasks.
Click the Create new task button to open a modal window with the form as it is used when entering tasks via web access. The meaning of individual fields is described in detail in Tasks -> Create task, text: some fields are pre-filled based on the email used when submitting the request.
Task Name – pre-filled from the message subject
Description – pre-filled from the body of the message
Attachments – the original e-mail is inserted into the attachment, as well as attachments and email images.
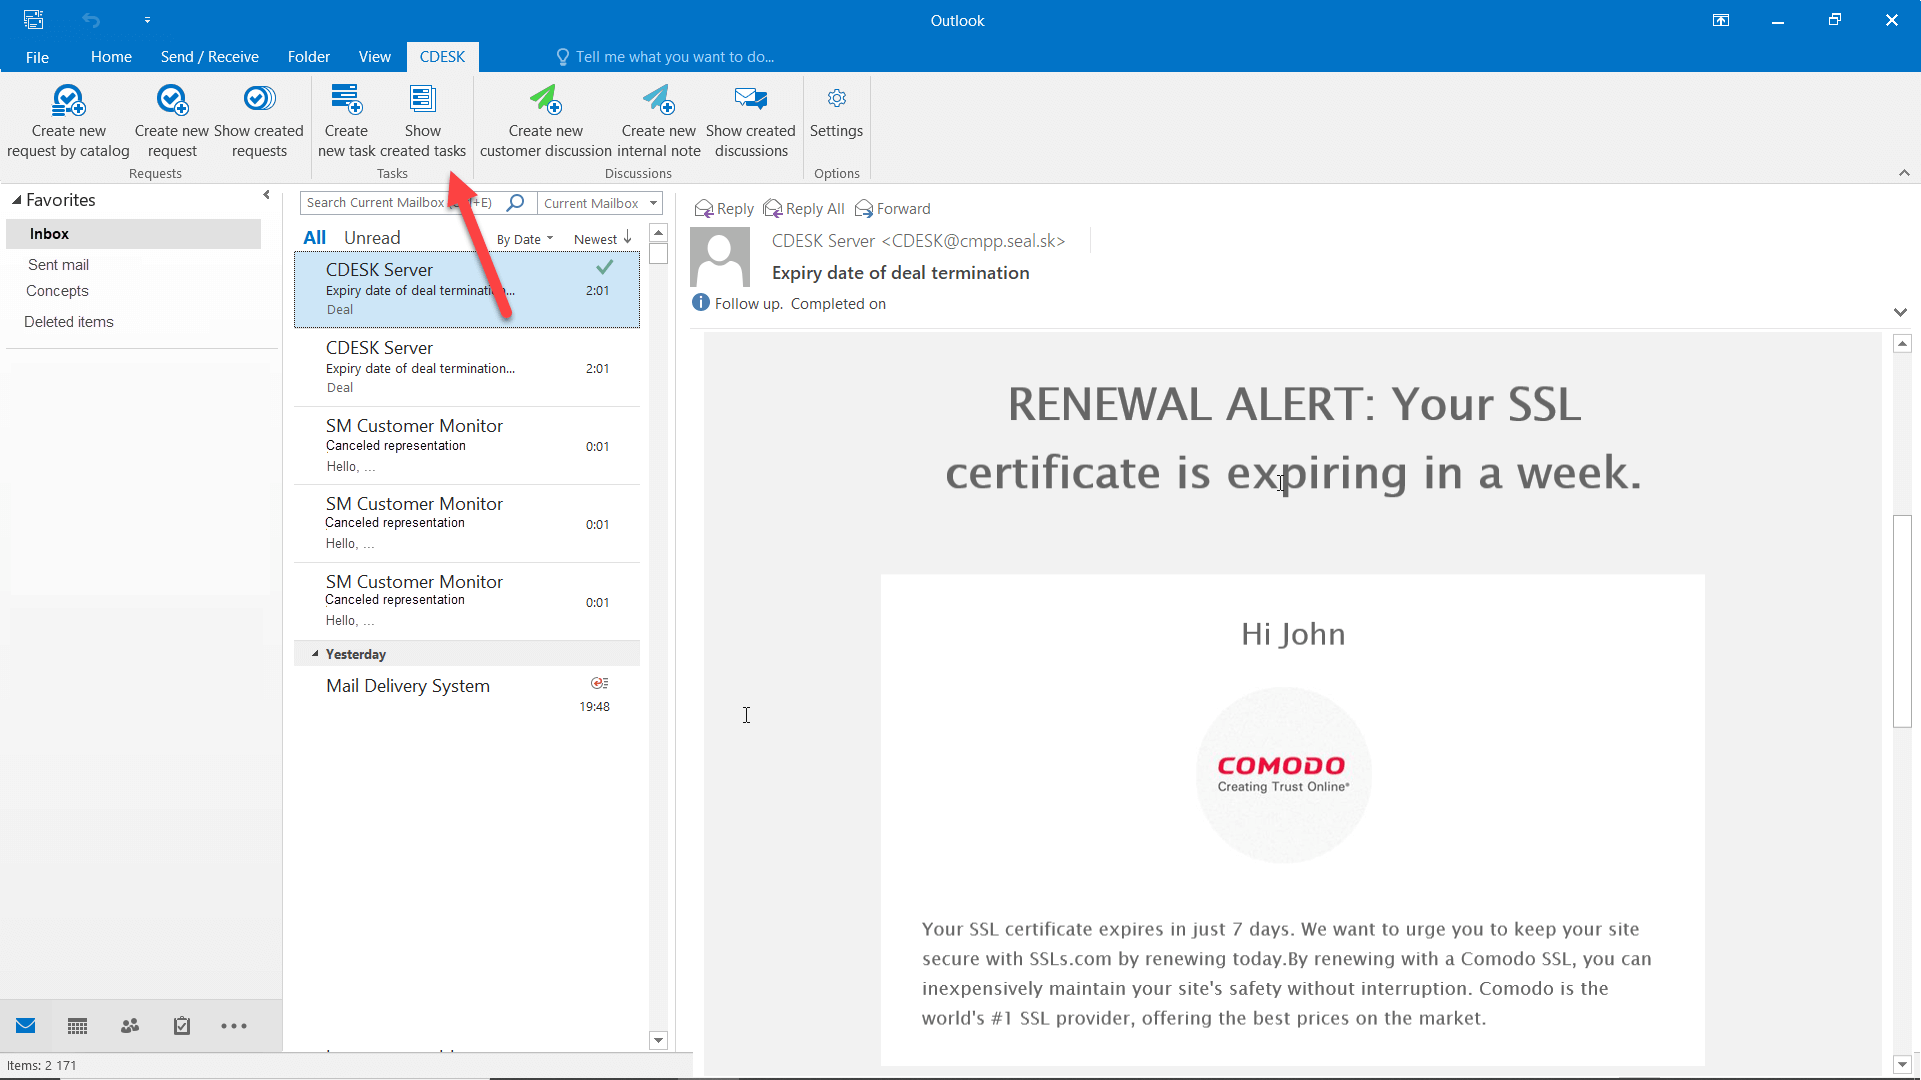
Show Created Tasks
If a task has been created previously for a selected email, the Show created tasks button is enabled. Click to display the task in a modal window directly from the CDESK server. If the task was not finished and only a draft has been created, the draft is displayed in the modal window.
Create a New Customer Discussion
The CDESK Outlook Plugin allows you to create a discussion post to your request directly from email. If this is to be an ordinary discussion post visible to customers, select the e-mail and then click the Create new customer discussion button.
The button to add a discussion with customers is only displayed if you have permission to create this type of discussion. Permissions can be set in CDESK in Users and Groups -> Users -> specific user -> Permissions tab -> Requests -> Discussion -> Discussion with Customer.
Click to open the modal window with the following lines. Required fields are marked with *.
Request * – a field to select a request to which the discussion will be linked. After selecting a request, the Preview request button appears, allowing you to view the request details.
Request from – the field is automatically pre-filled with the sender of the email.
Message * – email contents are automatically inserted in the text box.
Files – an email copy from which the discussion is being added is automatically pasted here. Attachments and e-mail images are also inserted into files.
To add a discussion, click the Save button below the form. Discussion is saved without any notification and no email is generated. After saving the discussion, the Open request discussion in CDESK button is enabled, which will give you access to the entire discussion for the request.
Create a New Internal Note
The CDESK Outlook Plugin allows you to create a discussion post to your request directly from email. If you want the post to be visible only to assignees, select an email and then click the Create a new internal note button.
The button to add an internal note is only displayed if you have permission to create this type of discussion. Permissions can be set in CDESK in Users and Groups -> Users -> specific user -> Permissions tab -> Requests -> Discussion -> Note for assignees (internal discussion).
Click to open the modal window with the following lines. Required fields are marked with *.
Request * – a field to select a request to which the discussion will be linked. After selecting a request, the Preview request button appears, allowing you to view the request details.
For whom – the field is automatically pre-filled with the mail recipient.
Request from – the field is automatically pre-filled by the sender of the email.
Message * – email contents are automatically inserted in the text box.
Files – an email copy from which the discussion is being added is automatically pasted here. Attachments and e-mail images are also inserted into files.
To add a discussion, click the Save button below the form. Discussion is saved without any notification and no email is generated. After saving the discussion, the Open request discussion in CDESK button is enabled, which will give you access to the entire discussion concerning the request.
Show Created Discussions
To view discussions created from an email, use the Show Created Discussions button at the top bar.

If a request has been previously created for the selected email, the View created requests button is enabled. Click to display this request in a modal window directly from the CDESK server. If the request was not finished and only a draft has been created, the draft is displayed in the modal window.