GOOGLE MAPS CONNECTOR
The Google Maps connector is used to obtain GPS coordinates of the location of a company or CI object of Places type, which are then stored in CDESK. These coordinates are excellent for particularizing the workplace location. They can be used when navigating with Waze, based on a link in a mail notification.
Before You Add Connector to CDESK
Before you start using the Google Maps connector in CDESK, first you need to create a project in Google Cloud Platform and then activate Maps JavaScript API and Geocoding API.
Create a Project in Google Cloud Platform
To create a new project, go to the Google Cloud Platform page at this link. If you have not used this platform before, after you click the link, a window will appear to confirm the terms of service.
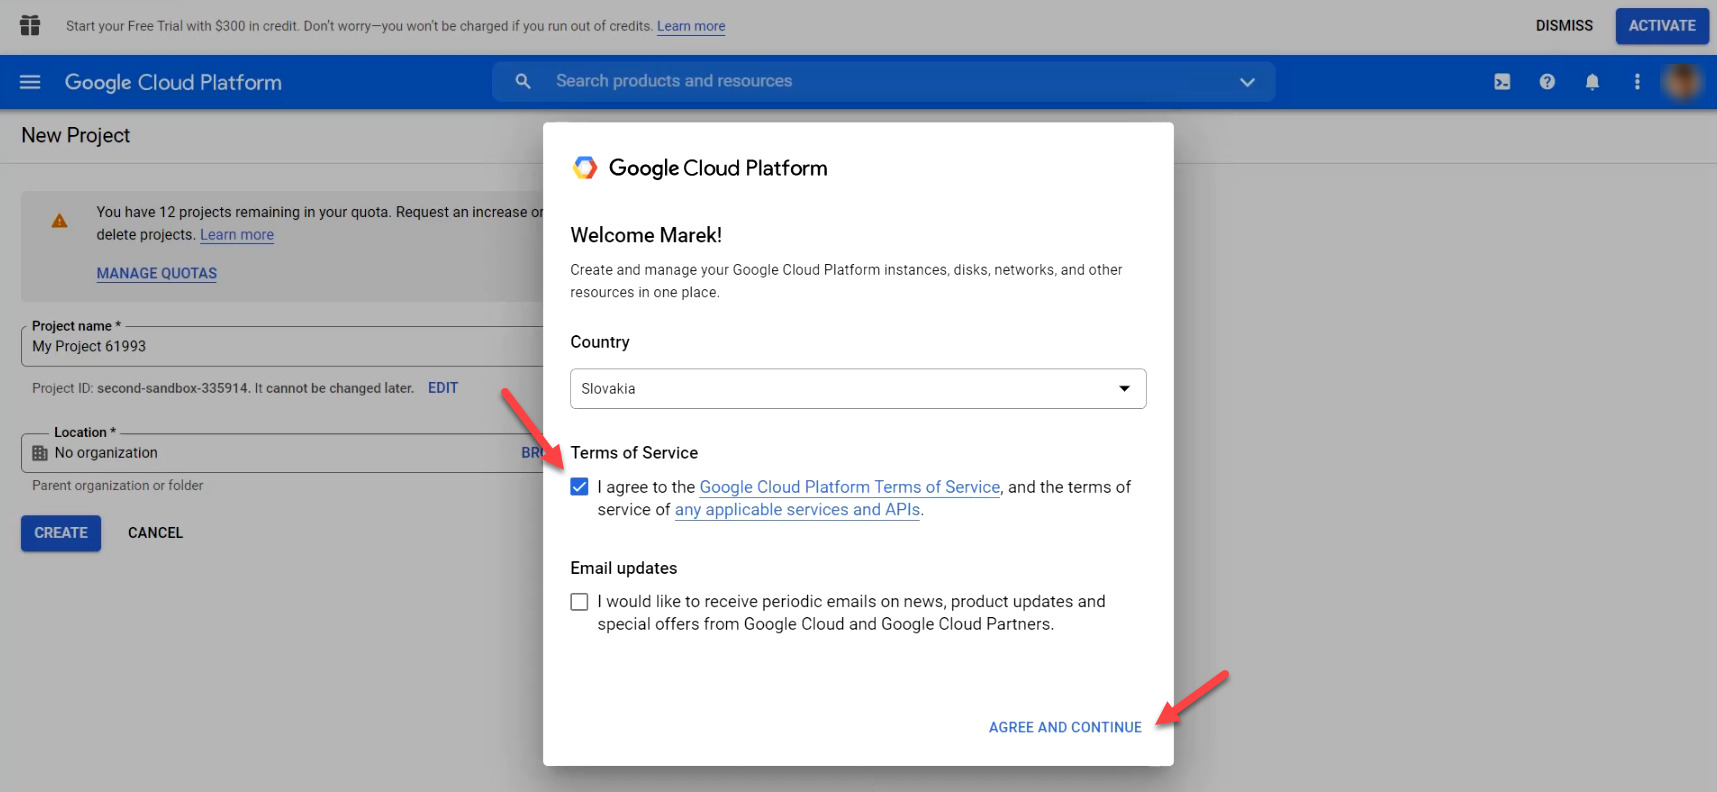
After agreeing to the terms of service, a window for inserting the project name appears. The Location field does not need to be changed. Then click the Create button.
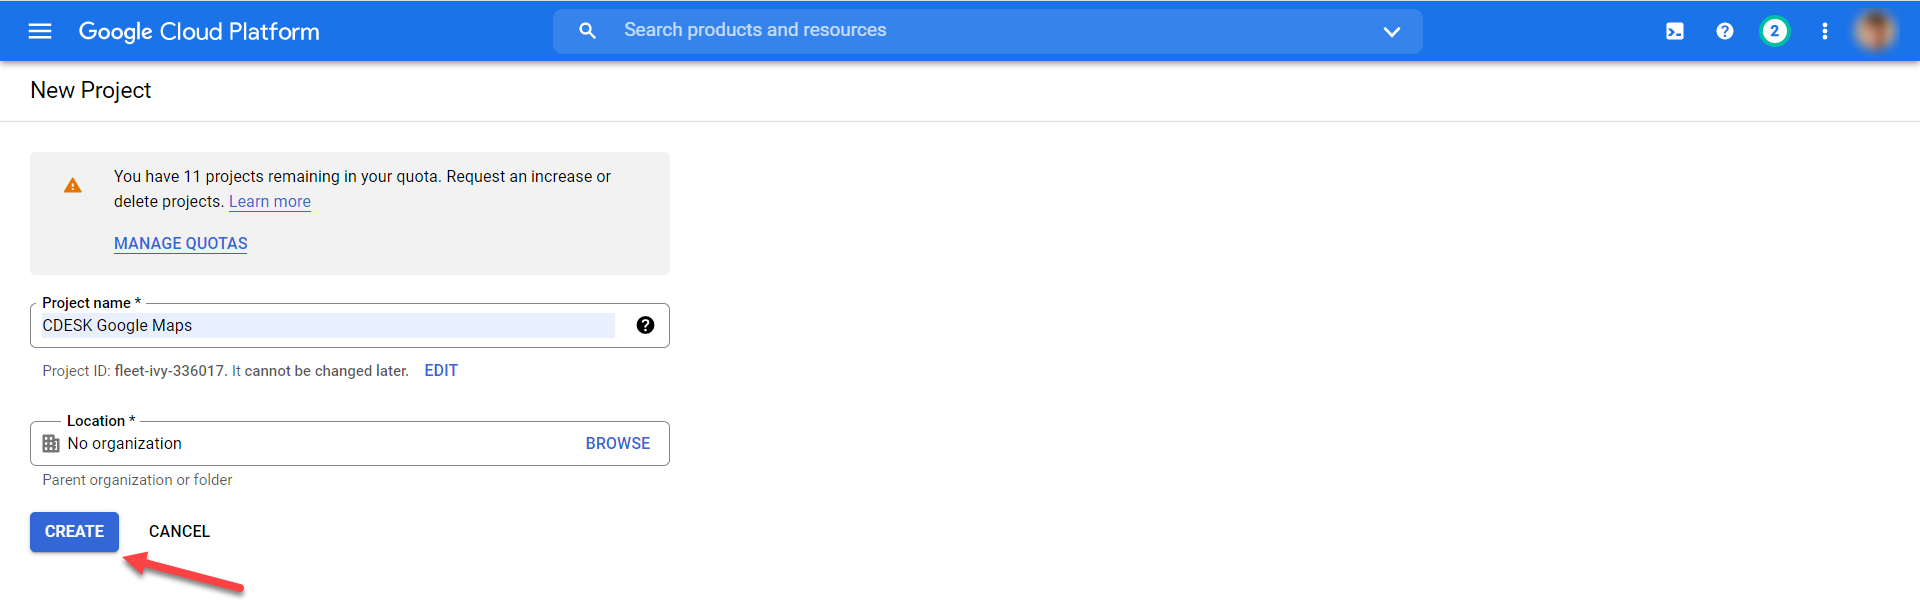
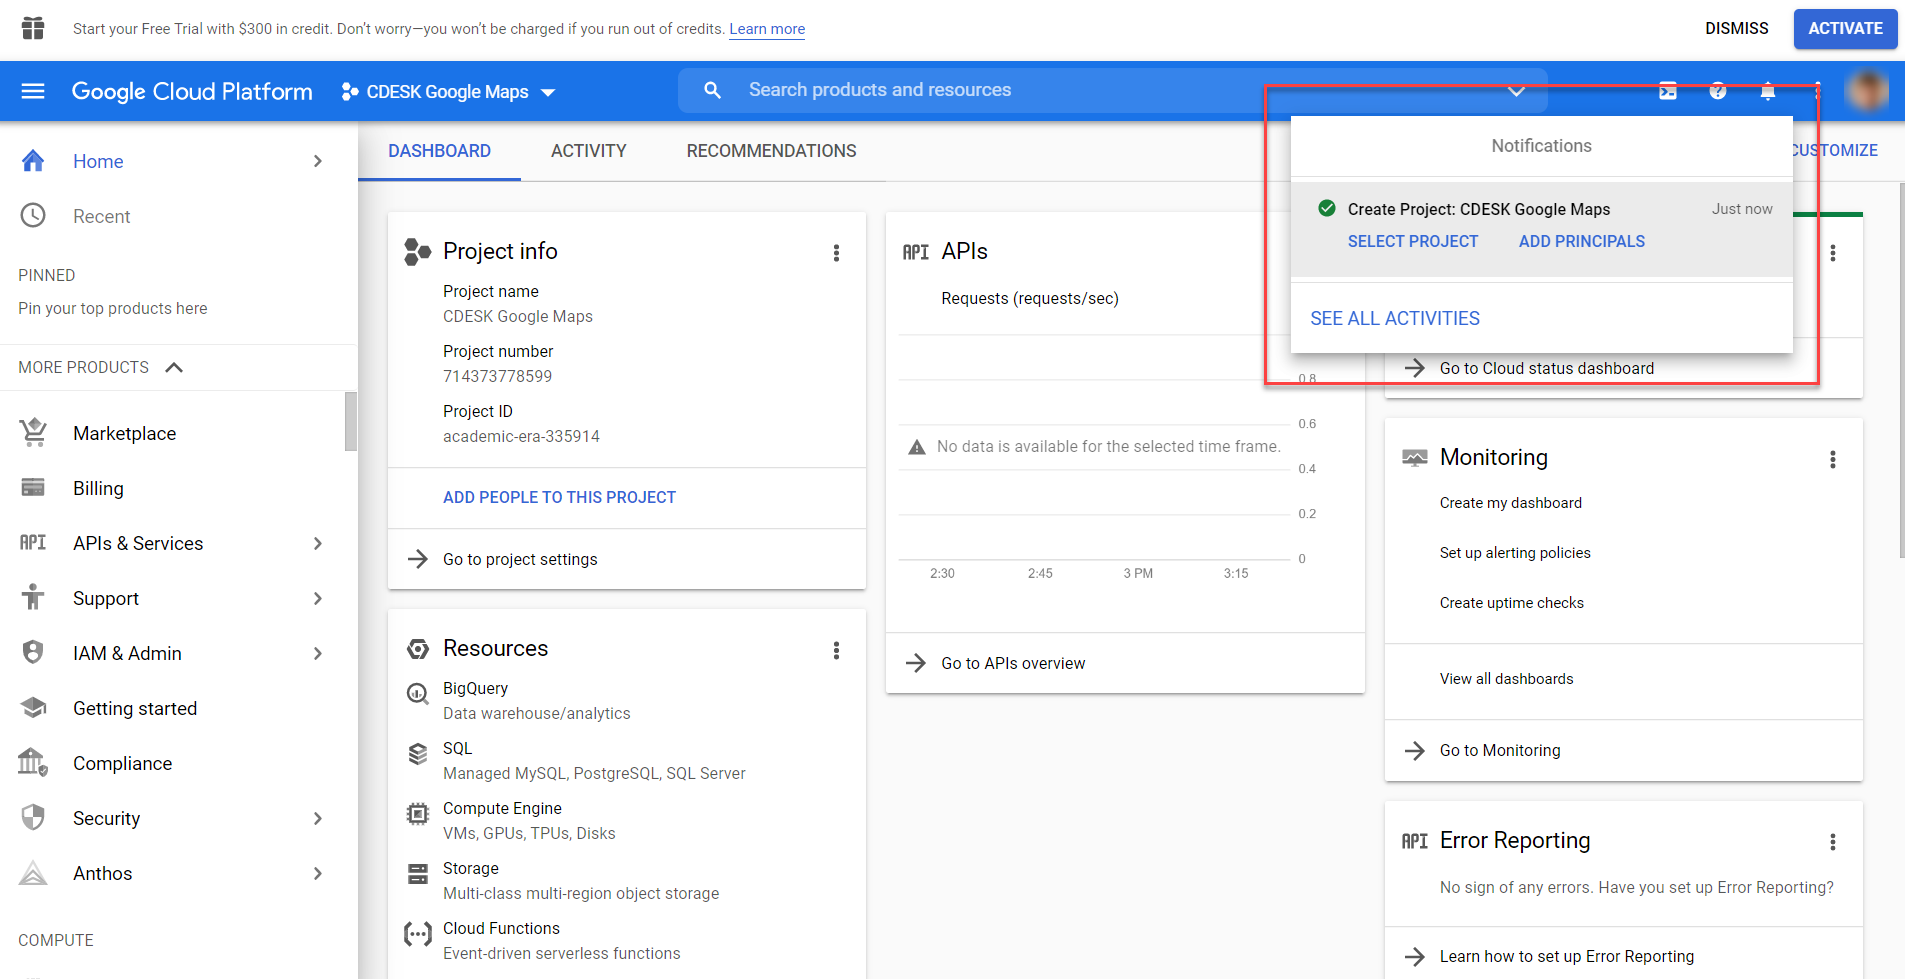
Afterwards, you will be redirected to the Google Cloud Platform home screen. If you have created the project correctly, a notification in the top right corner will inform you that the project has been successfully created.
Configure Payment Details for a New Project
After successfully creating the project, you need to set up payment details. When creating a new account, each user receives a credit worth 300 US dollars. If it is overdrawn, no additional fees will be charged without your approval.
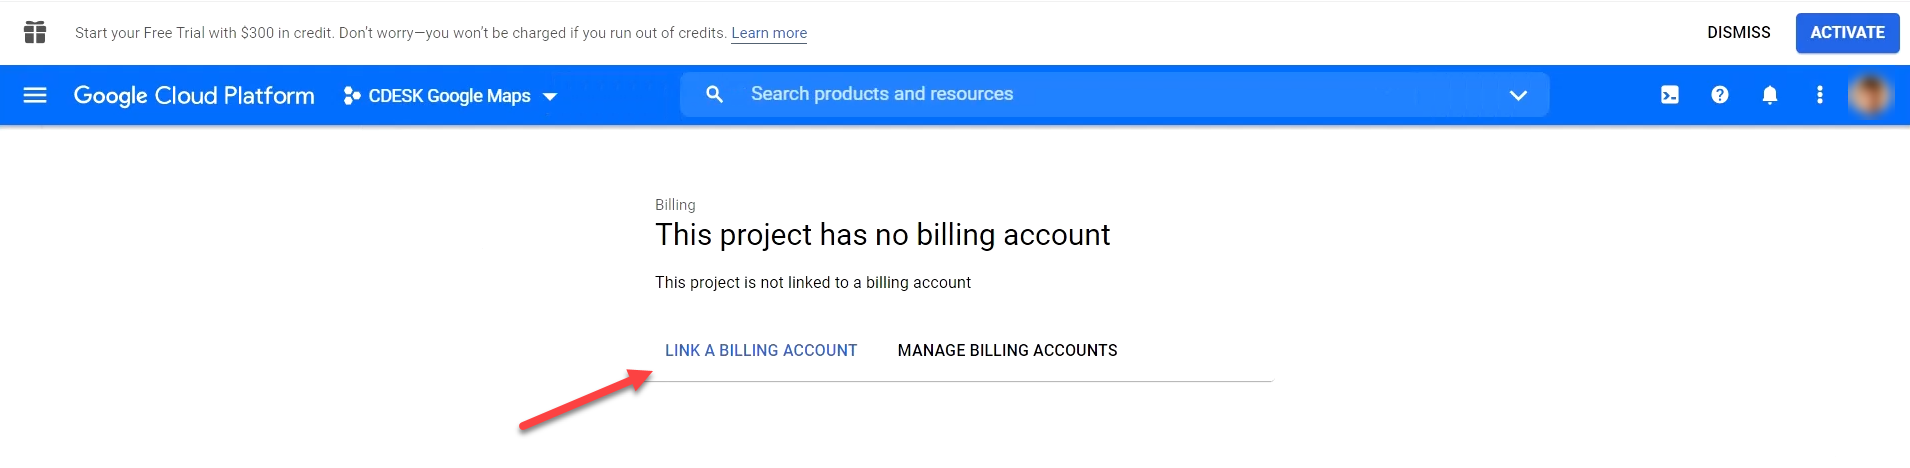
To set up payment details for a new project, click on the Billing option in the menu on the left side.

When clicked, a window will appear with a warning that the project has no payment method set up. To set one, click on the Link a billing account button.
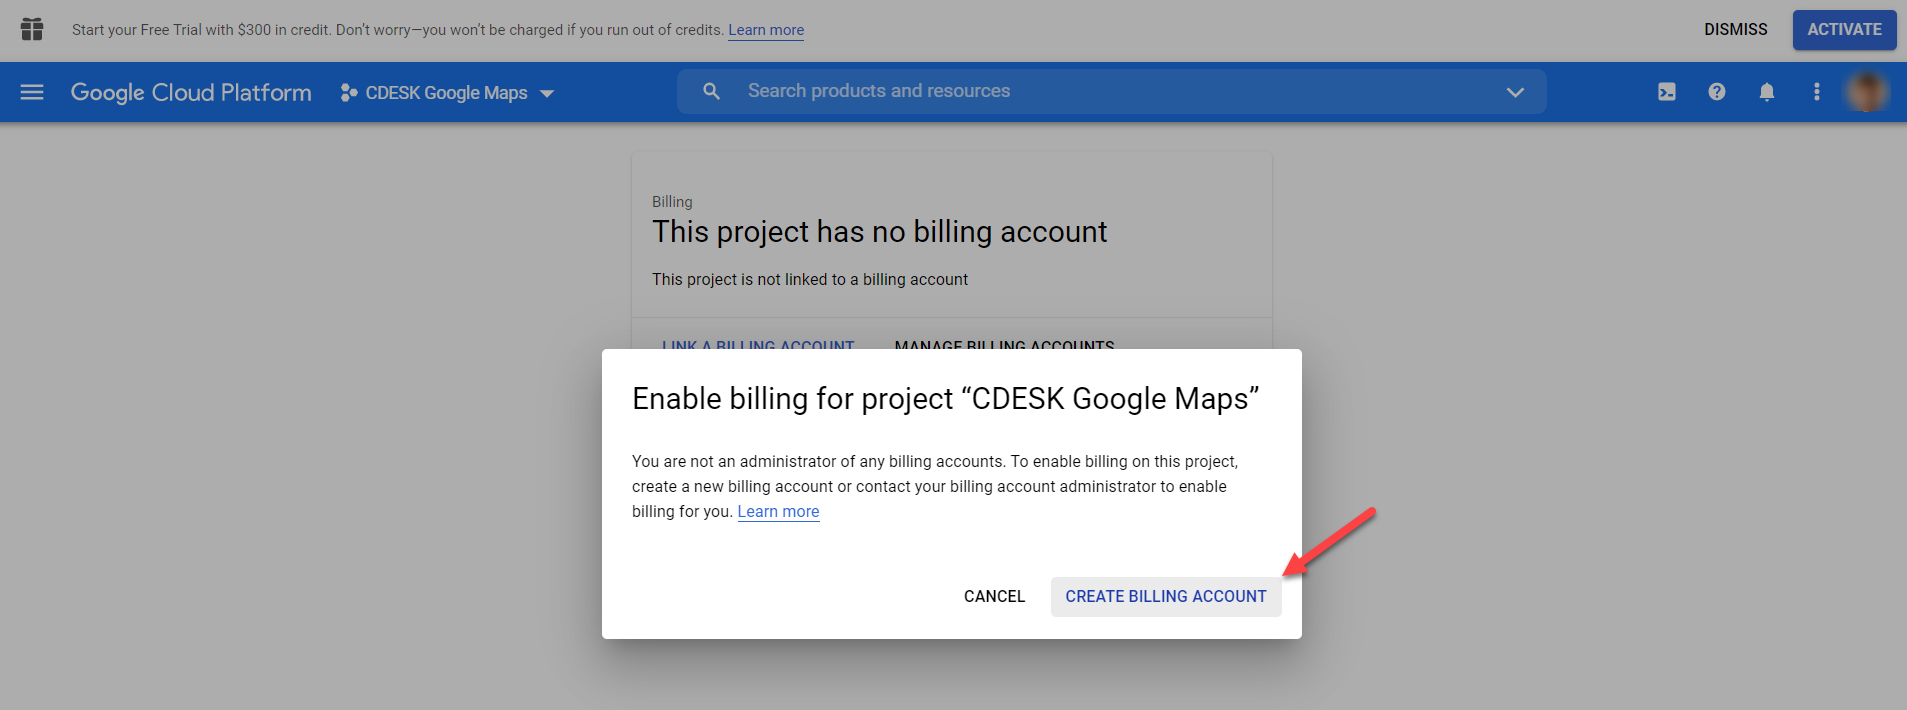
If you don’t use any payment details in Google Cloud Platform, a modal window will pop up asking you to add payment details. Click the Create billing account button to continue.
You will then be presented with a window to configure your Google Cloud account. In the first step, select the option that best describes your company. After selecting one of the options, a box will appear for you to enter a mail, in case you want to increase the number of credits on the platform. Filling in this field is optional. Please agree to the terms of service of the Google Cloud platform to continue. The country selection field is pre-filled automatically.

A field for entering a phone number then appears. A verification code will be sent to this number. Once you have entered the phone number, click the Send Code button.

A field for entering the verification code is then displayed. After entering the code, click the Verify button.

In the next step, fill in your personal information. Enter your address in the Name and Address section and enter your payment card details in the Payment Method section. Once you have filled in all the details, click on the Start My Free Trial button.

You will then see a modal window with a short questionnaire that Google uses to improve its services. The questionnaire is optional and can be skipped by clicking Close.
Activate Maps JavaScript API and Geocoding API
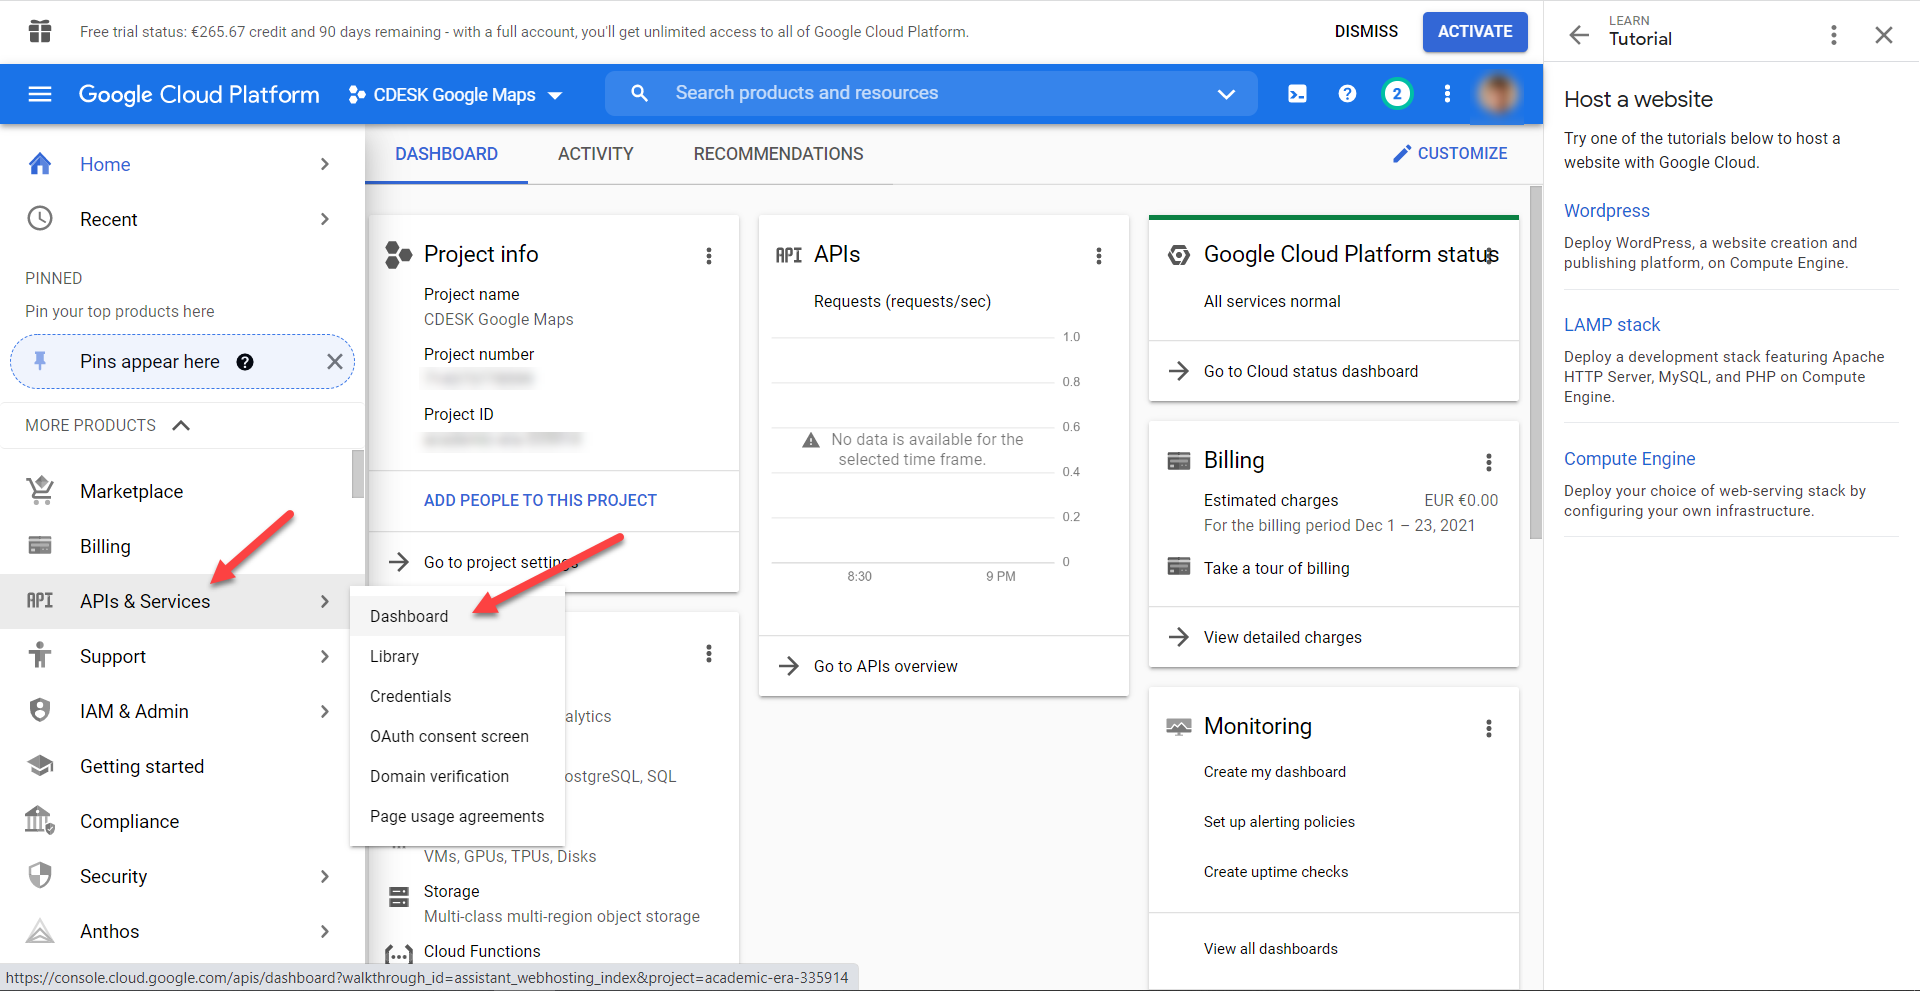
After configuring your personal and payment details, you can activate API for your project. To activate the API, go to the Google Cloud Platform homepage and select APIs & Services from the menu, then Dashboard.
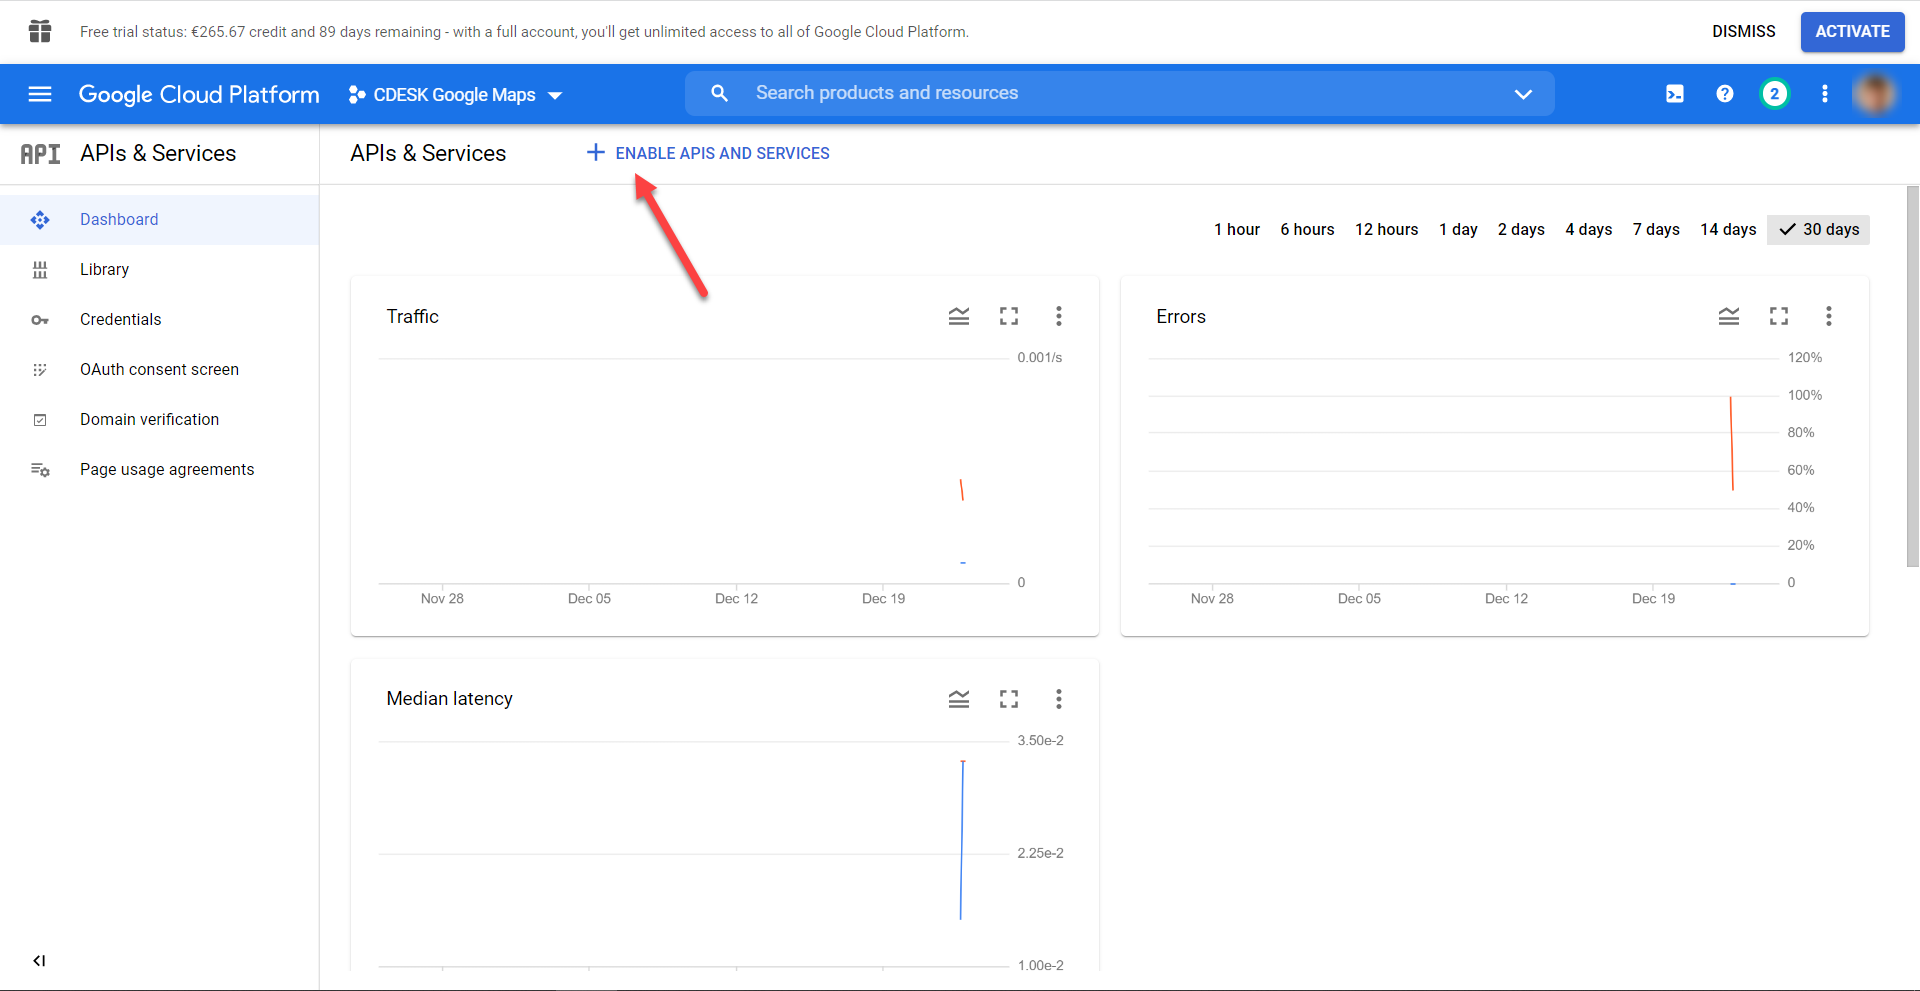
To activate a new API, click the +Enable APIs and Services button at the top of the window.
Then, in the search bar, search for Maps JavaScript API and click Enable.
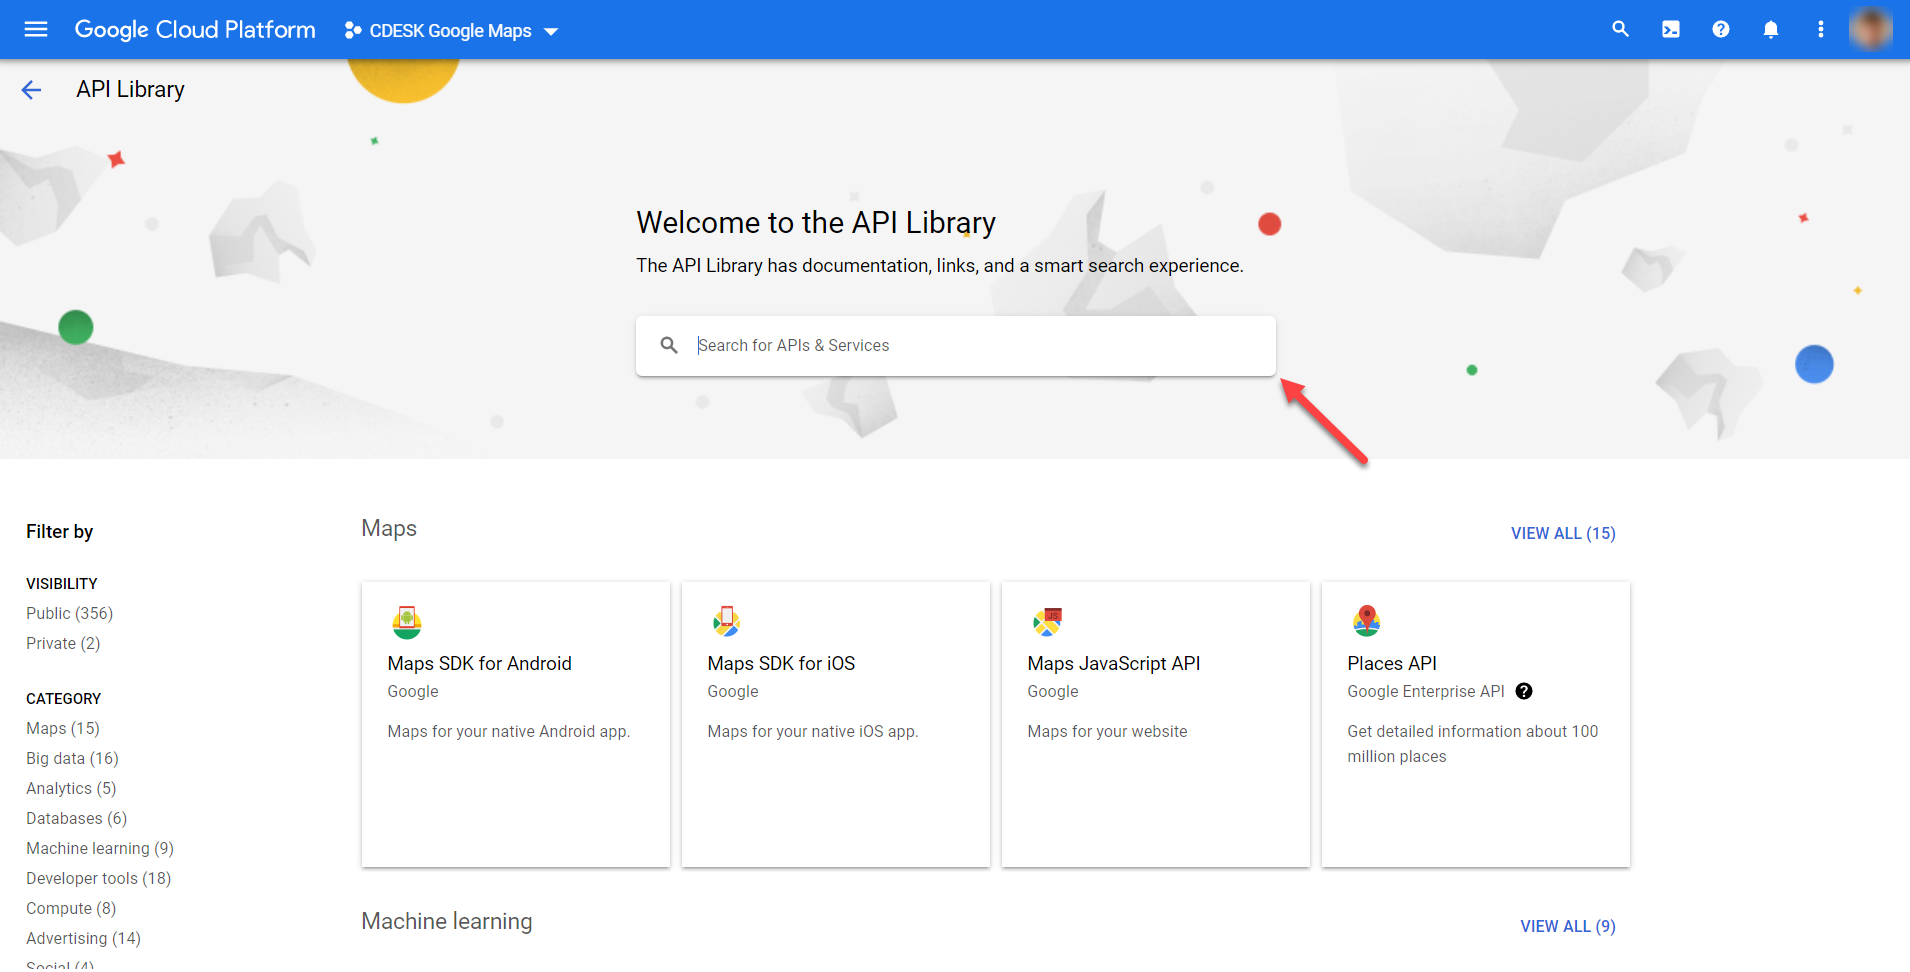

You can add the Geocoding API in the same way.
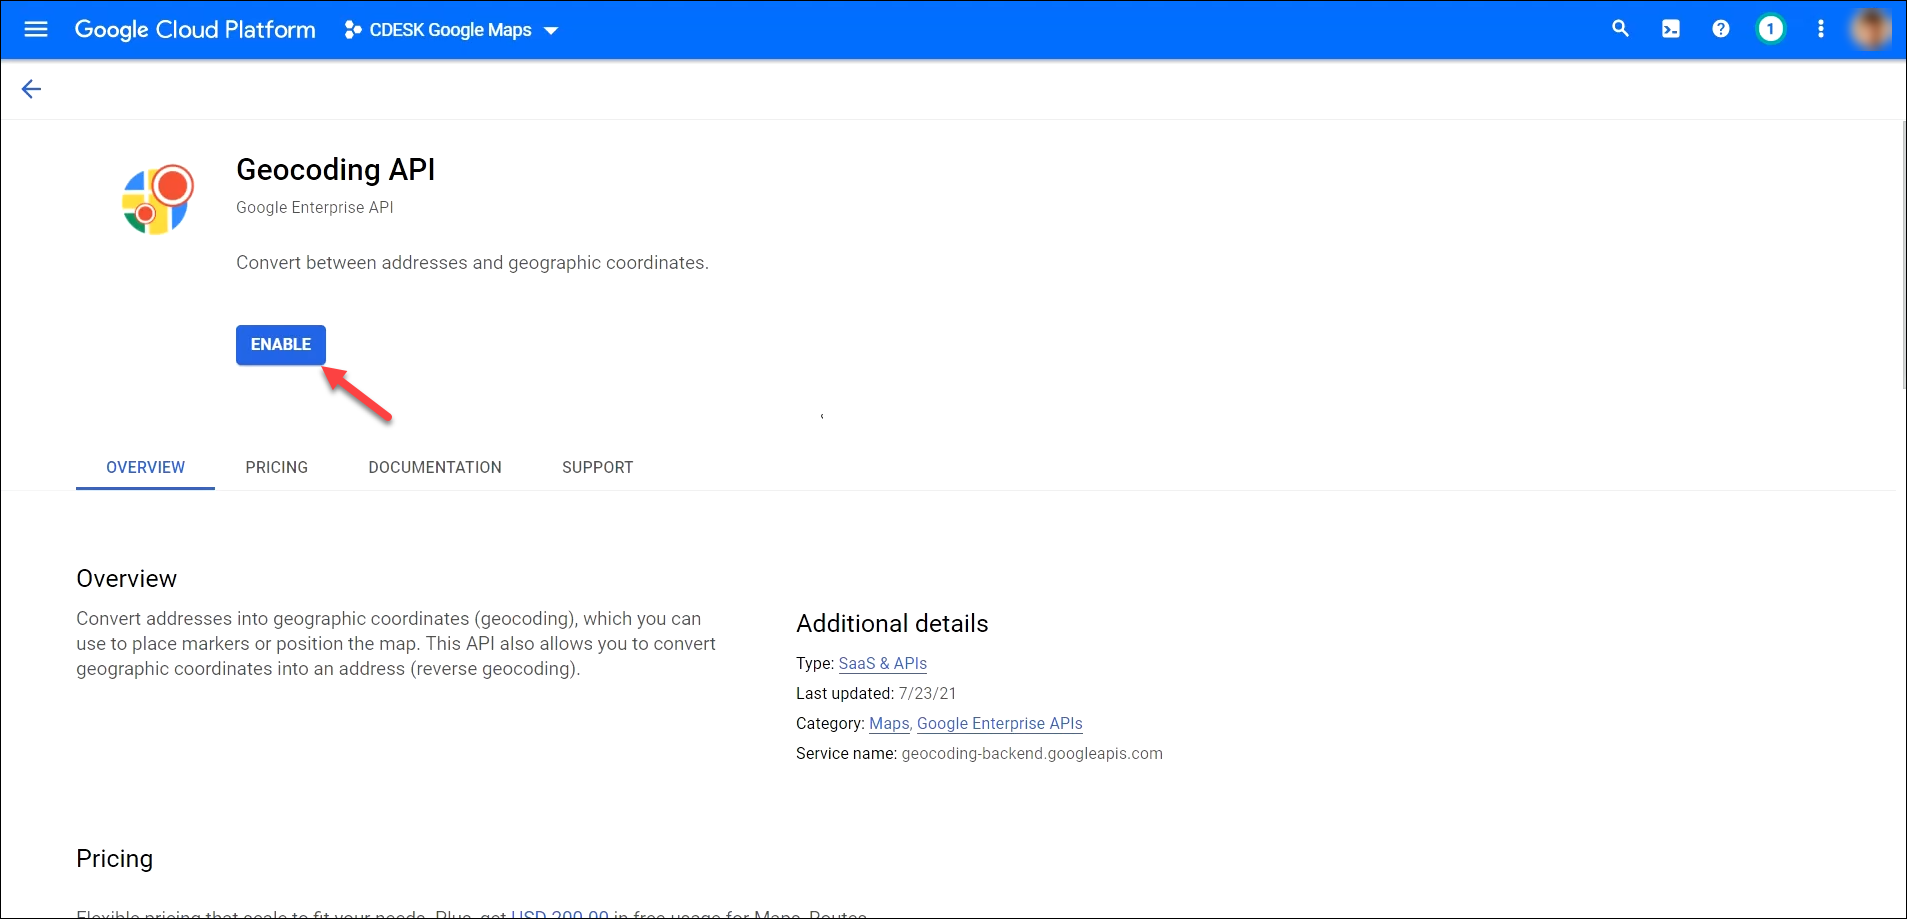
Get Google API Key
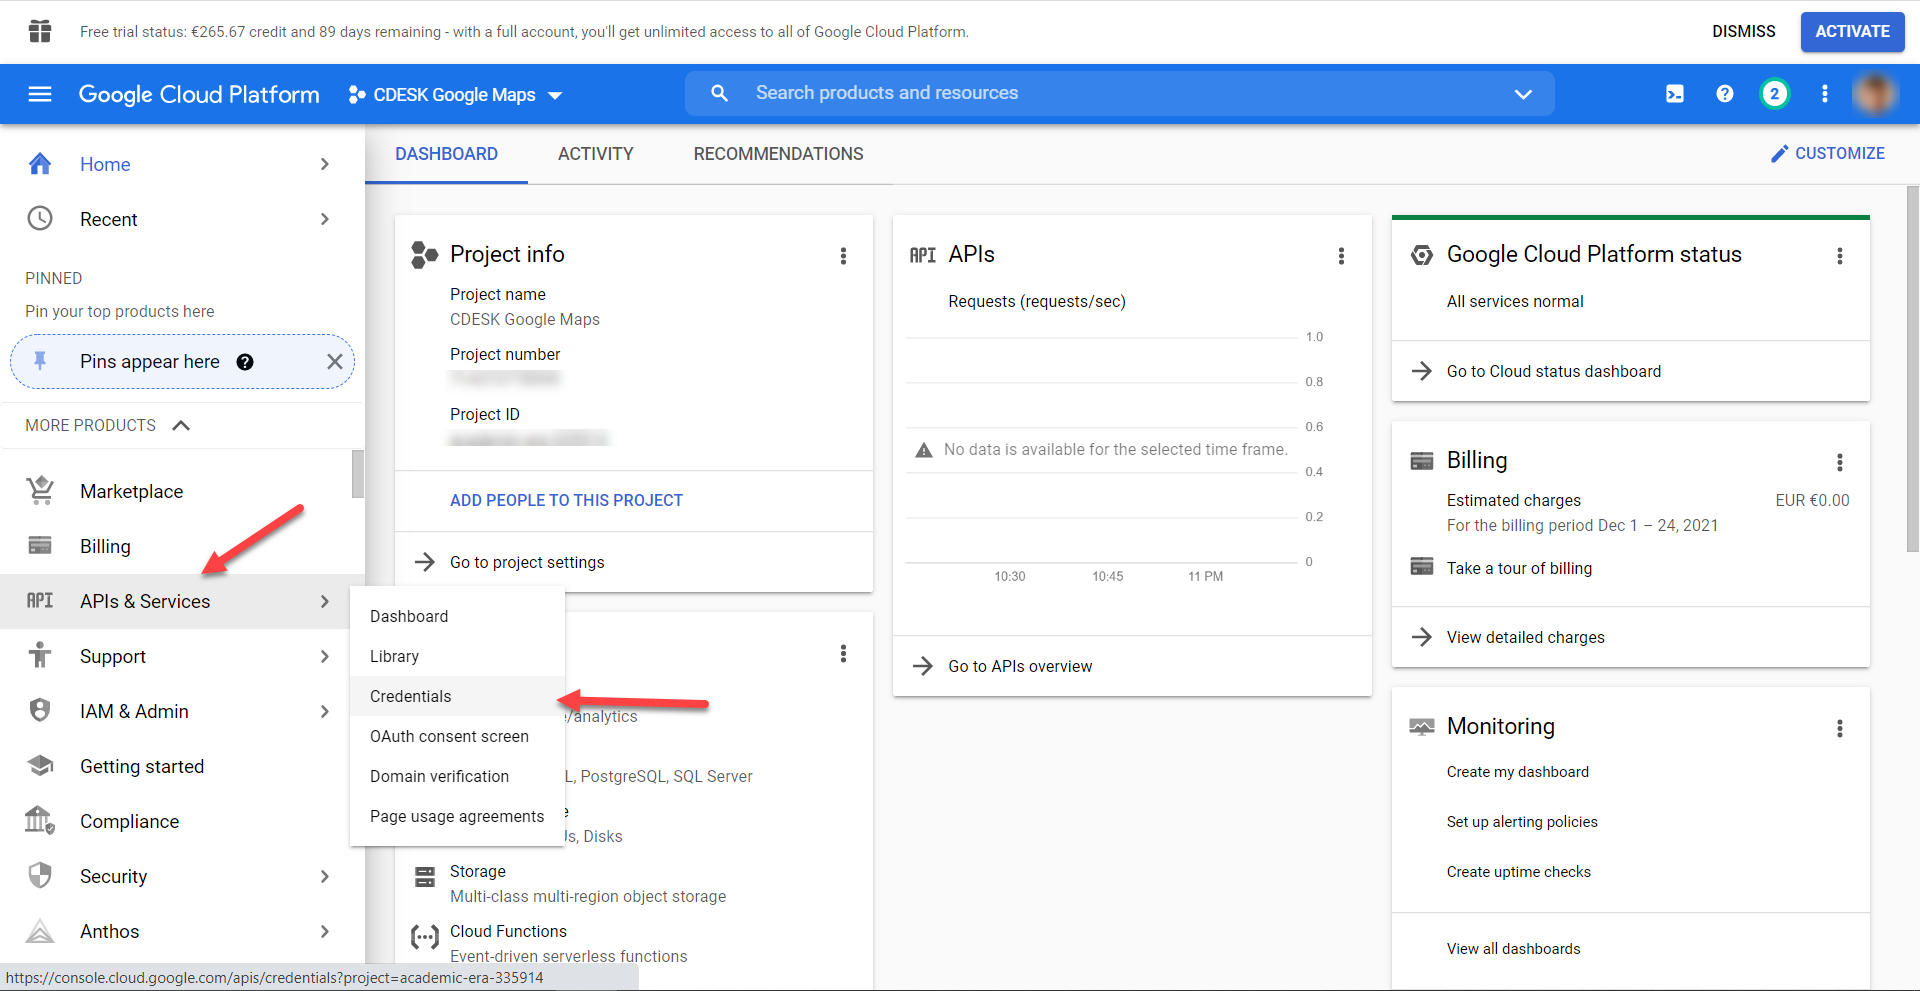
Once both APIs are activated, you need to set the credentials to get the Google API key, which you will later insert in CDESK during the configuration of the Google Maps connector. Go to the Google Cloud Platform home page and select APIs & Services -> Credentials from the menu.
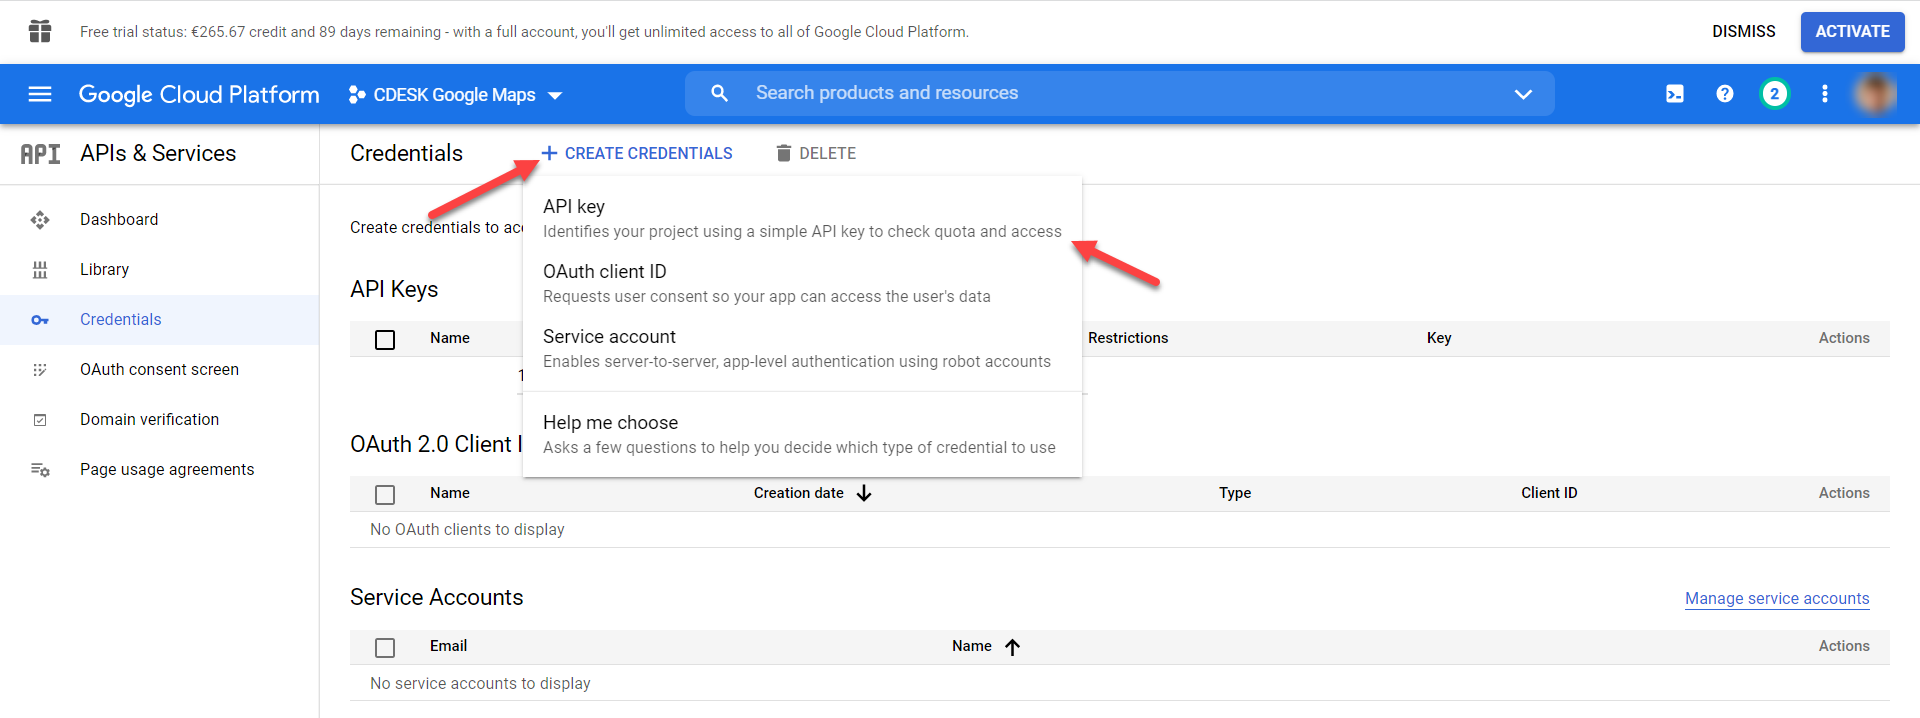
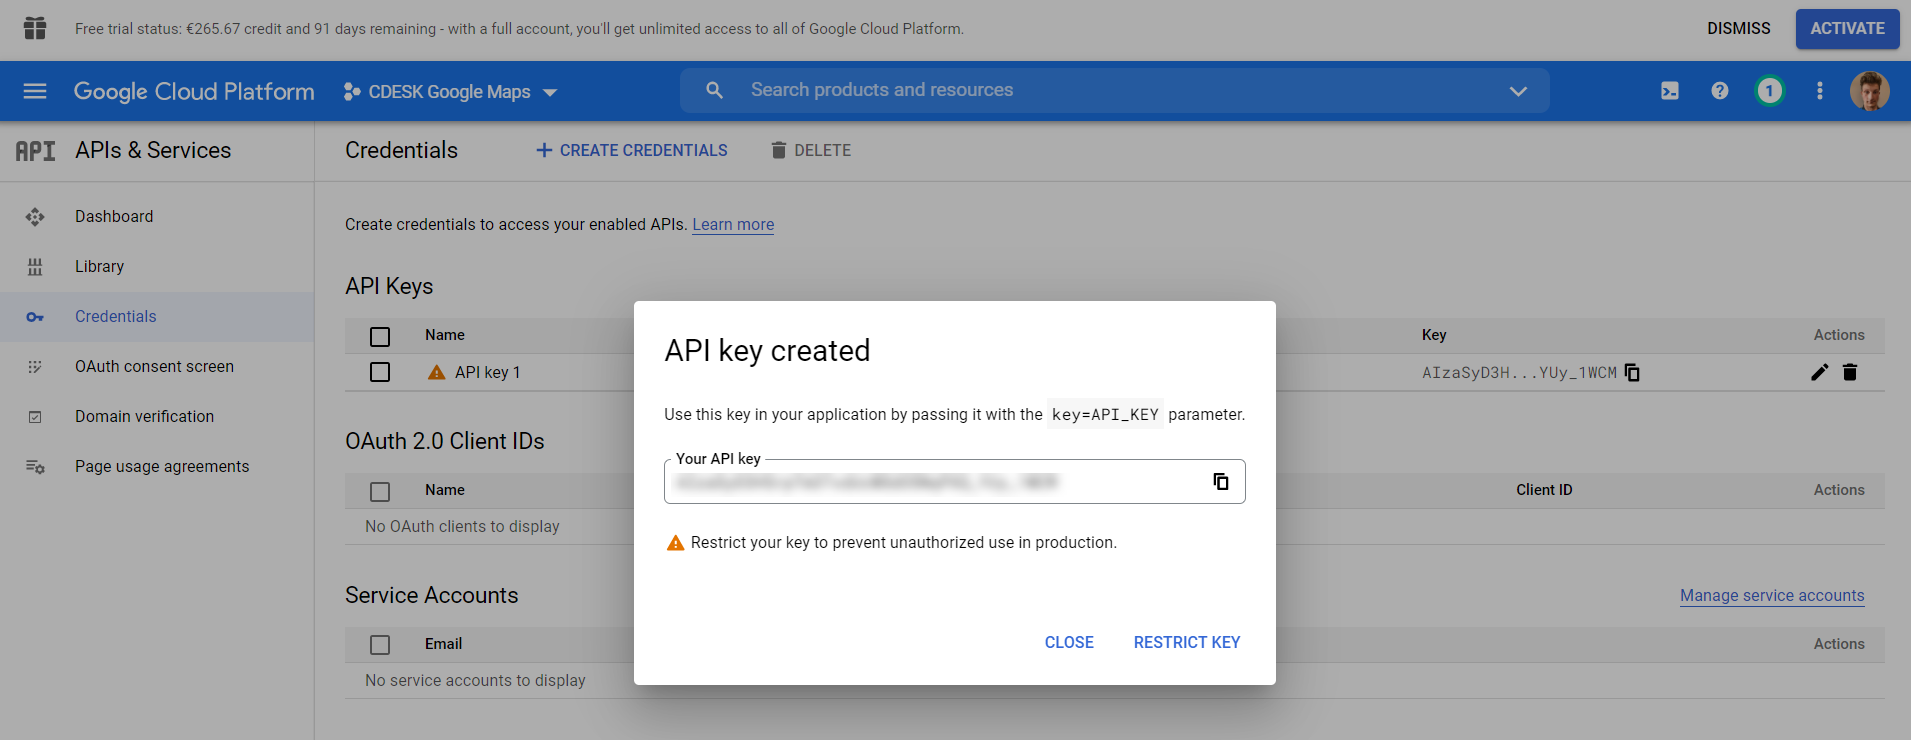
Click to open a new window. Click on the +Create Credentials button located on the top bar. Then select the API key option.
Click to display the key in the modal window that will be needed in the next steps. Do not close this page or copy the key to the clipboard. Go to your CDESK where you can add the Google Maps connector.
Add and Configure Google Maps Connector in CDESK
To add a Google Maps connector, go to Global Settings->API Connectors in CDESK and then click the +Add conector button.
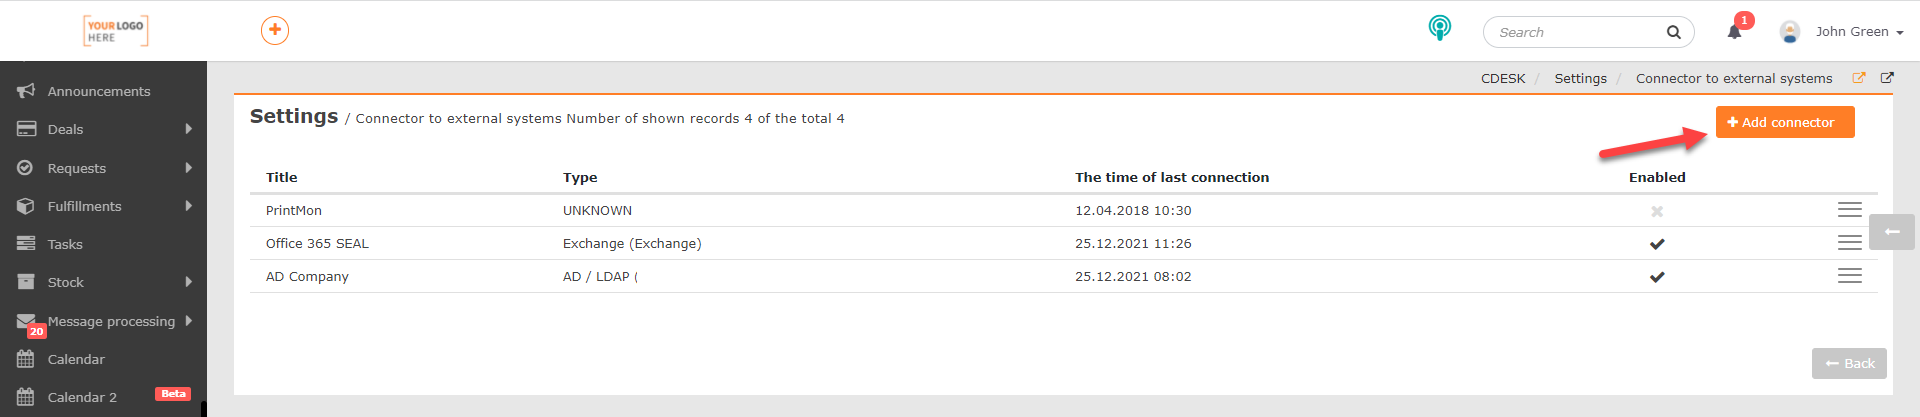
When clicked, a window will appear to select the connector type. Select Google Maps. Click >Continue to proceed.

A window for configuring the connector parameters is then displayed.
Connector type – This item is not editable. The Google Maps option will be pre-filled automatically.
Title – Enter a custom title under which the connector will appear in the list of connectors.
Enabled – To use the connector, turn the switch to the on position ![]() . If the switch is in the off position
. If the switch is in the off position ![]() , the connector is not active.
, the connector is not active.
Google API key – Insert the key from Google Cloud Platform. In the main menu on this platform, click APIs & Services -> Credentials. In the API Keys section, open the item you created. (The procedure to get the Google API key is described in the Get Google API Key paragraph). Once clicked, a form will appear to set the key restrictions. The key can be found in the upper right corner.
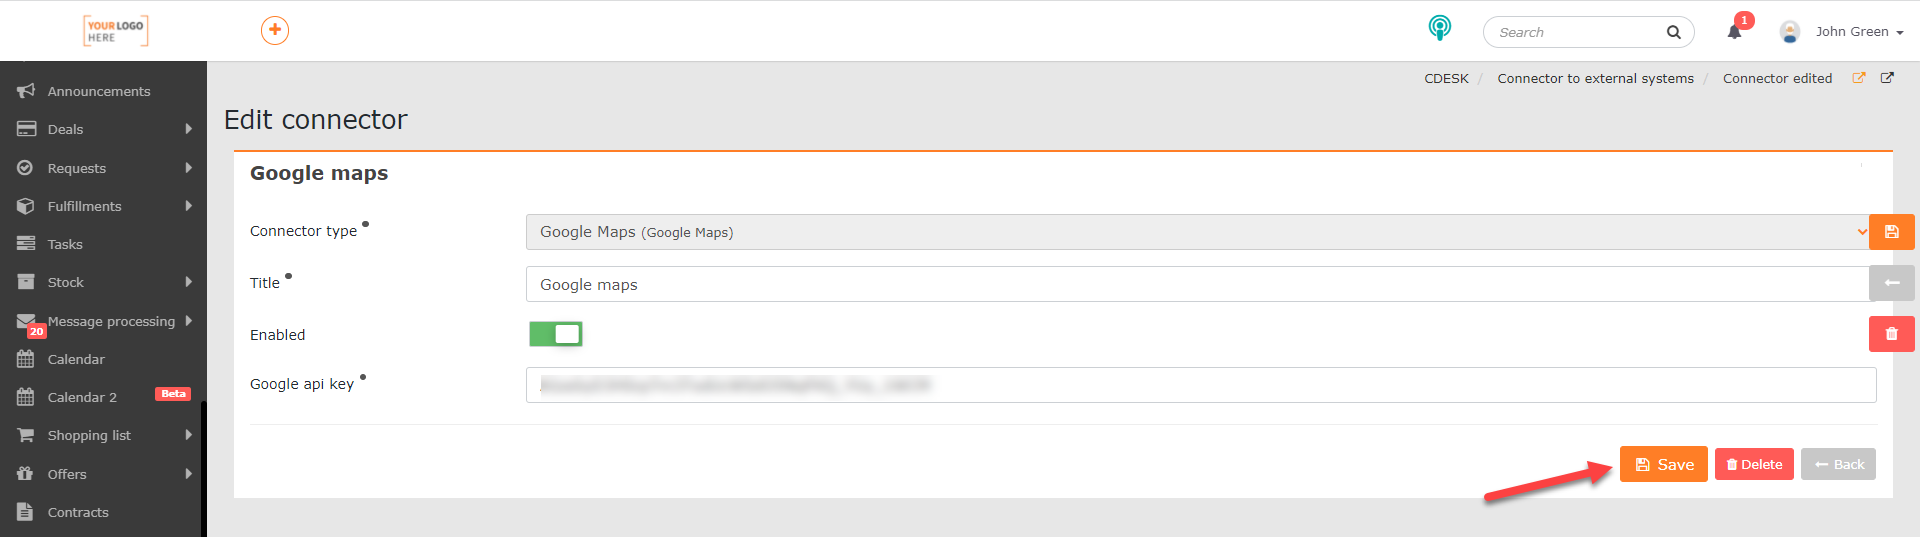
To save the changes you have made in CDESK, click the Save button. To load the connector correctly, you need to reload the page, by using the CTRL+R keyboard shortcut, for example.
Zobrazenie miesta z CDESKu na mape
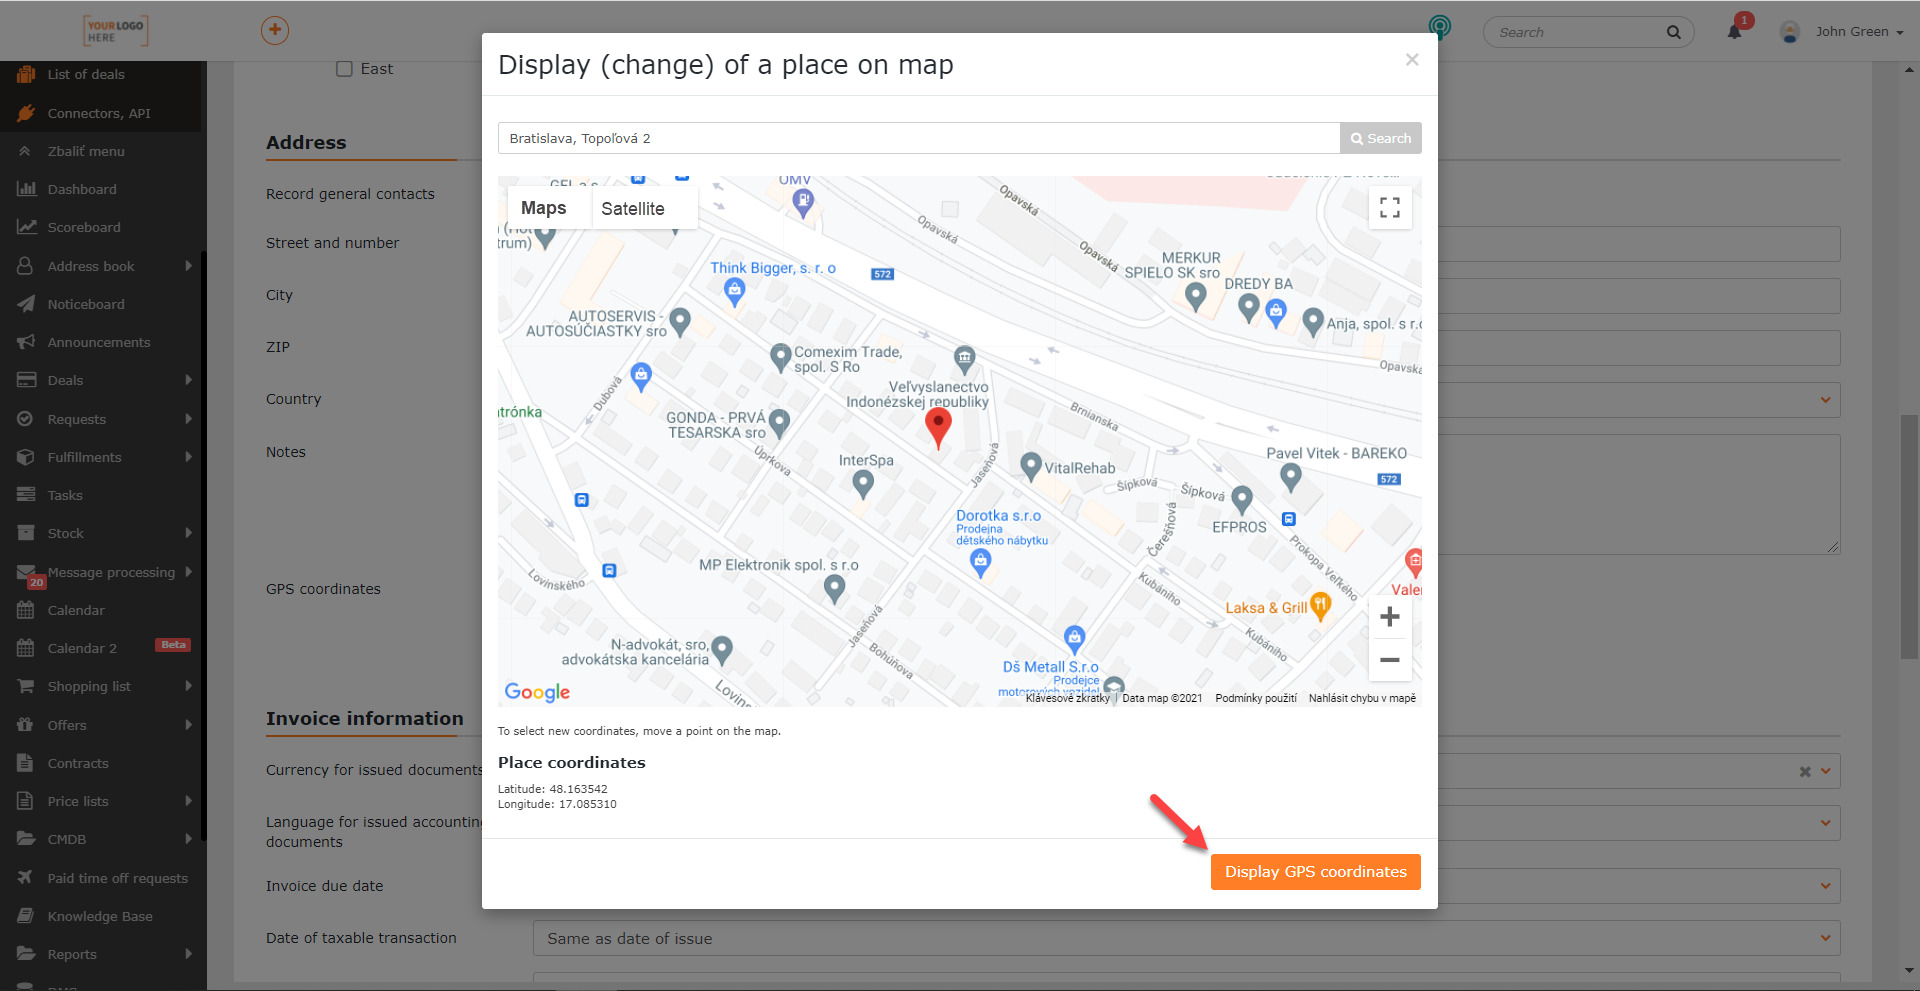
The purpose of the Google Maps connector is to display a company address or specified Places on Google Maps directly in CDESK. If you have set up the connector correctly using the procedure described above, the Show on Map button will appear in the company form in the General Information tab, under Address. For this button to display, the address details of the company/location must be listed correctly. Further information can be found in this article.
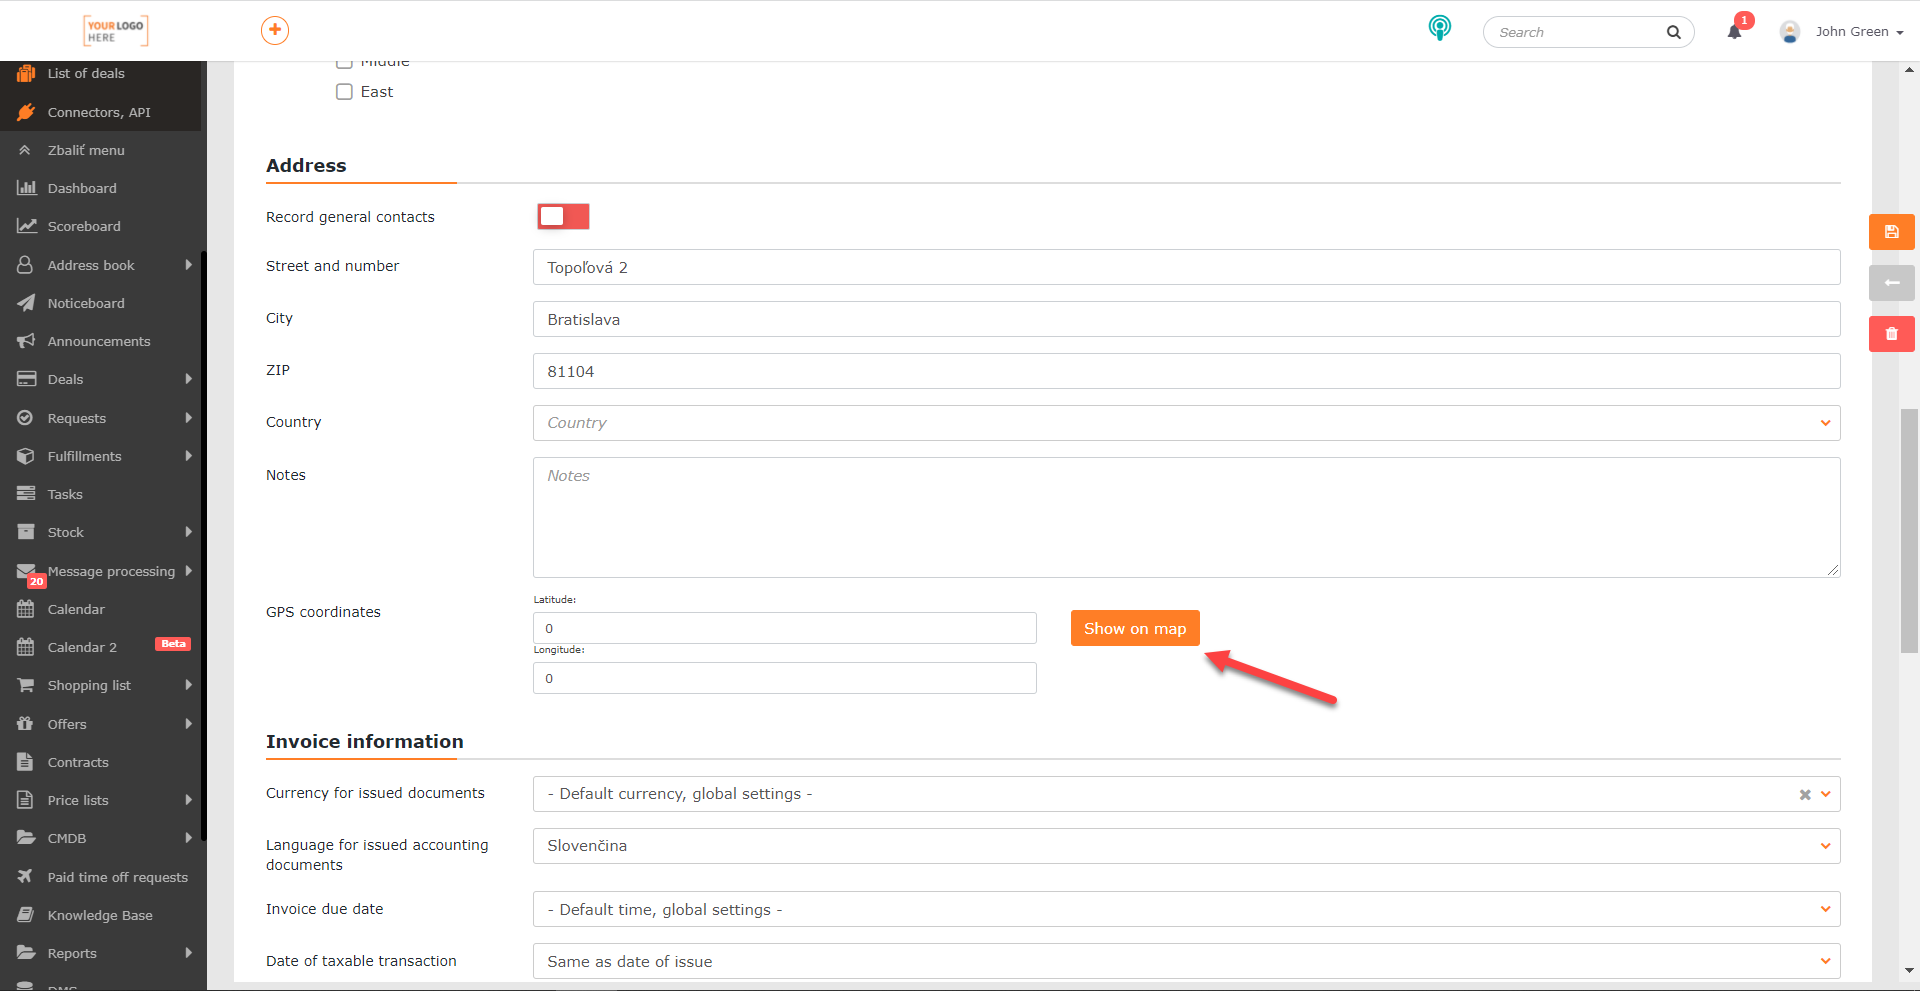
When you click the button, a dialog box will appear with a map from Google Maps showing the location of the company. If necessary, GPS coordinates can be obtained for this location. The Deploy GPS coordinates button, which appears in the bottom right corner below the map, is used for this purpose. When this button is clicked, the map dialog window is closed and the coordinates are entered into the GPS coordinates fields in the company form.
To use this practically, add a link to the request mail notifications. If the request is for a company or a place that has an address / GPS coordinates entered, a link with the WAZE app icon is inserted. If you click on this link on a mobile device which has WAZE installed, it will open a map with navigation.